Solar PV installation with battery storage
Study started: February 2023. Project completed: 30 November 2023. (updated June 2024).
Project goals:
I want to maximise self-consumption from the start of the project, but the system needs to be extensible, with the possibility of adding batteries in the future (within 3 years), and the ability to use surplus production (from day one) in summer to heat the domestic hot water tank and/or the pool, and/or to install an EV charger down the line.
My goal is to cut my bill, not necessarily my consumption.
Once installed, I want to manage the whole system myself and follow all the technical data in detail on the manufacturers’ websites (Fronius, Enphase, Victron-type platforms) so I can track production/consumption in real time and analyse the history by day/week/month/year.
The construction: installing the panels on the roofs. Project planning and the Enphase tools.General description of the site:
The house sits by the sea in the village of Kerroch, about 100m from the harbour. It’s roughly 200m² over two floors, with an 80m³ pool and a 37m² garage at the end of the garden. The house was renovated in 2014, with flat-roof extensions to the south and north, a garage and a south-facing carport (-15° East) with no shading at all (except on the north side).
During the renovation, the older part of the house was insulated from the outside and the roof entirely rebuilt and insulated (now zinc). The house is rated A+ by a thermal engineering firm commissioned by the architect, factoring in the Mitsubishi heat pump with its 200L thermodynamic hot-water tank.
Usable surfaces for the PV installation:
There are three flat-roof areas at 3m height. The south-facing spaces are easily reached via a wide outdoor staircase and an adjoining wooden deck; the north-facing space requires a ladder.
- Extension roof (concrete + gravel): 8.65m x 4.70m = 40.6 m².
- Carport roof (concrete + green roof): 7.00m x 4.10m = 28.7 m²
- North roof (concrete + gravel): 4.90m x 3.80m = 18.6 m².
- Total of about 87.9 m².
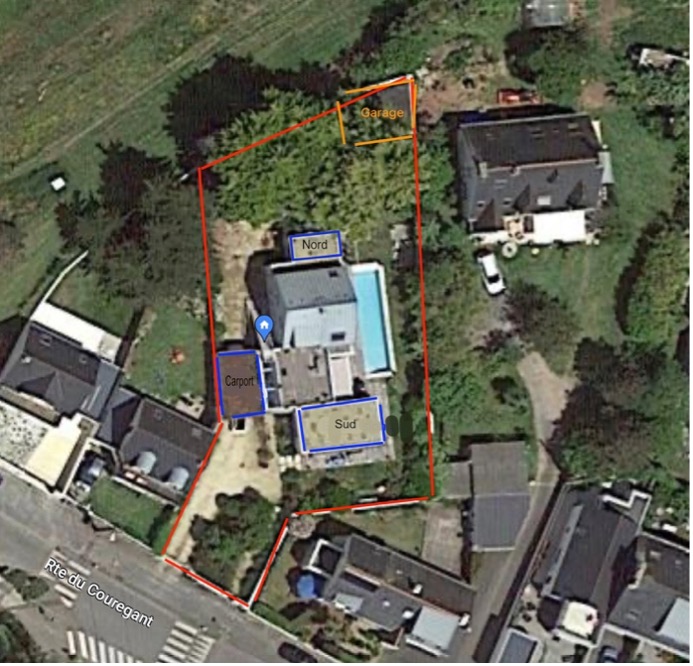 Aerial view with the three roofs marked (North, South, Carport) and the garage
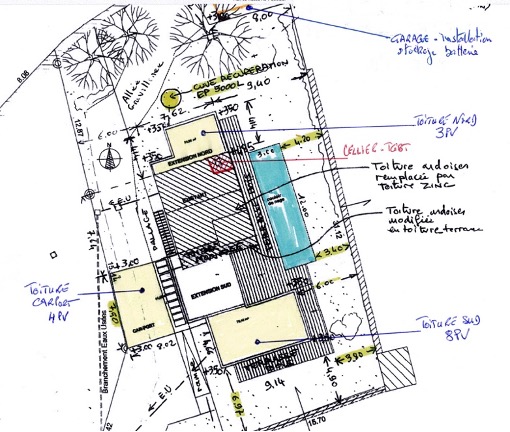 Annotated plan of the roofs and system layout
The flat roofs sit at the front of the property but set back from the street, 40m from the garage at the rear. The mains electricity feed comes in halfway, in the utility room, 20m from the roofs and 20m from the garage.
Space for the equipment:
The utility room can, after reorganisation, house a dedicated PV switchboard.
The garage can house a dedicated PV switchboard and/or space for storage.
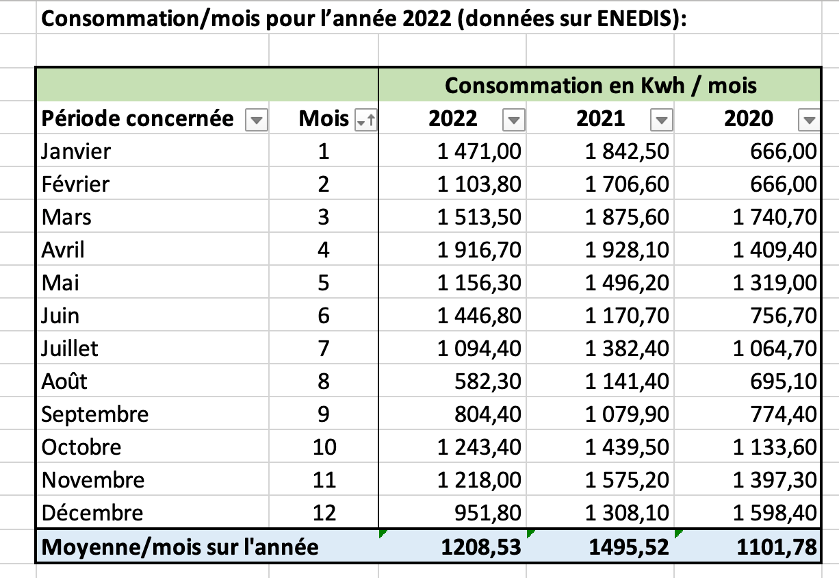
Consumption over the last 3 years (Enedis):
We installed a heat pump (Mitsubishi PUHZ-RP125VKA) with underfloor heating on the ground floor plus low-consumption radiators upstairs, and domestic hot water via a thermodynamic tank (Mitsubishi ECODAN HYDROBOX Duo Module 2 EHST20C-VM6B, with a 200-litre stainless steel tank).
The pool also has a Fairland PH25L heat pump (1.4kW for a flow rate of 4-6 m³/h), though I’m not using it at present.
I have a Linky meter and I’m currently with EDF (Digiwatt). My subscribed capacity is 9kVA. Average consumption runs 1,200 to 1,500 kWh/month.
The Linky meter sits at the property boundary in a roadside cabinet. A main breaker is located in the utility room next to the main switchboard.
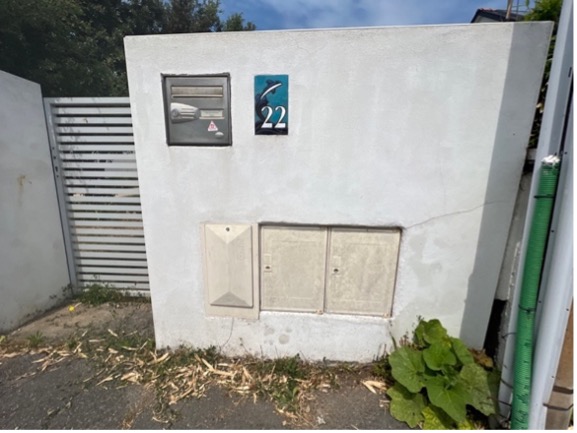
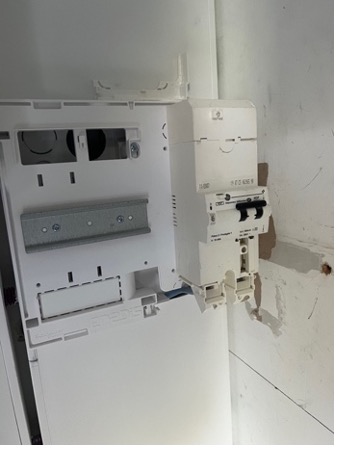
Moving to 12kVA: Maximum street capacity is 12kVA (60A), and the 16mm² cable from the street to the utility room also allows a move to 12kVA if needed. Only the street and utility-room breakers would need changing (from 45A to 60A). This could prove useful in future if I get electric vehicles.
Constraints:
[Wind/rain]: by the sea, the decks are exposed to strong winds, which I have to account for in the mounting system, especially the ballast loads. I ran simulations with the K2 and ESDEC systems, which factor in these constraints.
[Visual impact of the PV panels]: must be very low. Mounting on the flat roofs, with a 10° panel tilt and a 17cm parapet height.
[Technical space: utility room/garage]: Not big enough for a central inverter in the utility room, nor for a storage system — and I don’t want one there anyway, since we don’t want any potential noise nuisance in the house. The utility room suits a light installation (switchboard, relay, gateway) after reorganisation (upgrading the meter panel, improving the existing main switchboard, clearing space and adding the dedicated PV & storage switchboard). The garage suits both light and heavy installation (storage, relay, gateway and string inverters). The final installation must allow the system to grow by adding batteries.
[Cable routing and access]: Cable trunking and conduits should be as invisible as possible for aesthetic reasons. So I chose to run the conduits/cables myself to keep them hidden (routed under the wooden decks upstairs and downstairs, and behind the cladding for the run from upstairs to downstairs).
[Training on inverter configuration]: I want to be as self-sufficient as possible, so I trained myself during the installation on configuring the whole system (electrics, inverters, gateways, apps, reporting). I need to be able to diagnose problems and repair faulty equipment via standard-exchange.
[Overhaul of my data network]: since I had to reorganise the utility-room spaces anyway, I upgraded my data network at the same time. I replaced several Cat4 runs with Cat7, pulled a new fibre-optic run between the utility room and the garage, installed a 19" server rack in the utility room and another in the garage, and relocated the Ubiquiti UniFi networking gear (UDM-Pro, switch, WiFi access points, UNVR, cameras) and the Synology NAS servers and apps running on a Pi4.
Choice of solution:
Since the utility room is close to the living spaces, only a completely silent system was workable for an installation near the main switchboard. Installing in the garage would have doubled the PV cable runs (25m to the utility room but 40-50m to the garage). Storage could be installed in the garage with cable runs of about 25-35m to the utility room. Since the decks and PV panels are easily accessible for maintenance (in case of micro-inverter failure), a decentralised solution with micro-inverters minimised the PV cable runs, allowing storage in the garage and the PV switchboard, Q Relays, CTs and Envoy gateway in the utility room.
Layout of PV panels and loads:
I used the K2 system software and the ESDEC calculator to estimate and position the maximum number of PV panels and calculate the ballast loads.
I ultimately went with ESDEC mounting systems for all 3 roofs, after delivery difficulties with the K2 system from one of my suppliers. The ESDEC FlatFix Fusion system, with a 10° tilt, suits my surfaces very well for the least visible impact possible.
The solar panels:
I chose based on prices and availability at the time:
-
EcoDelta Black Shingle Eco-415M-60SB PV panels, 415Wp (1719x1140x30 mm), for the south roof, landscape mode, south-facing.
-
Trina Solar Vertex TSM-405DE09.08 PV panels, 405Wp (1754x1096x30mm), for the north roof, dome landscape mode, east-west facing.
-
Trina Solar Vertex TSM-425DE09R.08 PV panels, 425Wp (1762x1134x30mm), for the carport, landscape mode, south-facing.
-
Trina Solar Vertex TSM-415DE09R.05 PV panels, 415Wp (1762x1134x30mm), for the carport, landscape mode, south-facing.
-
8 panels (2 rows of 4) on the south deck roof (3320 Wp) — [1.95 x 8 = 15.68 m² of panel surface]
-
4 panels (1 column of 4) on the north deck roof (1620 Wp) — [1.92 x 4 = 7.69 m² of panel surface]
-
8 panels (2 columns of 4) on the carport (3350 Wp) — [1.99 x 8 = 15.98 m² of panel surface]
Total max production: 8290 Wp and 6888 VA (1320+2640/IQ8M + 2928/IQ8A) — [and a total panel surface of 39.35m²].
Layout and load diagram:
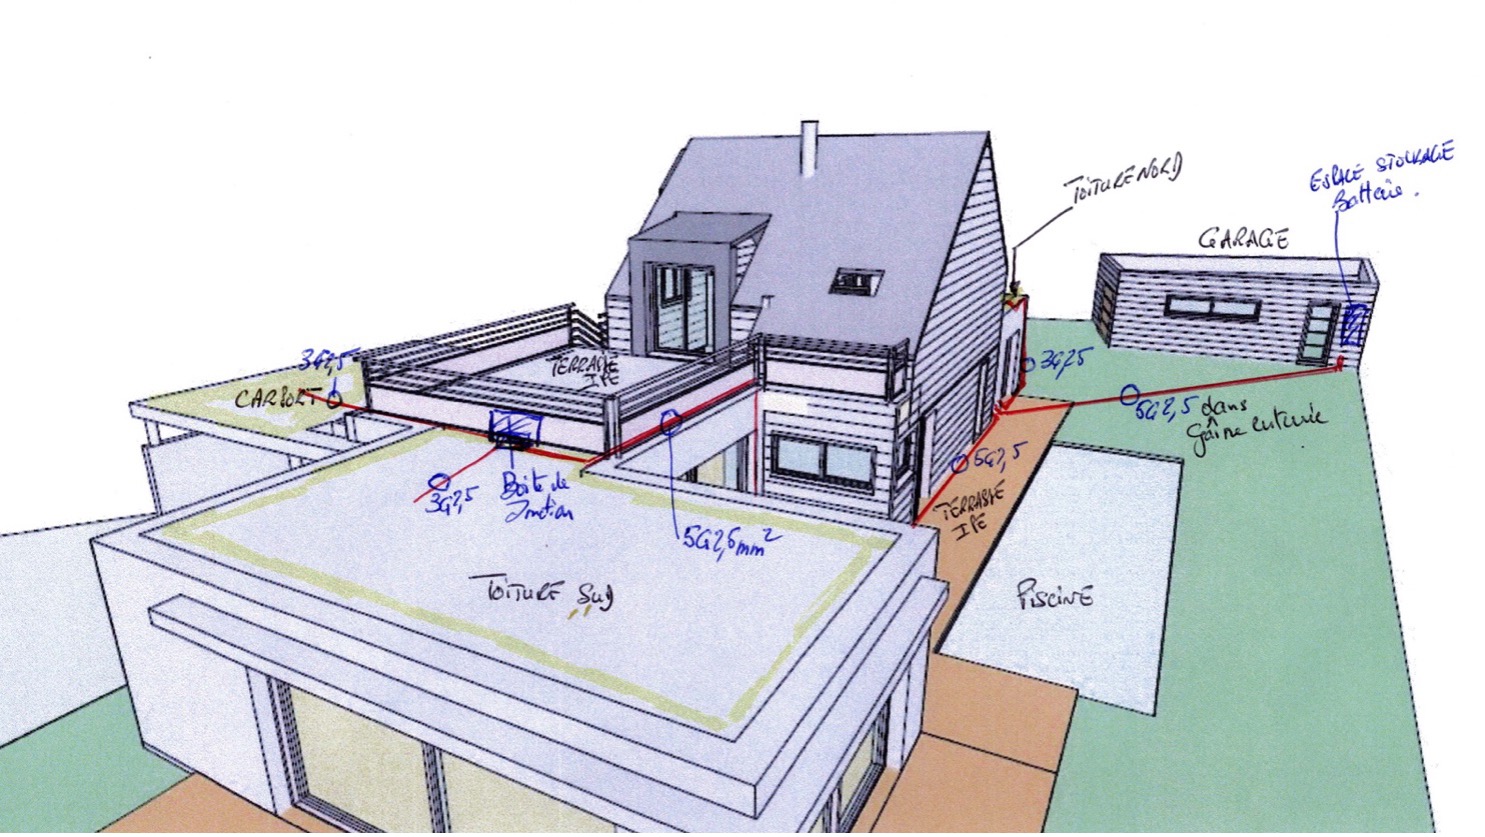
General view of the roofs and building layout
Aerial view of the PV layouts
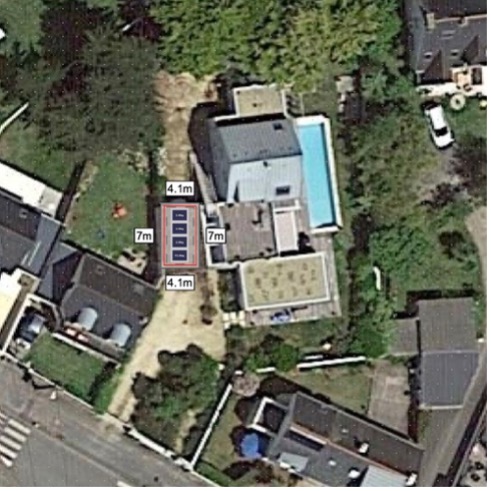 Carport: 8 panels, south-facing
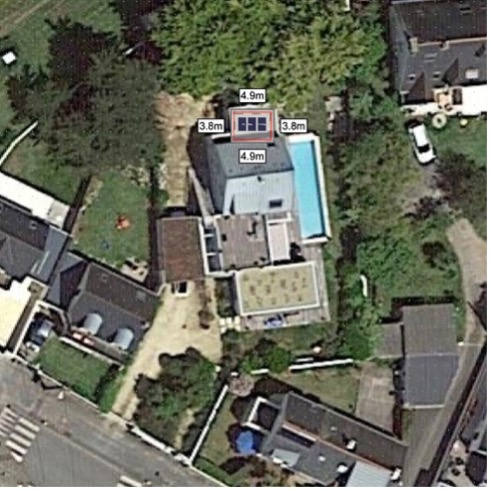 North roof: 4 panels, east-west facing
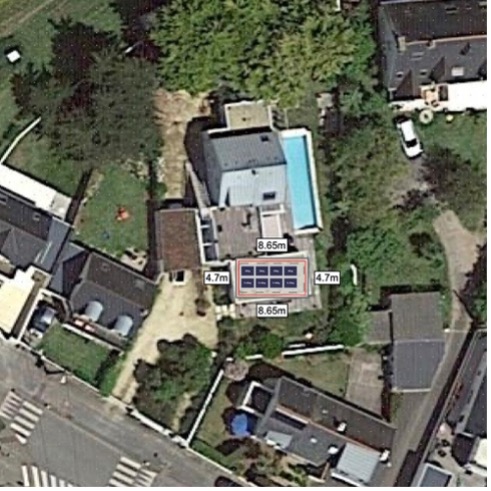 South roof: 8 panels, south-facing
Choice of inverter:
Given my environment, I chose the decentralised micro-inverter solution. It suits my needs well and minimises electrical risk. Maintenance of the equipment on the flat roofs is easy, power losses from any shading are reduced, there’s less risk of electrical arcing, and thinner cable gauges are needed. Overall efficiency may be slightly lower, but that’s acceptable.
I chose Enphase IQ8-series micro-inverters for their novelty, reliability and 25-year warranty, along with the Encharge 3T storage system for its safety (LFP battery), ease of installation, and integration into the overall Enphase system.
- 8 x IQ8M and 4 x IQ8M for the south and north roofs
- 8 x IQ8AC for the carport
- 1 x Encharge 3T in the garage (likely extension to 2 units).
Administrative steps:
I also handled the administrative process myself.
Town hall: The prior declaration was filed with the town hall on 8 February 2023, and the non-opposition authorisation was received on 3 March 2023. The town of Ploemeur is part of the Lorient metropolitan area, and planning procedures can be done online (https://gnau.lorient-agglo.bzh/gnau/#/).
Enedis: I applied for grid connection via the connection portal. I was fairly undecided between selling surplus power (OA) or giving it away for free. In the end, I chose to give it away for free. After obtaining the purple Consuel certificate and declaring a 3kWc cap for Enedis, I was able, by the end of November, to switch the Enphase grid profile from zero export to a 3kWc maximum. My installation was fully operational in early December 2023.
Battery prices keep falling, along with performance. I’m now leaning toward investing in a second battery instead. EDF OA requires the installation to be done by an RGE-certified company, which automatically rules out DIY installers. There are other buyers on the market, as well as virtual battery solutions. That’s something I’ve decided to look into later, once I’ve studied my installation’s performance over a longer period (about a year, I think).
Consuel: I planned to have the Consuel inspection at the end of the installation. I applied on the Consuel website in July (€180). After several email exchanges over configuration details and documents to supply, my application was finally approved in late August, and I had to wait until the end of November for the technician’s visit. I obtained the certificate of compliance (purple Consuel) on 25/11/2023. For the Consuel file, I used QElectroTech to draw the electrical diagrams. I discovered this software through the videos of YouTuber “FabBricole.” It produces good-quality diagrams. My PDF diagram is available here.
The storage system:
To start with, I’m planning to buy an Encharge 3T battery, to be installed in the garage. If my production is sufficient, it will then be easy to extend this to 2x3T, or add a 5P once it’s available on the French market.
The battery (or batteries) connects via a 2.5 mm² cable that runs directly underground from the garage to the utility room (an independent circuit, separate from the main electrical network). The distance is about 20m. The connection in the utility room goes into the secondary panel dedicated to solar, on a Q Relay + 20A switch + RCD.
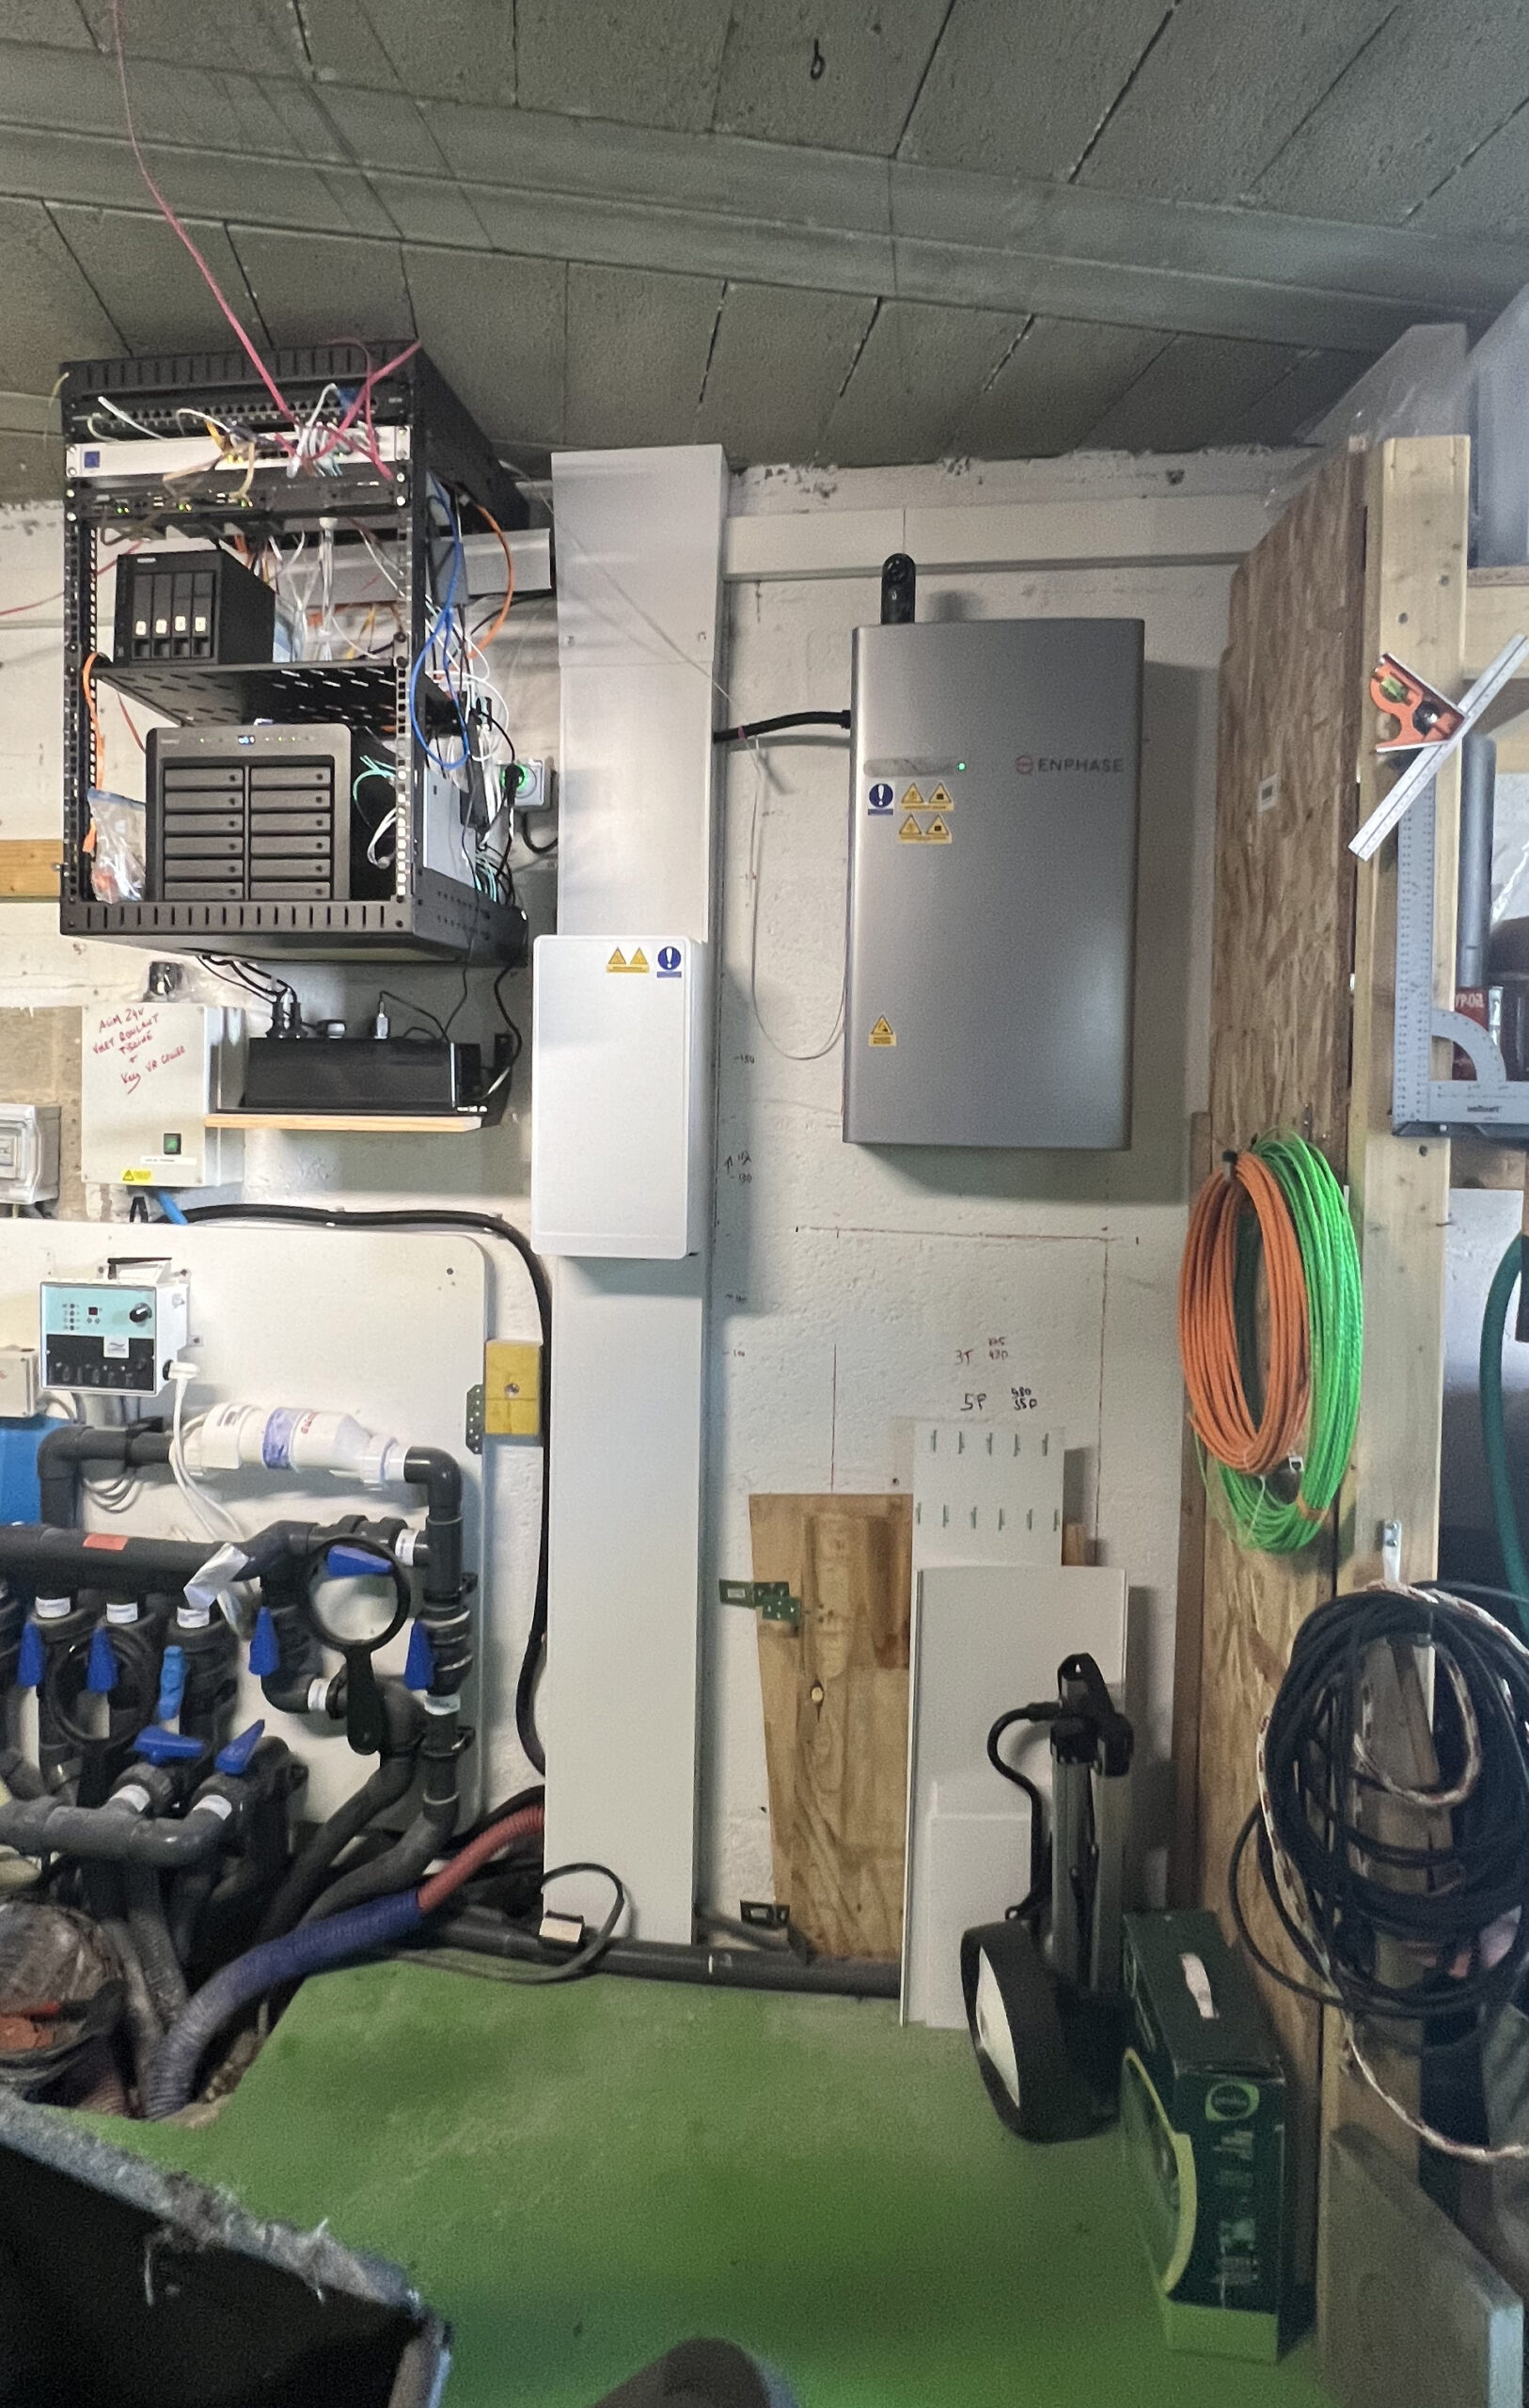 Wall-mounted 3T battery installation in the garage
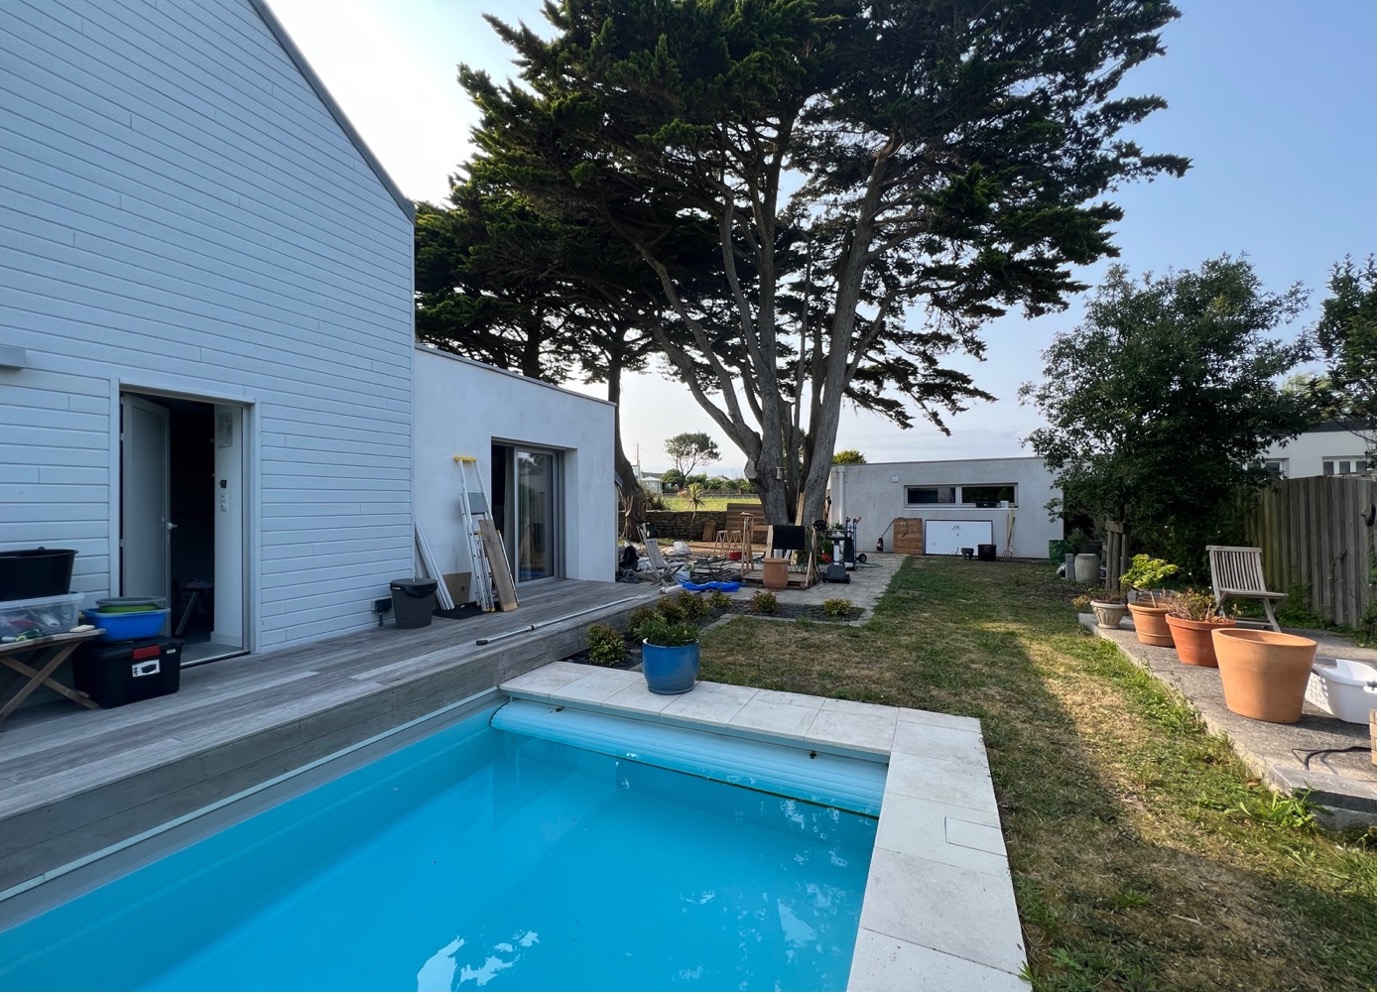 Perspective view of the utility room-garden-garage distance
Training:
Through the Enphase University online training, I took the courses and earned certifications in IQ8 technology and the Encharge 3T and 10T storage systems. These trainings, in my view, matter — they help you get familiar with the equipment, its configuration and its installation. Training on the storage systems is mandatory for anyone wanting to install Enphase 3T, 10T and 5P batteries.
Timeline:
| February-March 2023 | Study of solutions and town-hall declaration. |
| March-June 2023 | Ordering equipment, running cables, reorganising the utility room and garage, upgrading the meter panel and switchboards, installing the server rack and partially recabling data outlets to Cat7 FTP, pulling a new fibre run between garage/utility room and utility room/deck, and various other work. |
| June 2023 | The south and north decks are installed and connected. They produce but are capped (grid profile set to zero export) until I finish the installation and apply for Enedis grid connection. |
| End of June 2023 | Technical file sent to Enphase engineers for validation before installing the battery. Very quick response from the engineers. |
| July 2023 | The carport is installed and operational, capped. |
| August 2023 | The 3T battery is installed in the garage and commissioned. |
| November 2023 | Consuel inspection and validation. Enedis approves free grid injection up to 3kWh maximum. |
WiFi link between the Envoy (utility room) and the battery (garage):
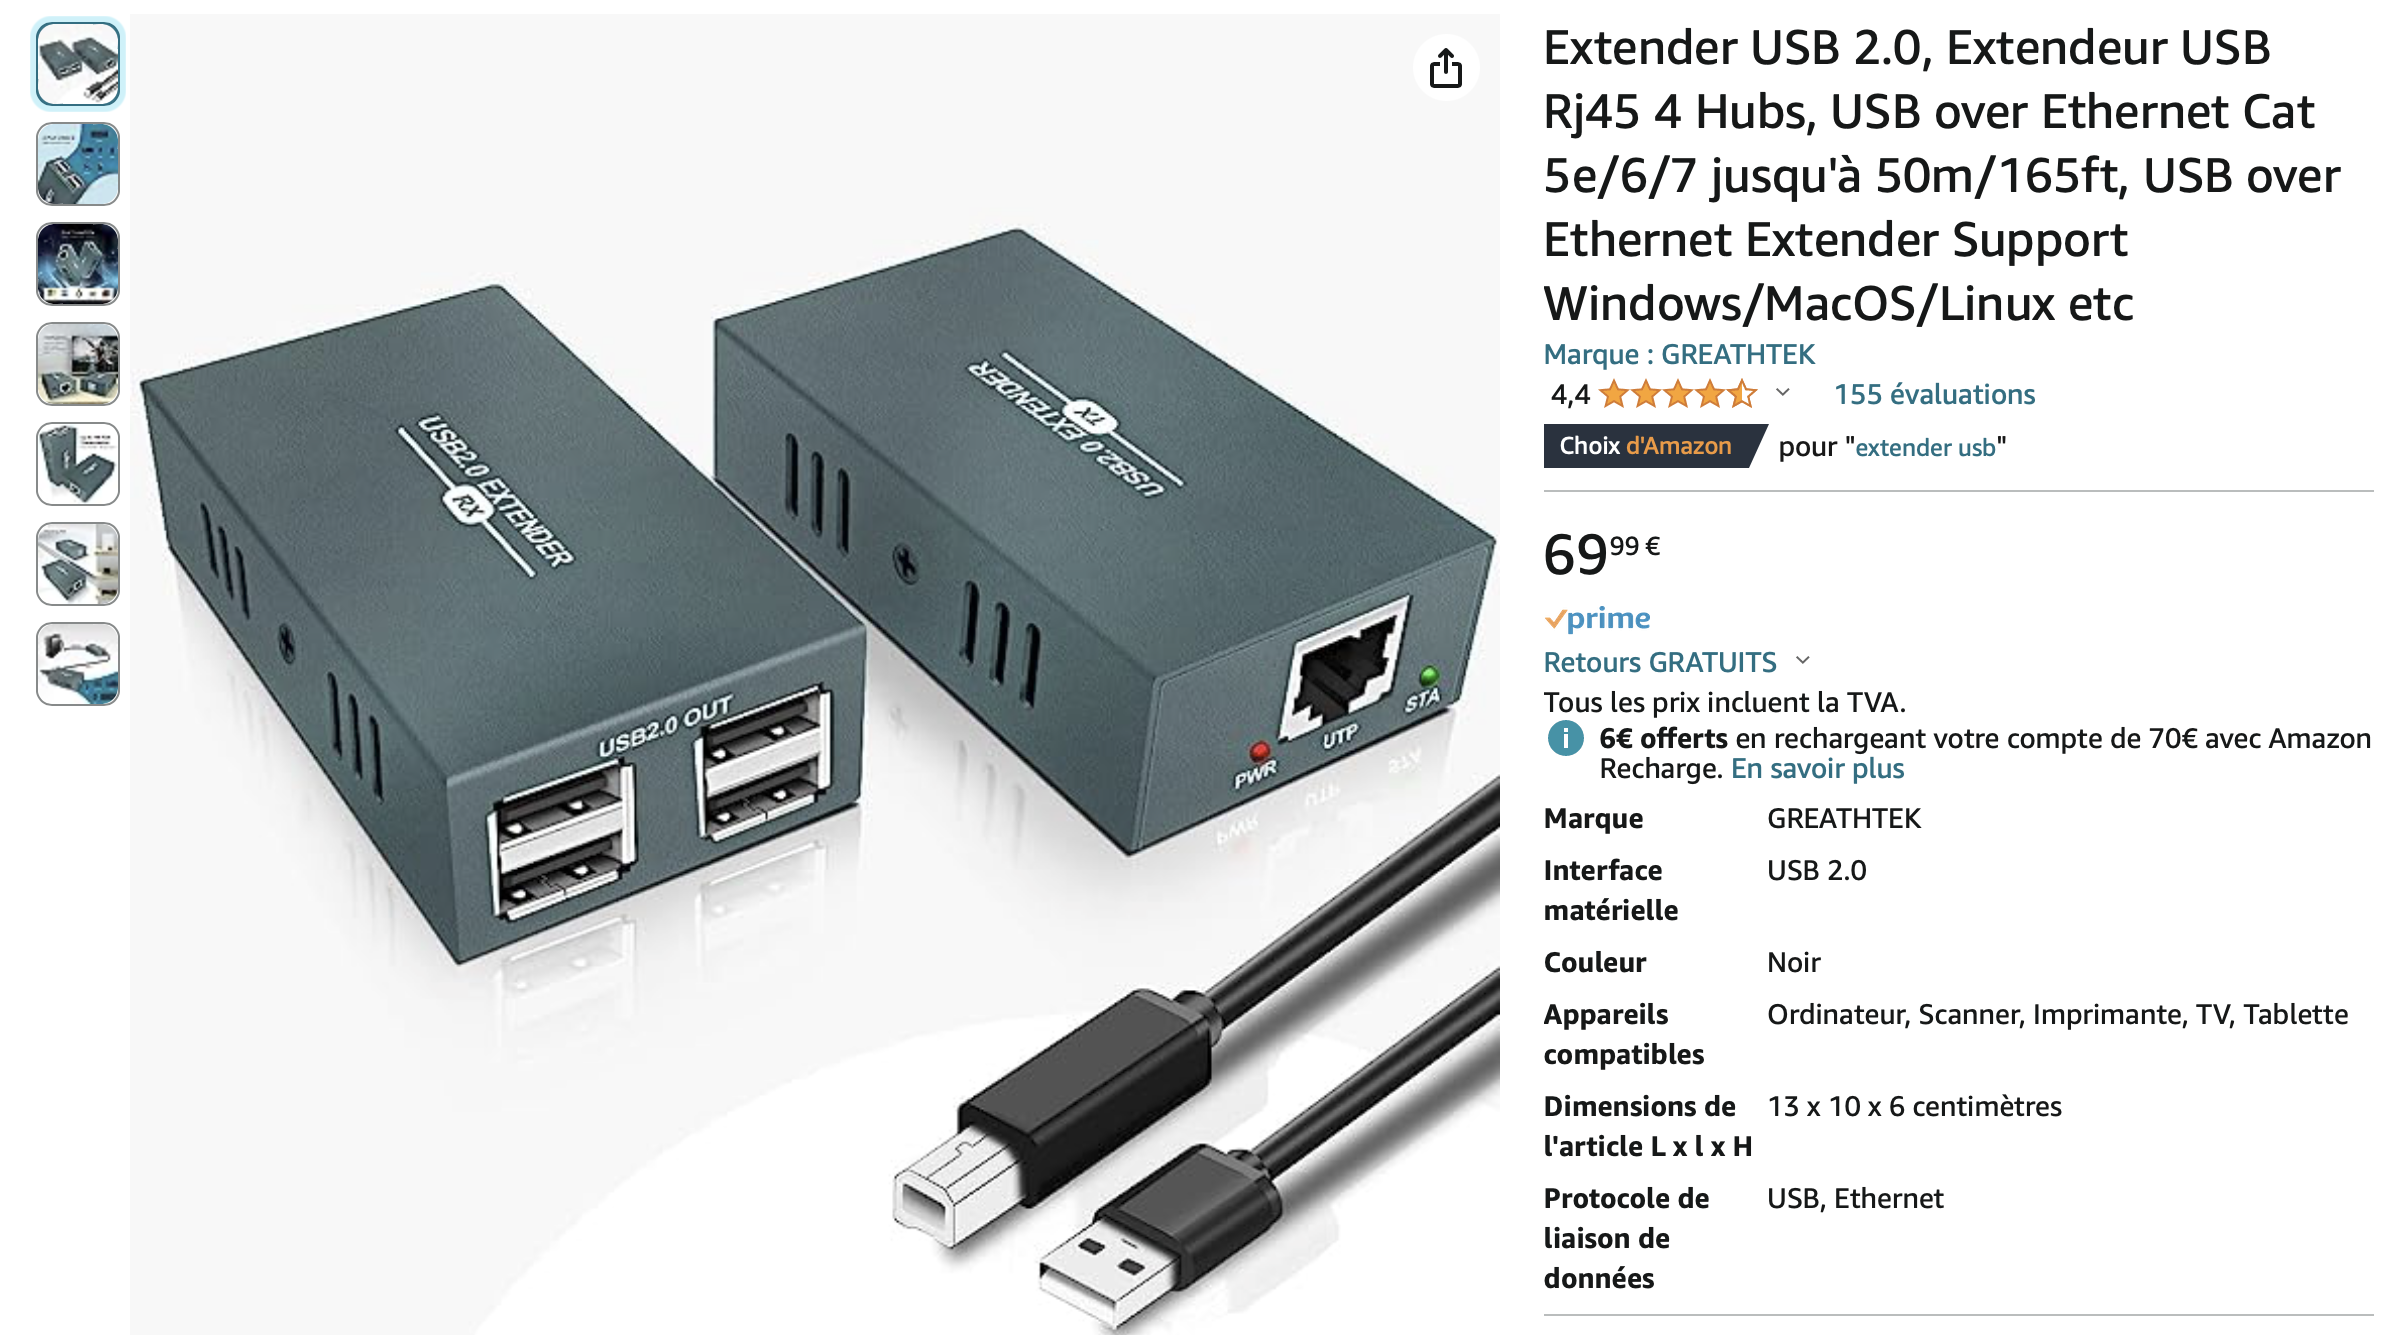
Unfortunately, Enphase doesn’t use WiFi 4, 5 or 6 networks for this link, but a dedicated network (Zigbee-type). So I couldn’t use my home WiFi network, even though it’s available throughout the house and garage. I planned to use an existing Cat6 Ethernet cable to install a USB “extender.” This lets me carry the USB link between the Envoy and the Enphase communication module over that cable. It avoids needing an Enphase signal repeater for range issues, and gives a very stable link between the Envoy and the battery/batteries. This solution is, incidentally, described on the Enphase US website.
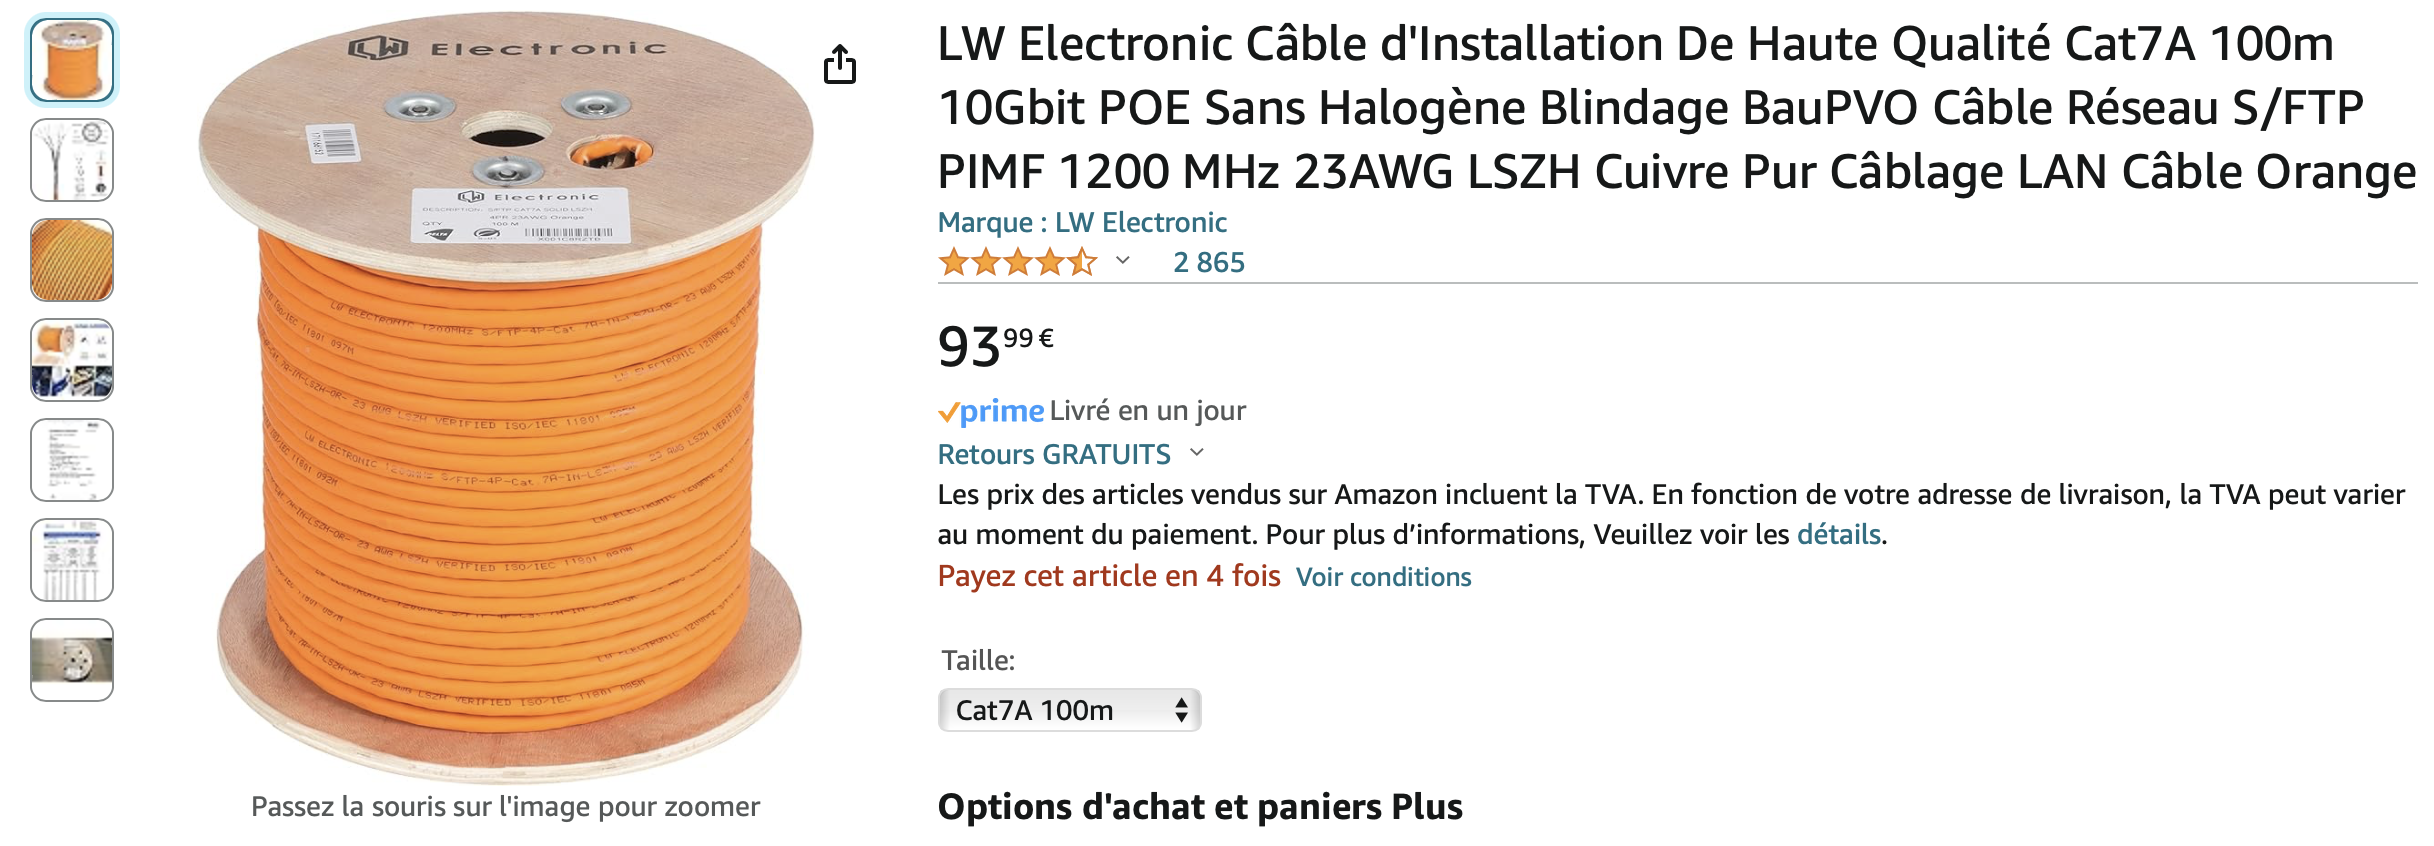
Problems and solution: A problem appeared when setting up the extender, related to the length of the Cat6 cable and, above all, its gauge. After testing several extenders on the market (Digitus, Greathtek and AV Access) with several lengths of Cat6 and Cat7 FTP cable, I found that thin-gauge cables (AWG 27) don’t sustain a good link between extenders once distances exceed 20m. So I ran a new Cat7a FTP cable with a 23 gauge (AWG 23), and my tests over about 40m gave good results: the link was flawless. I ended up using the GreathTek extender because its LEDs let you quickly see whether the link is working. This information about the importance of Ethernet cable gauge is unfortunately not provided in the extenders’ spec sheets.
Connection diagram:
A simple diagram (hand-cut and pasted) that accompanies the file sent to the Enphase engineers, along with a Word document describing my whole approach (this extra document probably wasn’t necessary). Enphase’s engineers responded quickly and validated my installation to unlock my profile, allowing me to install the Encharge 3T battery myself using the ToolKit app. Enphase’s engineers were genuinely responsive, courteous, and I really appreciated their professionalism.
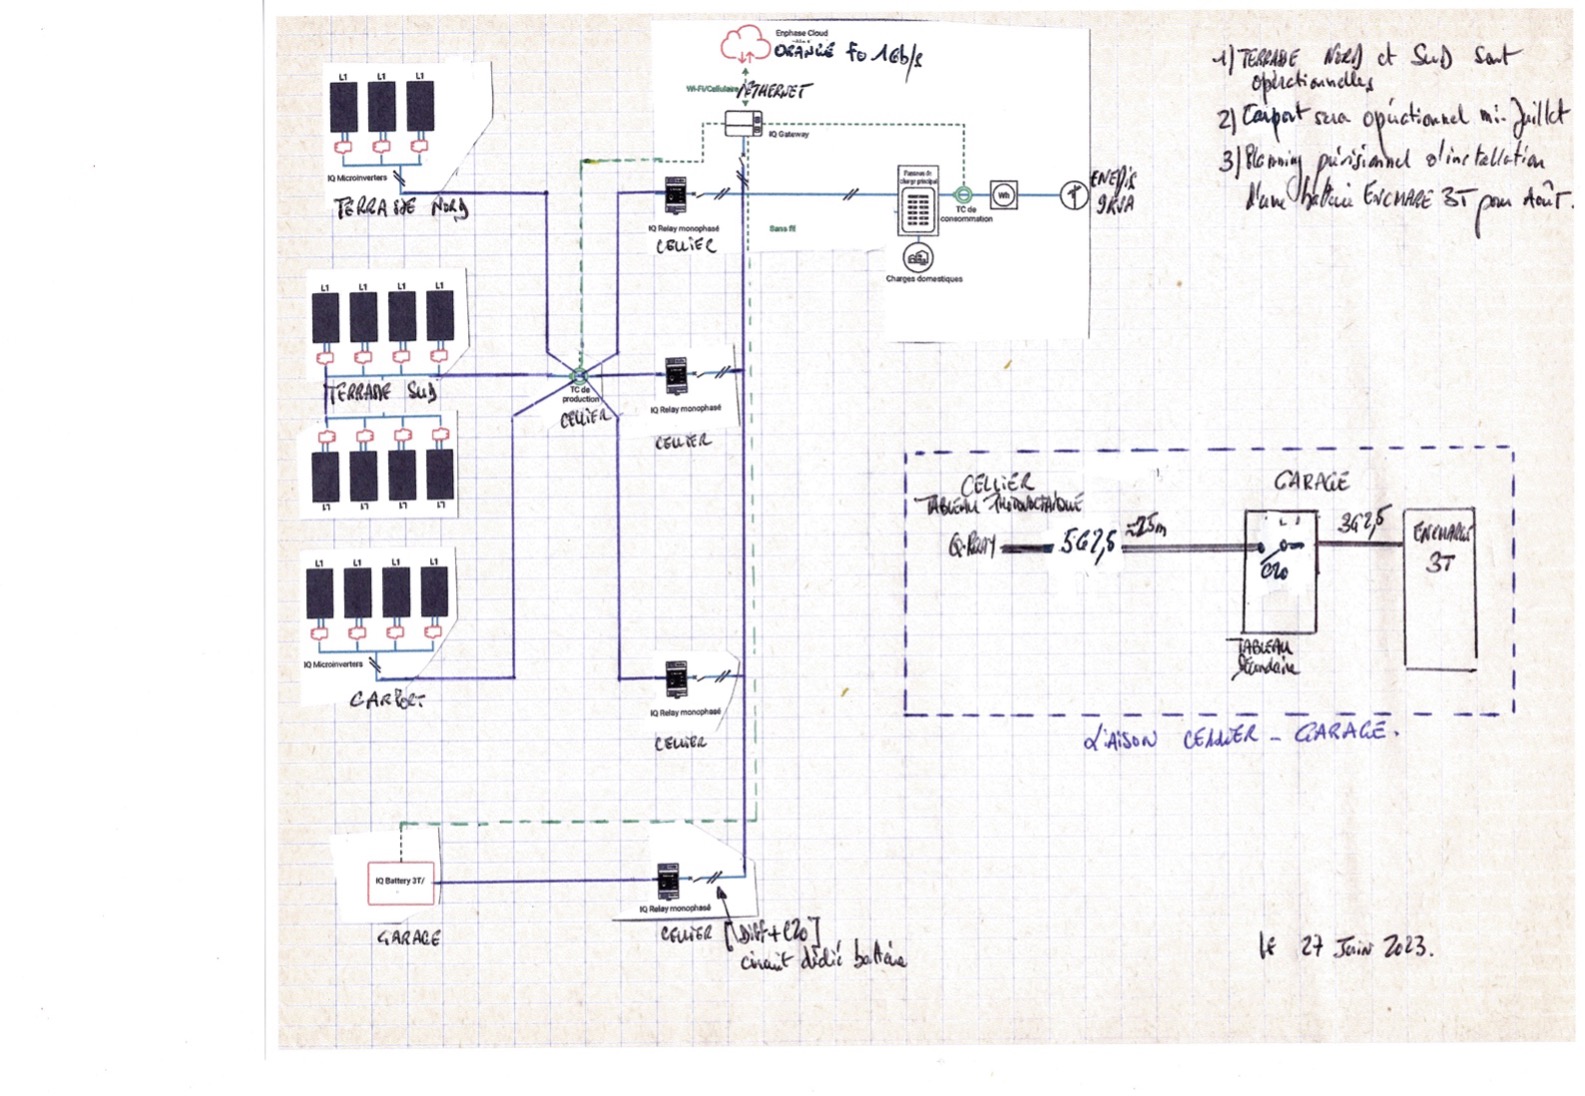
Example diagram based on the examples provided in Enphase’s documentation
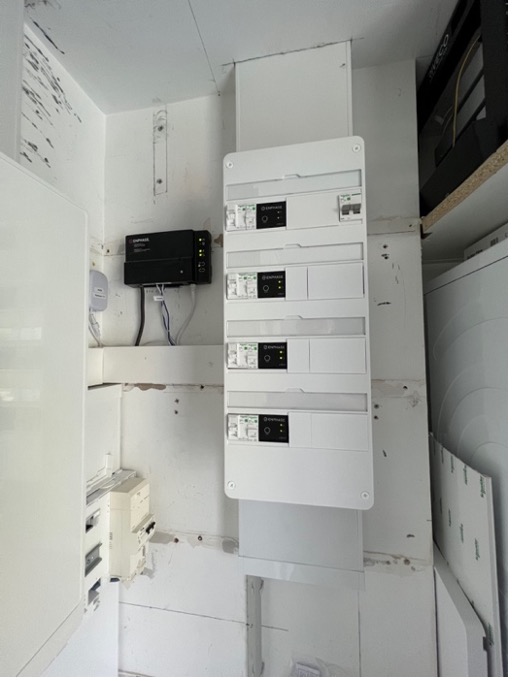
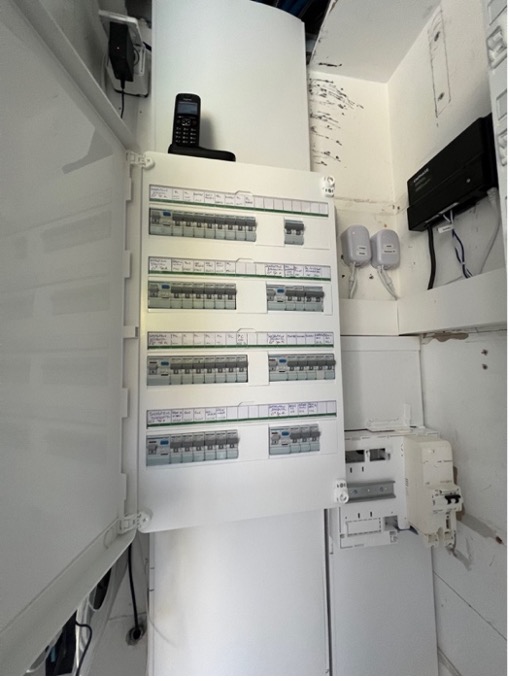
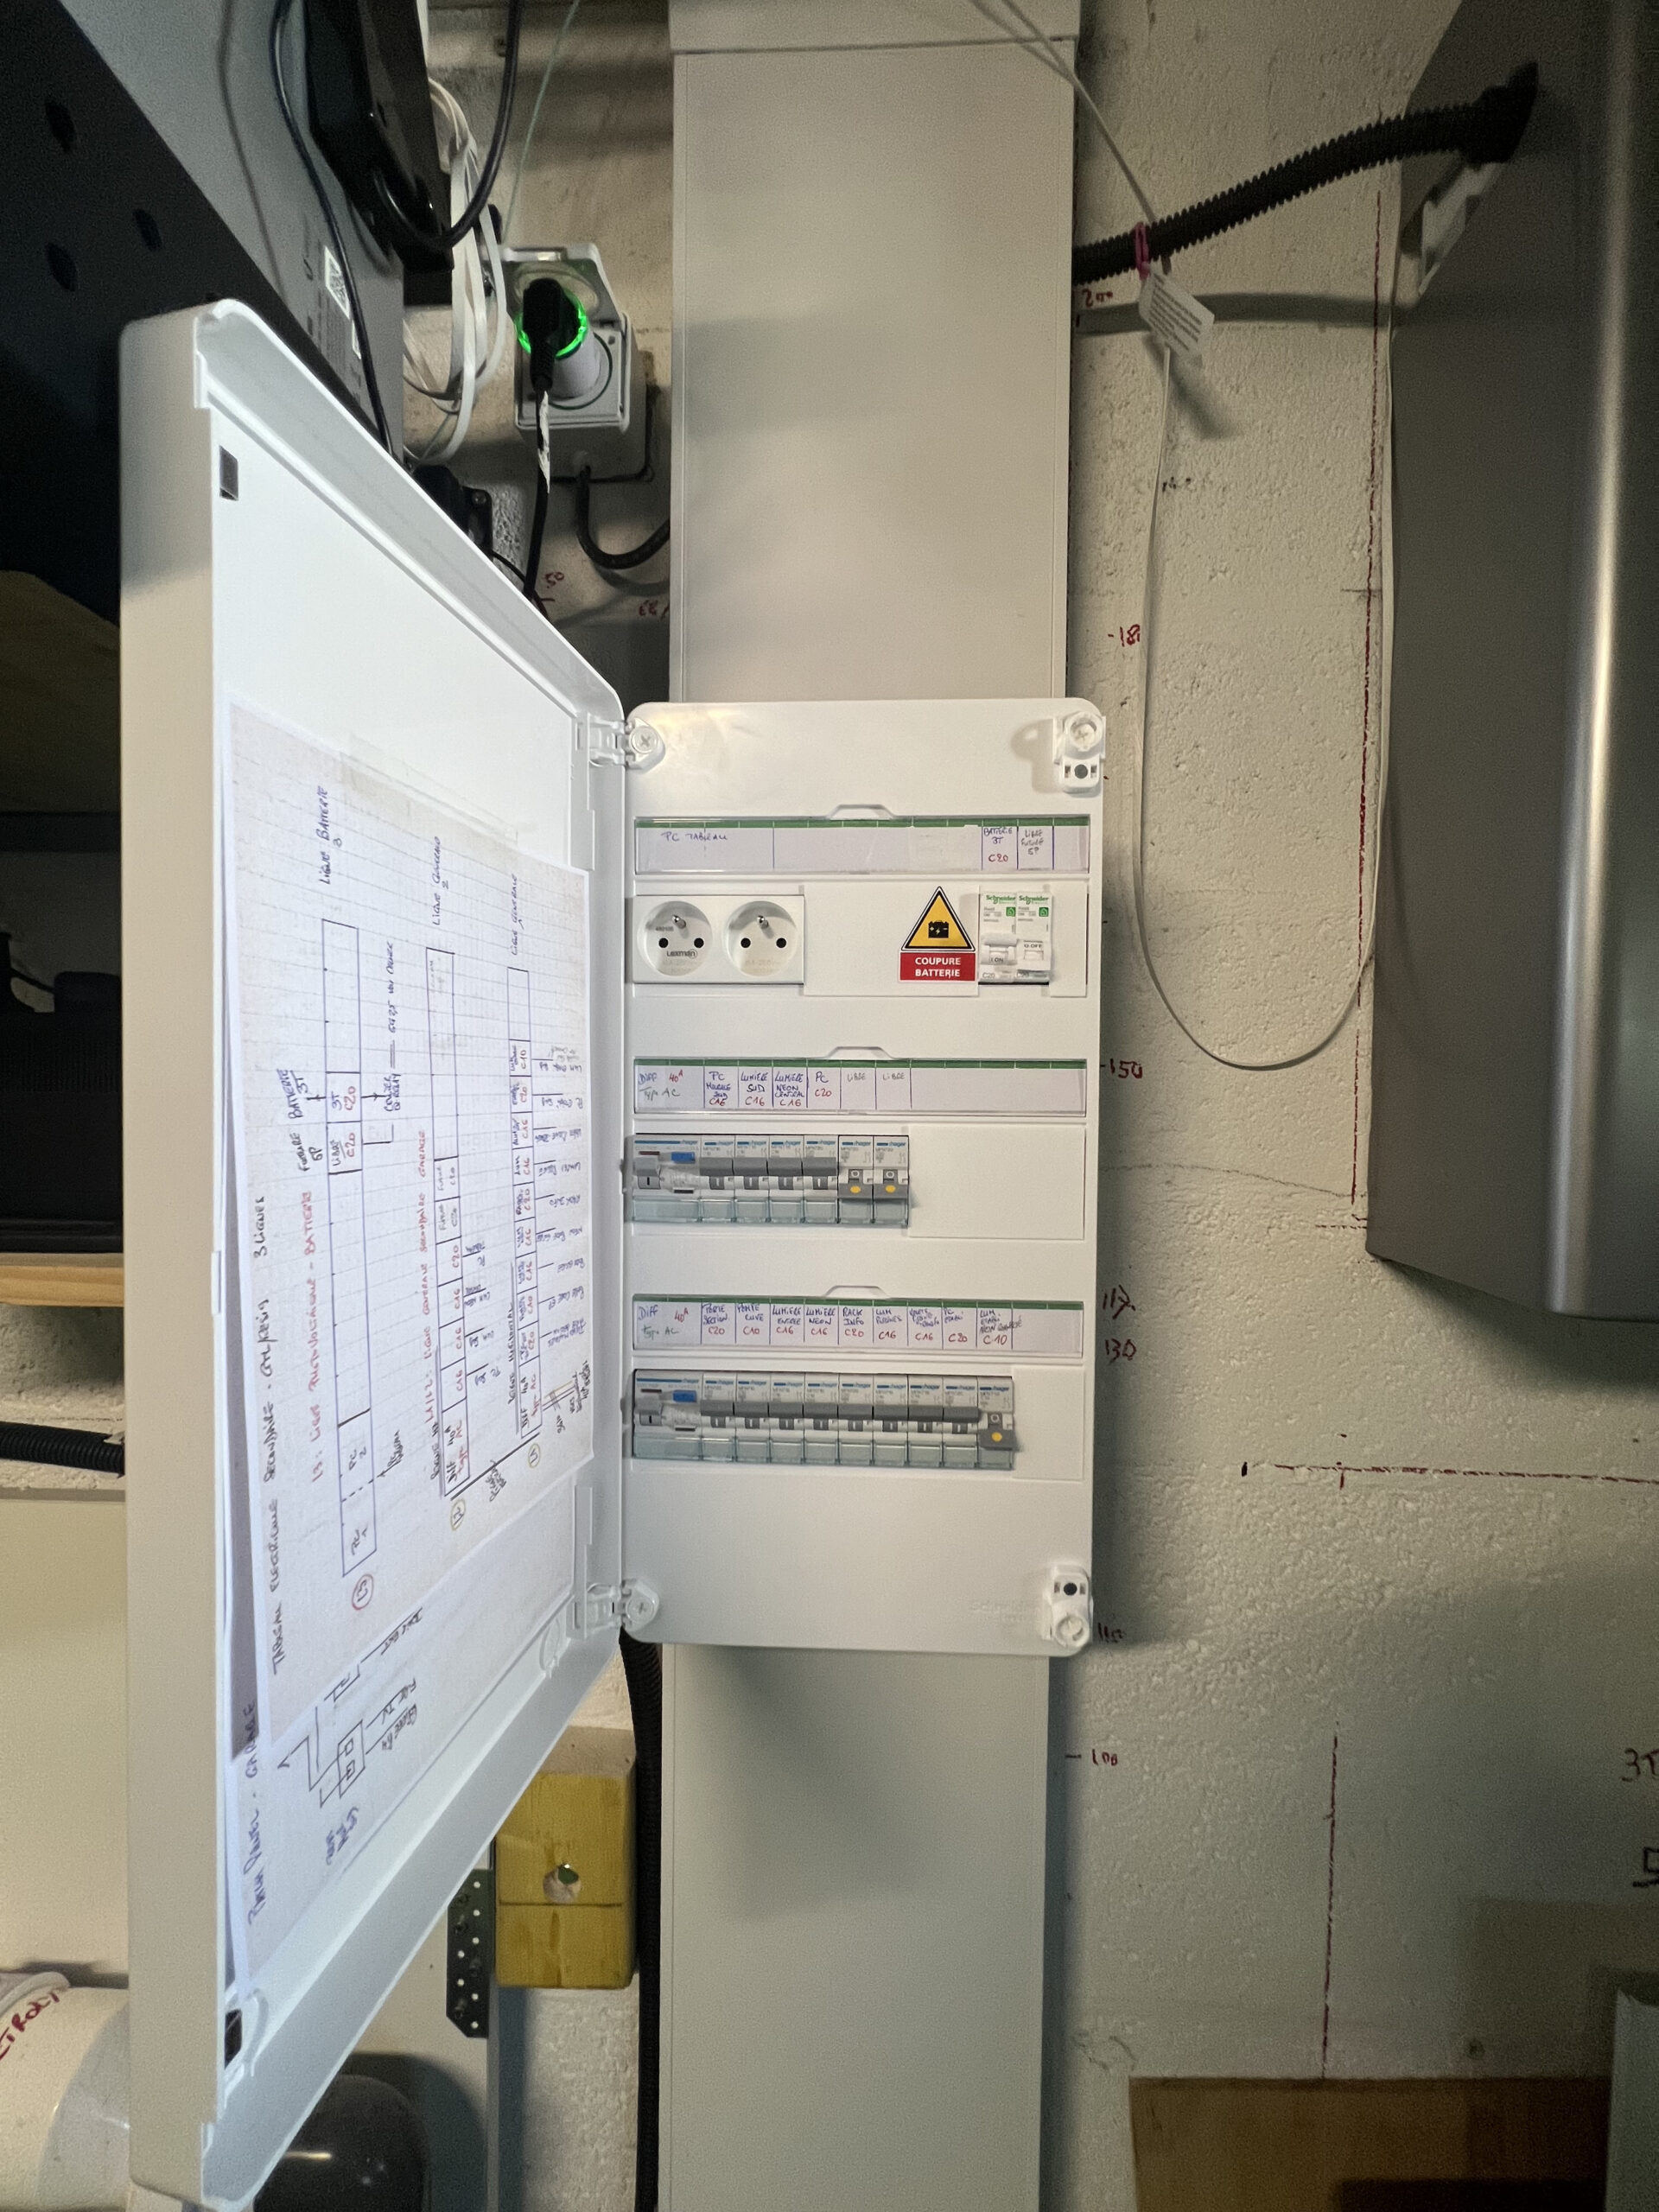
Photos of the completed installations: main switchboard and PV switchboard:
I chose Schneider meter panels and switchboards. For the main switchboard’s meter panel, I went from a 13-module to an 18-module unit to better comply with NFC 15-100 (available space and adding a breaker/isolator toward the secondary PV panel). Wiring and breakers stayed the same (Haeger equipment), but circuits are better balanced and grouped. For the secondary panels (utility room/garage), I chose Schneider equipment.
From ground level:
The installations have almost no visual impact from any of the 3 deck roofs. That was the goal. It’s the advantage of flat roofs: the panel tilt isn’t optimal, but the visual impact is negligible.
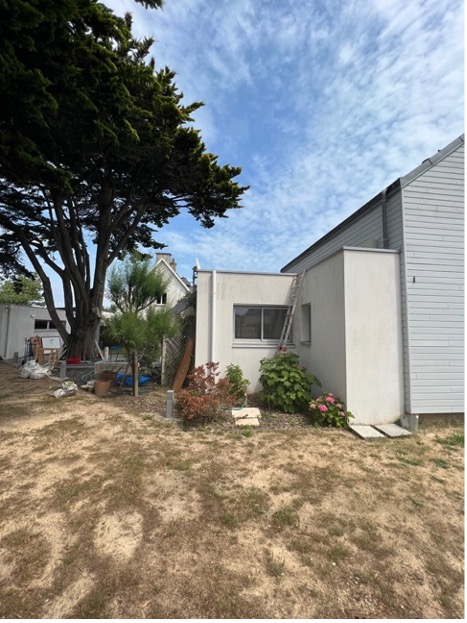
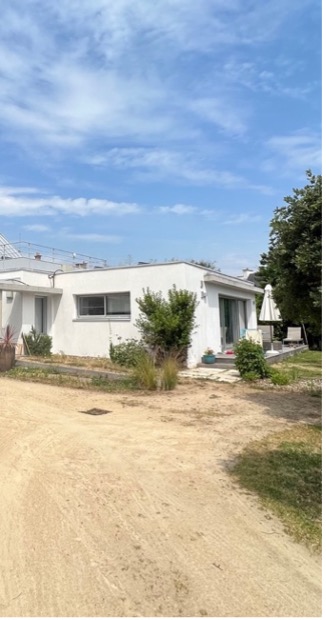
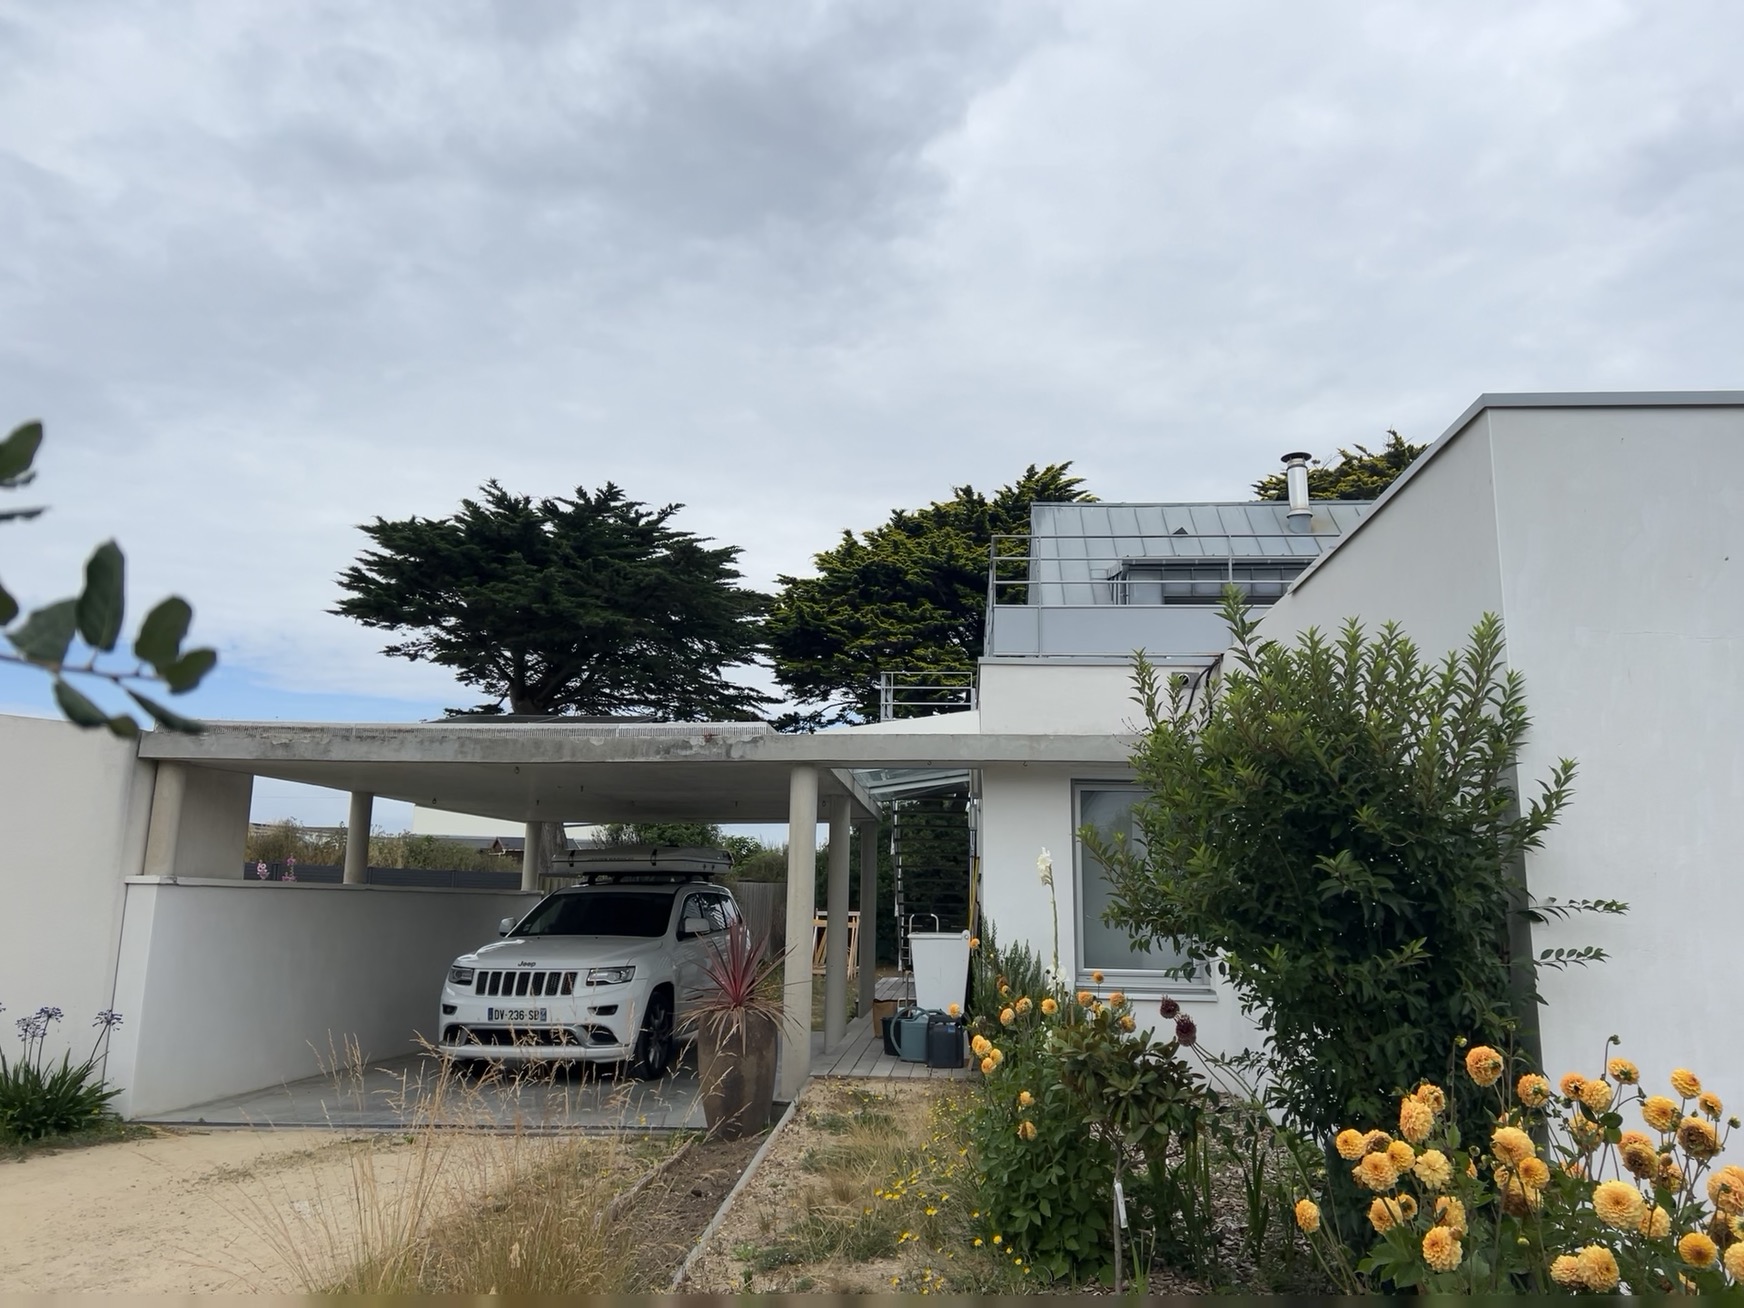
Installing the panels on the flat roofs
After waiting for the K2 mounting systems that never actually arrived, I decided to cancel my order with that supplier, who refunded me quickly. After more research, I decided to use the ESDEC FlatFix Fusion mounting system. I redid the load calculations on the ESDEC simulator and started with an order for the north roof, where I planned to put 4 panels in dome mode. This let me get familiar with the ESDEC system, panel and IQ8M micro-inverter installation, and commissioning within the Enphase system. I ended up fitting 3 panels (two facing east, one facing west), since I wanted more clearance to move around the panels. Age catches up with you… I’d rather be safe.
Ballast load calculations
The K2 and ESDEC simulators are designed to help plan panel installation: calculating loads based on your location (wind, snow, urban zone, coastal zone, etc.), your roof (pitch or flat), mounting height, panels used, and so on. At the end of the configuration you get a mounting diagram and a parts list for buying the equipment.
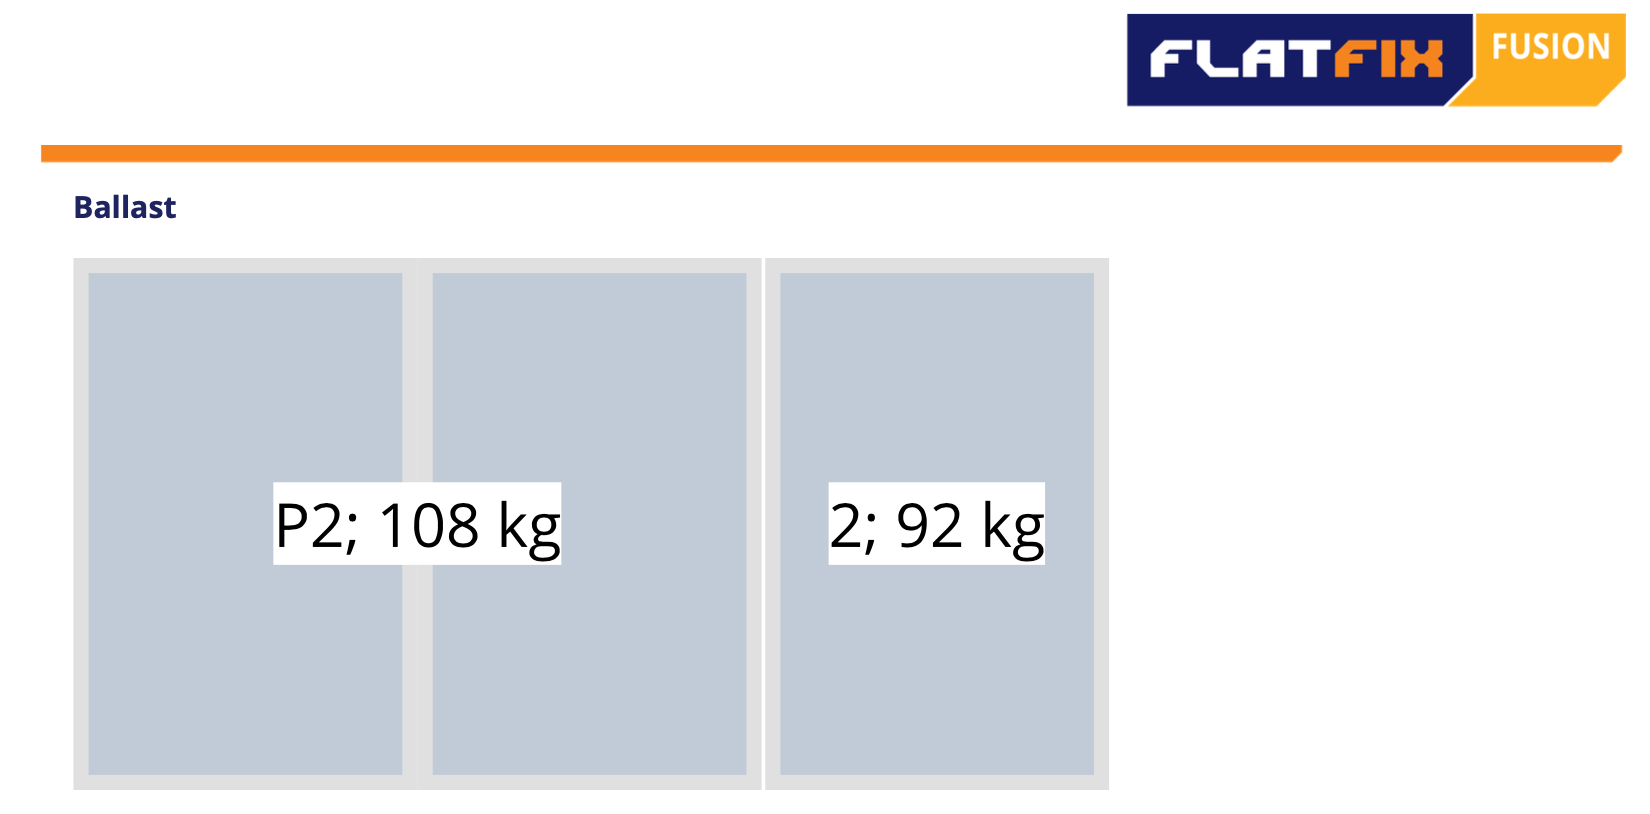 North roof: 4 panels (east/west dome) in landscape mode
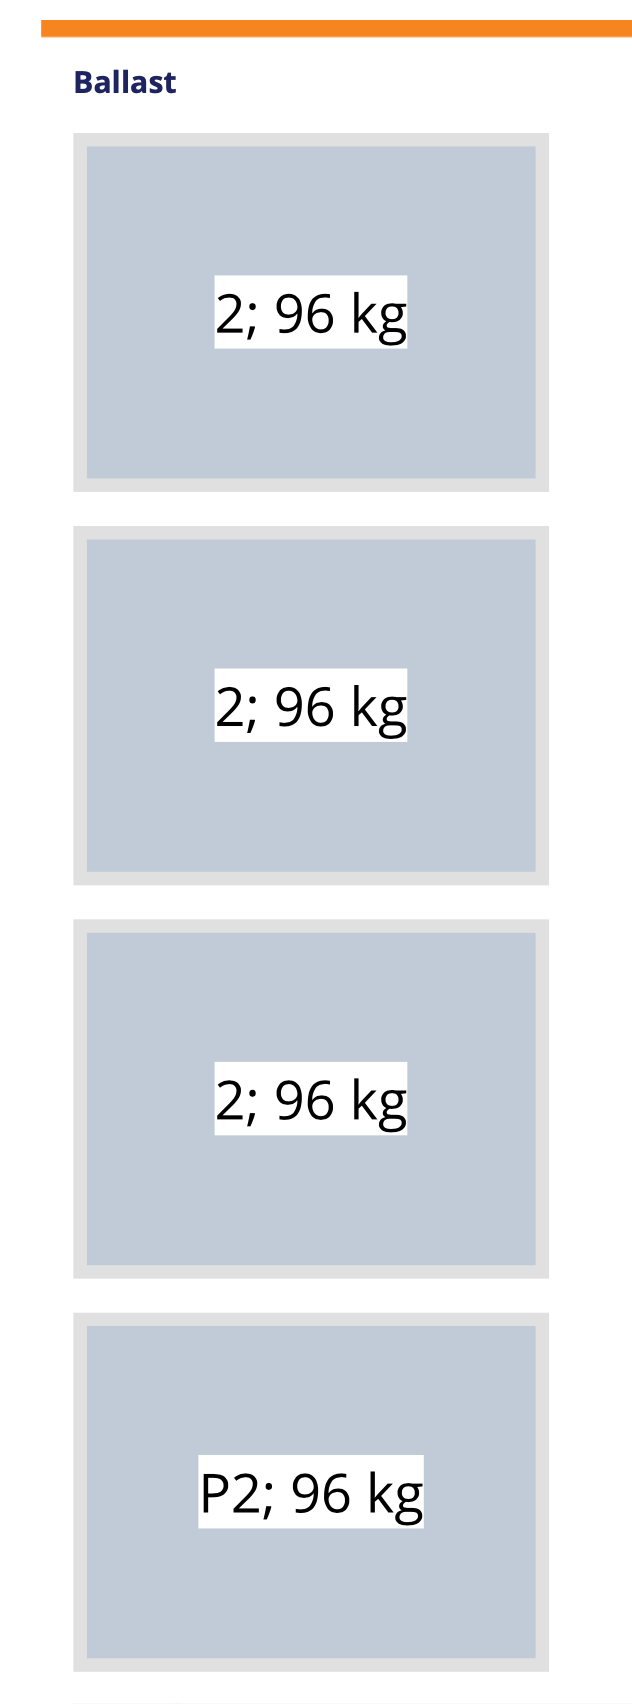 Carport: 8 panels in two south-facing columns, landscape mode
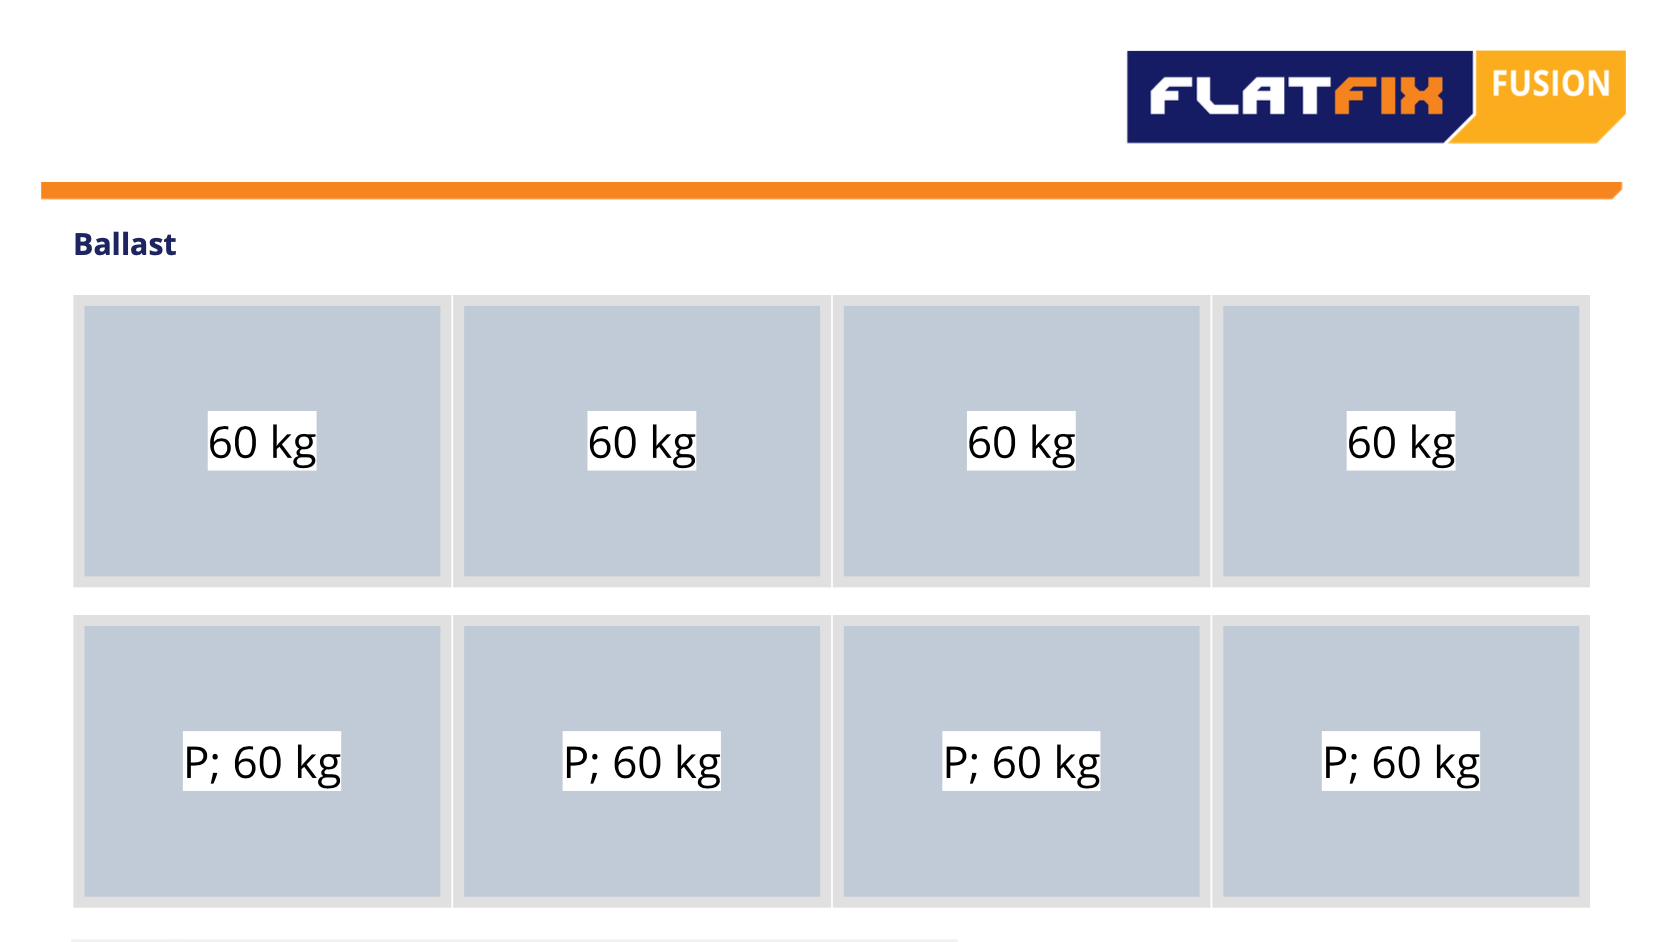 South roof: 8 panels, south-facing, in two rows, landscape mode
Choice of ballast:
After checking Leroy-Merlin, Point-P, Brico Dépôt and other local suppliers, I chose concrete pavers from Brico Dépôt and had a pallet of 20x10x5 concrete blocks delivered, which let me fit 4 across the width of the ESDEC ballast tray. I ended up with 95kg of ballast per panel by filling the whole length of the tray. I could carry the blocks up by hand (rope and basket) in batches of 4 or 5 without too much effort.
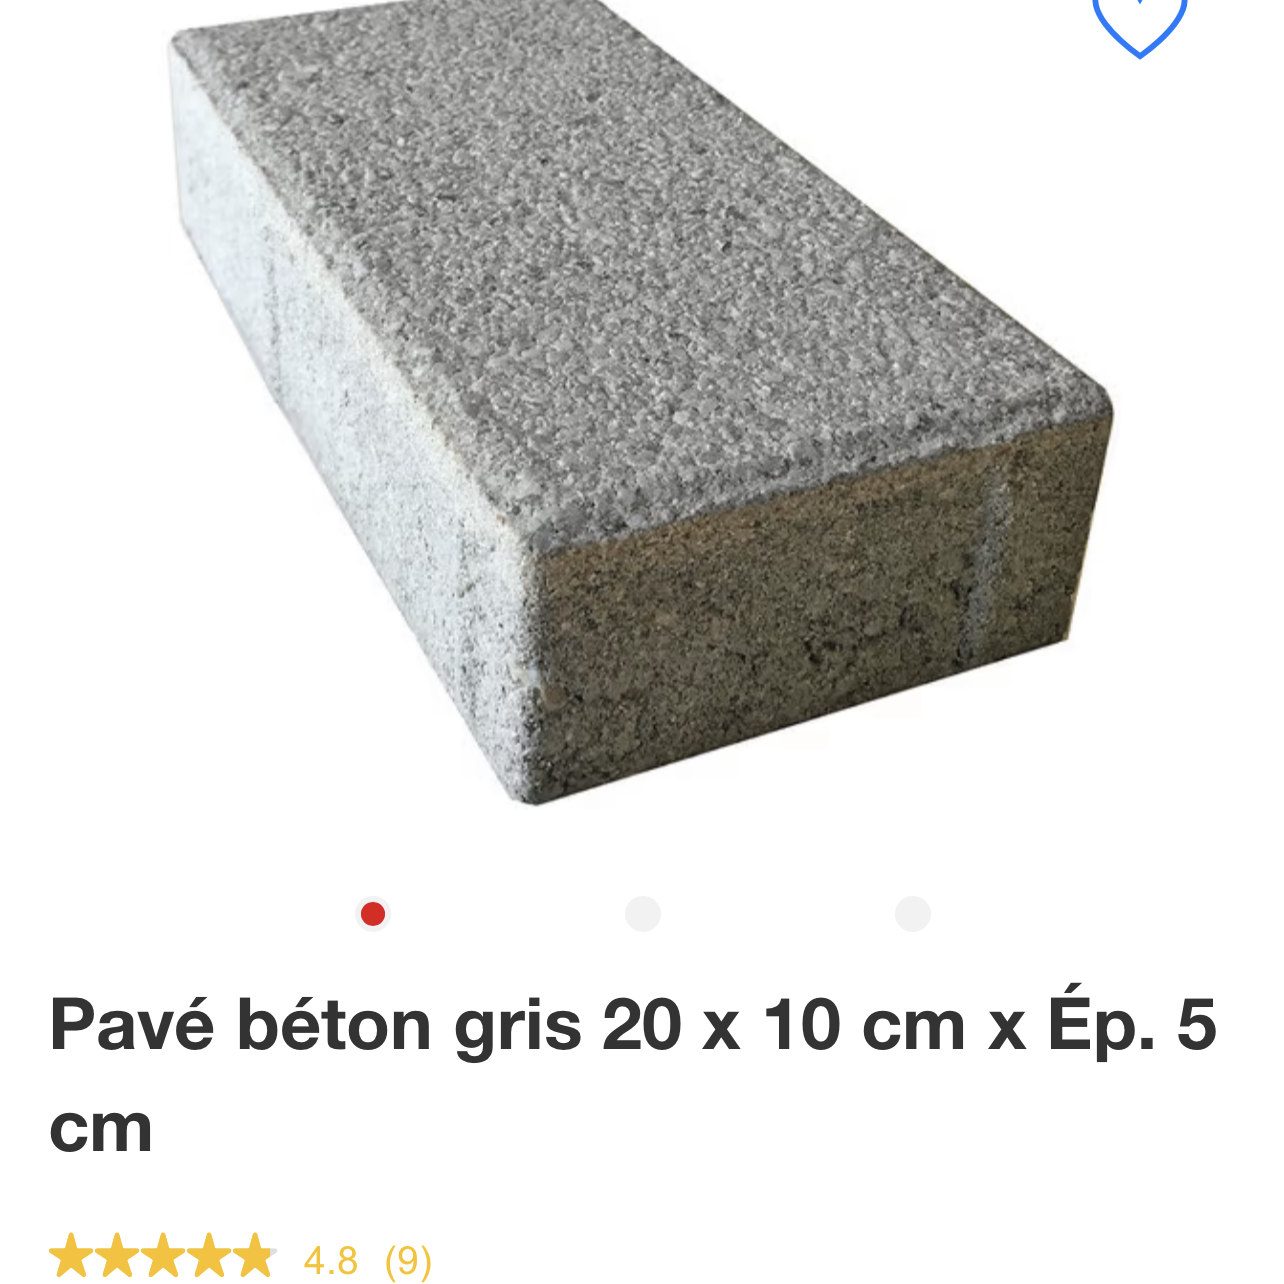 The concrete paver used for ballast
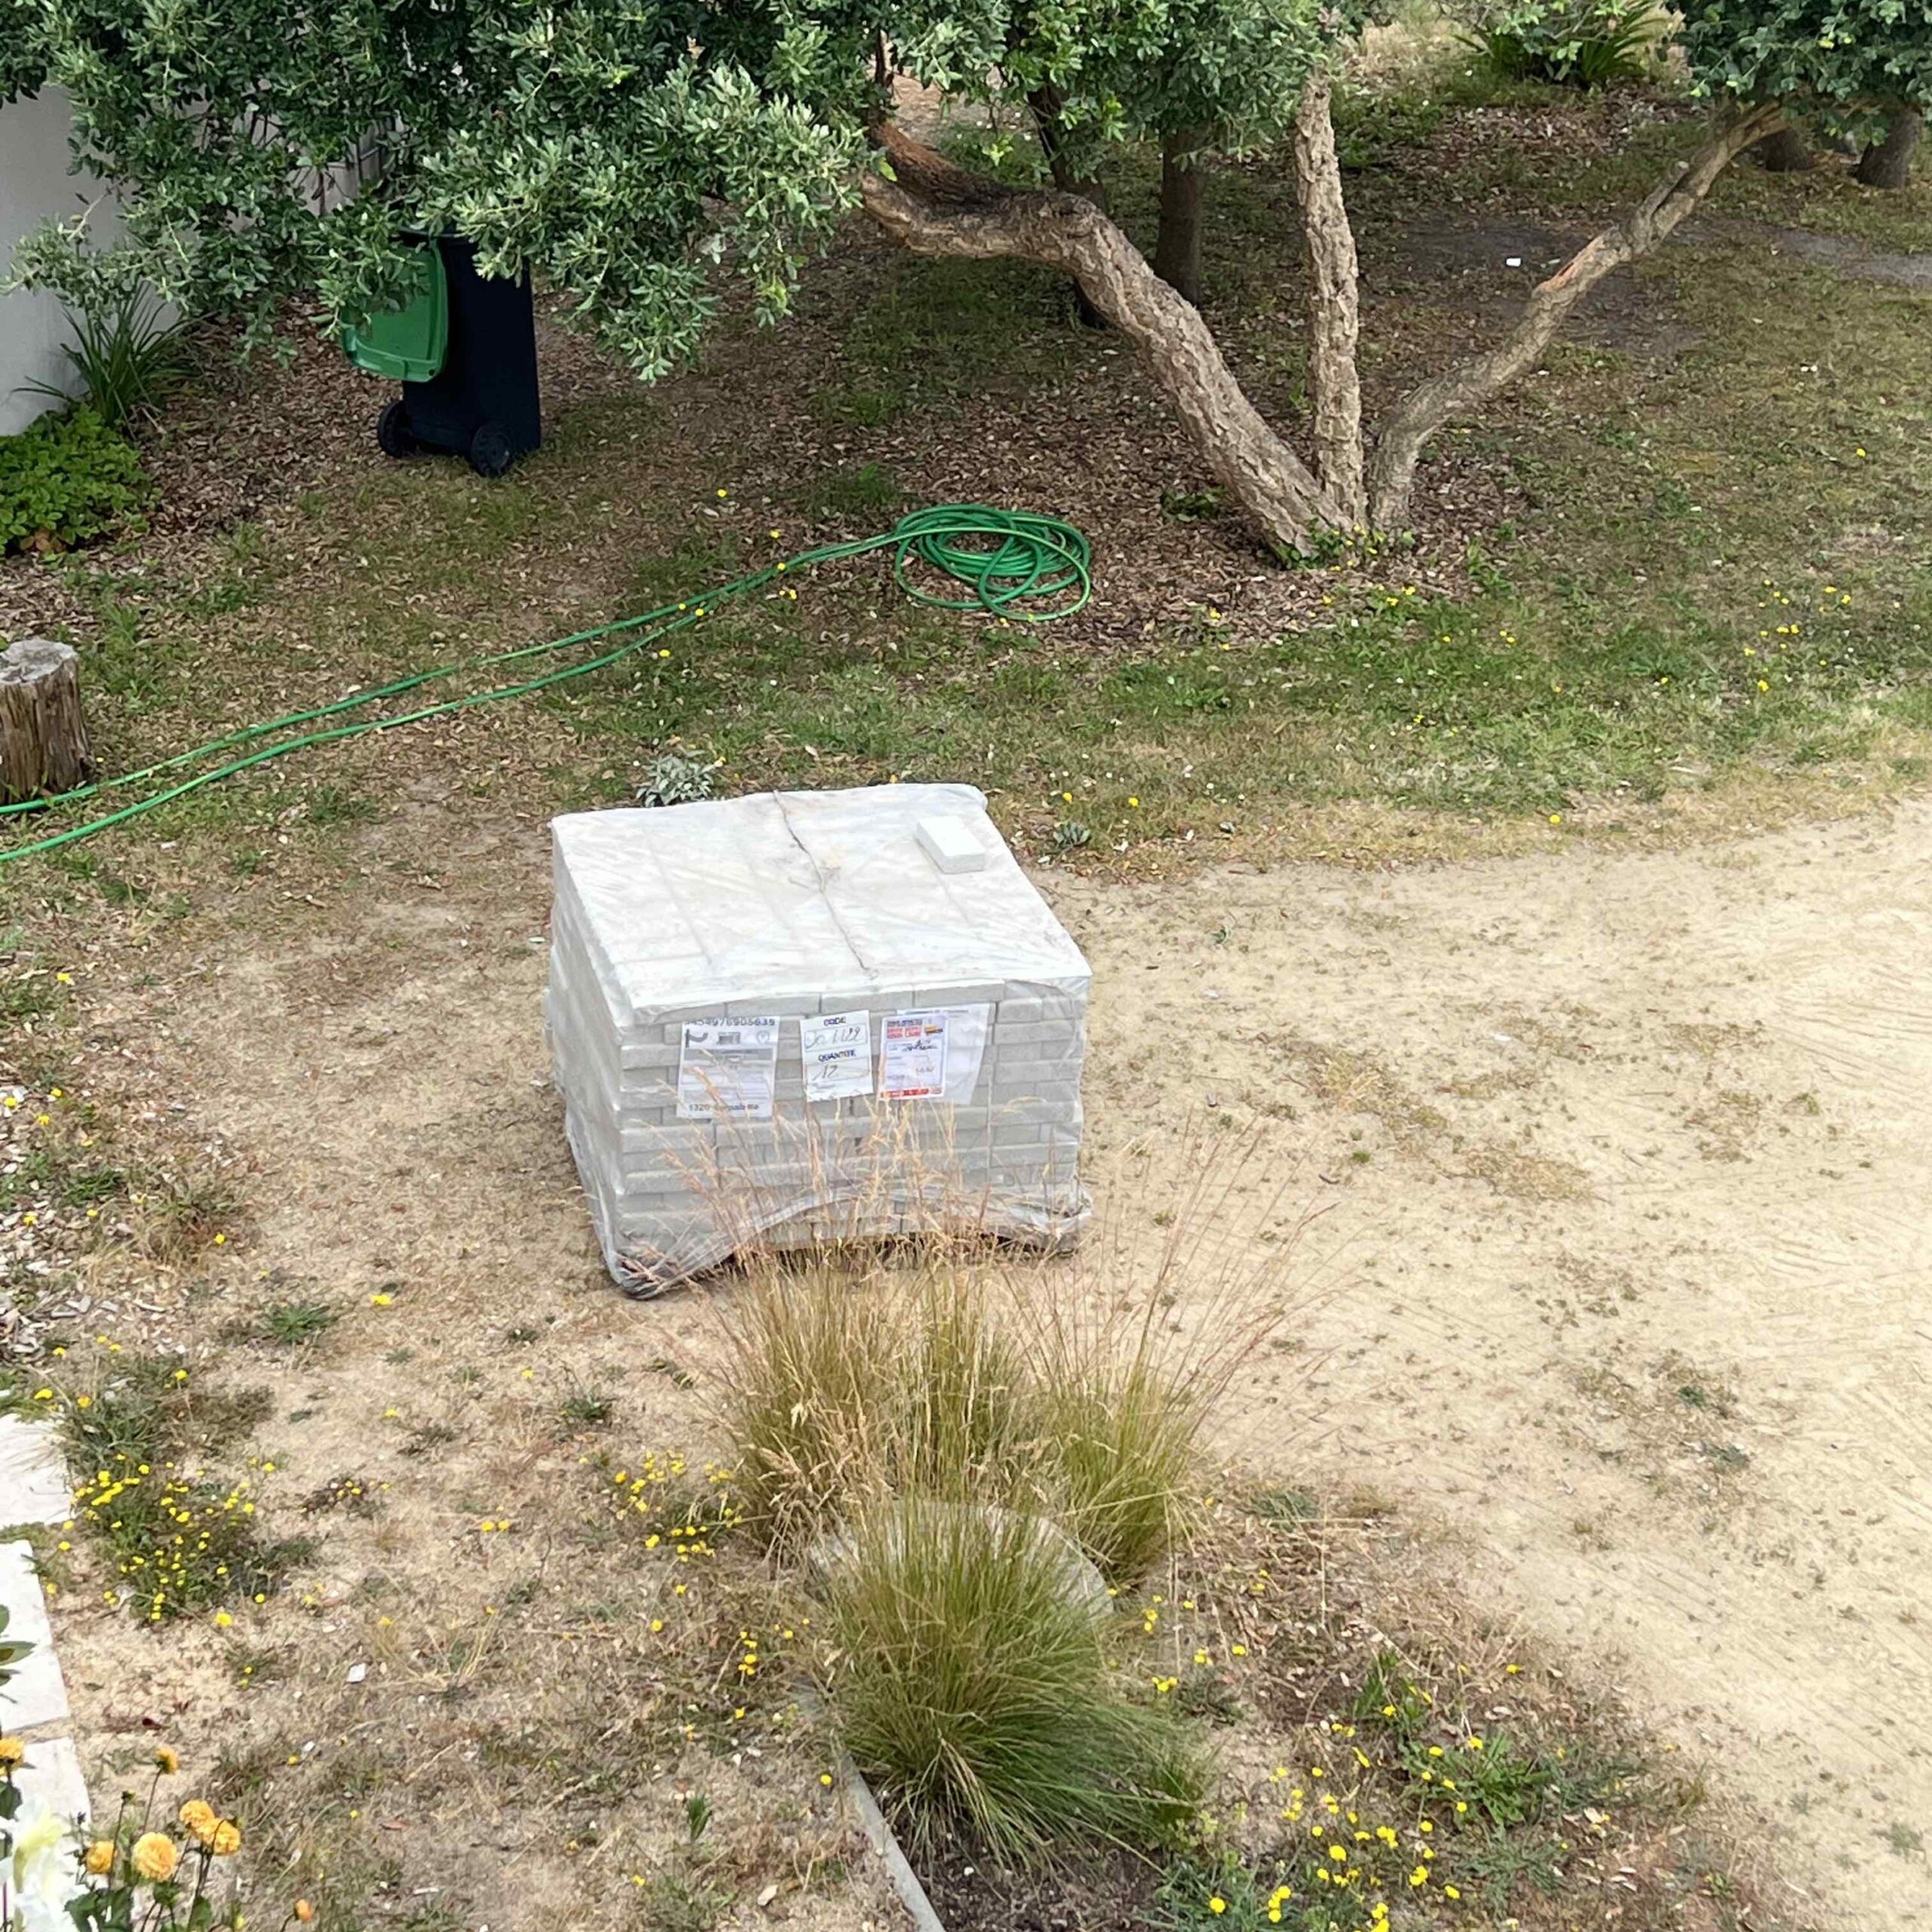 The pallet of pavers delivered in the garden
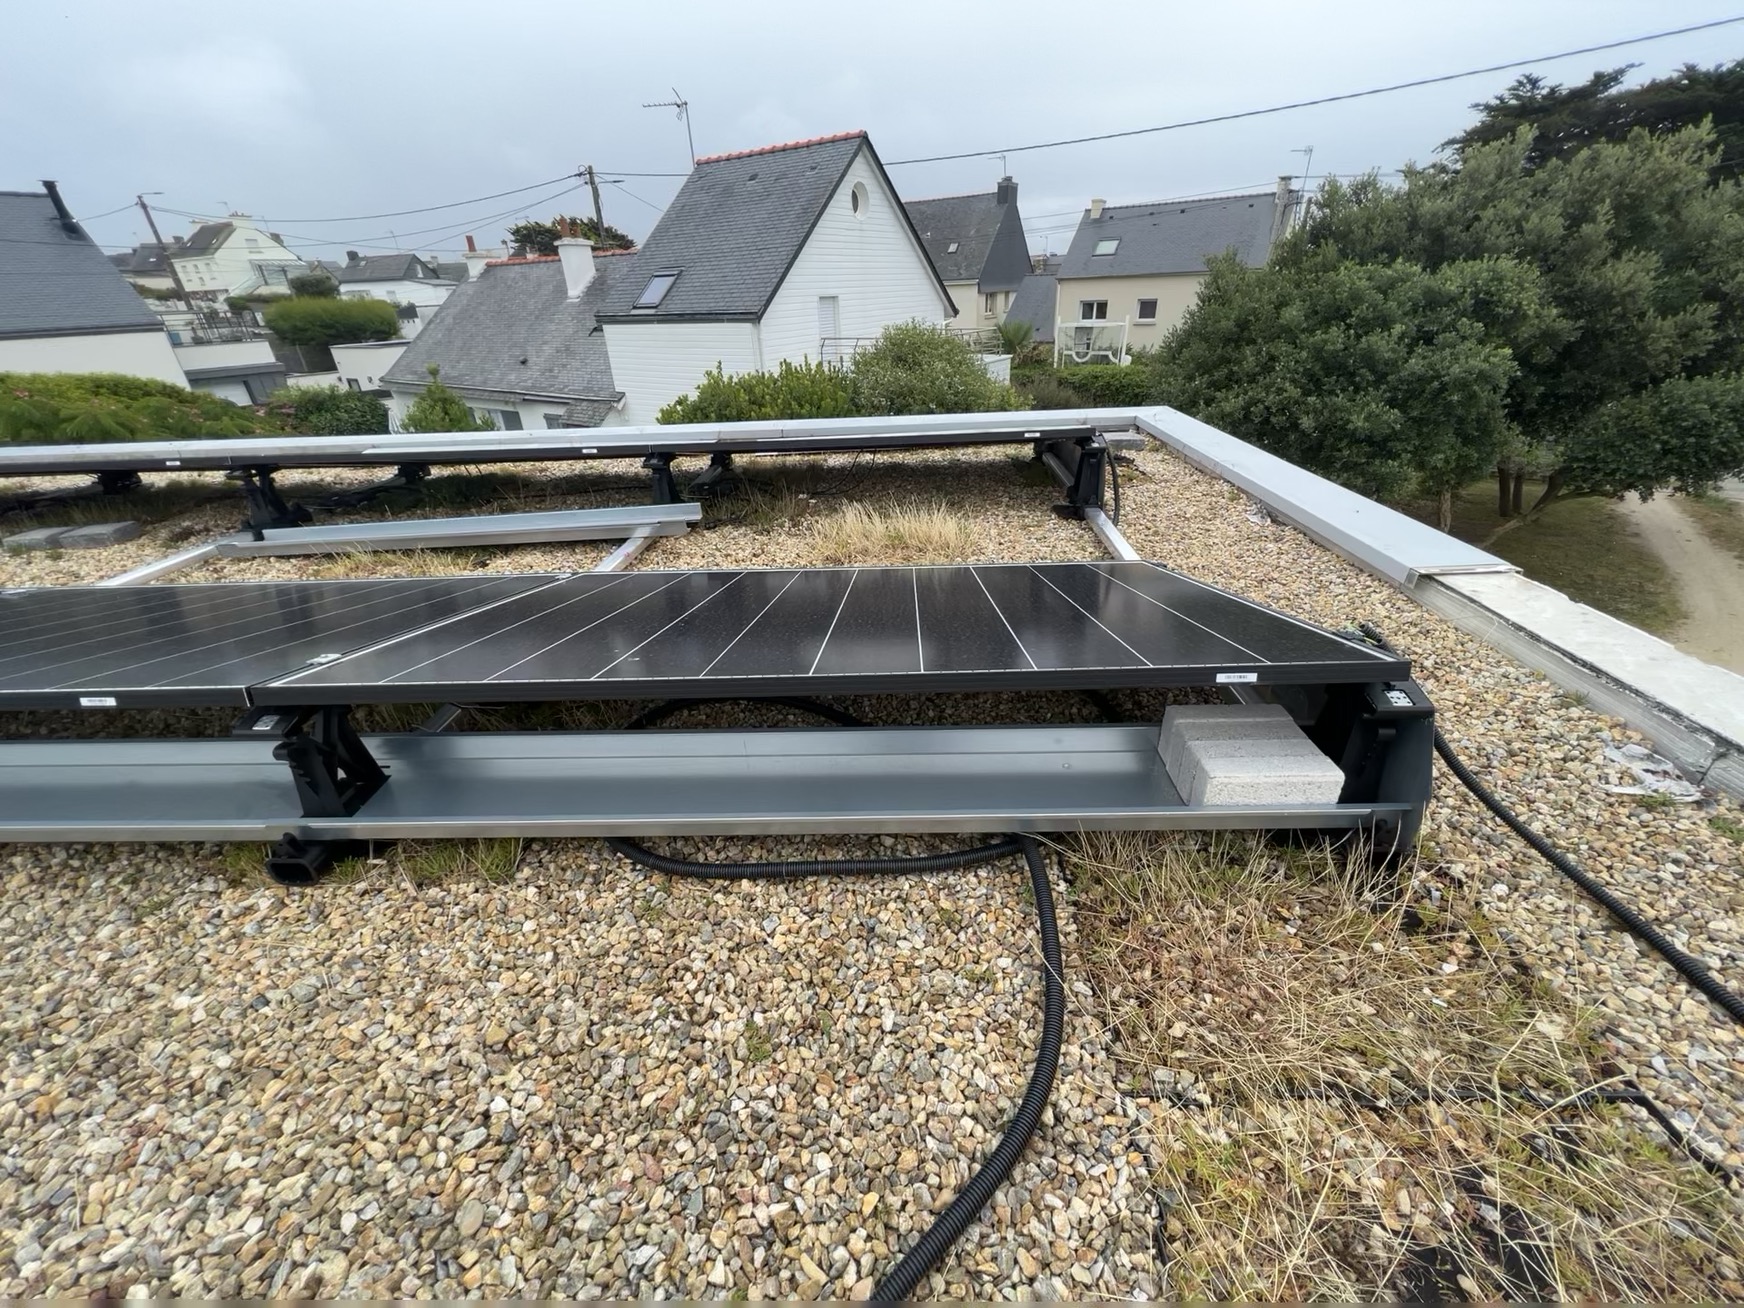 The ballast paver in place under the rail, on the roof
Fitting the panels:
There’s no particular difficulty fitting the panels onto the ESDEC FlatFix Fusion structure. The limitation comes from portrait vs. landscape mounting mode. Only landscape mode is approved in France by ESDEC. Too little demand for portrait, from their point of view, and ESDEC wants to limit the number of SKUs held by their distributors. Anyone who really wants portrait mode has to buy the structures in Belgium or the Netherlands. What’s more, the online simulator blocks portrait mode for France, so it’s impossible to prototype online or calculate loads in that mode.
Note on the rails:
You need to pay attention to rail length relative to your panel width. Online suppliers often offer kit configurations (1, 2, 3 or 4 panels) with 940mm rail lengths. Rails of different lengths exist but are often only available from professional resellers. You have to search for them… or cut rails down for the joins between rows.
Conduits and cables:
You can find the material easily at the big DIY chains. For the cables to the two south decks, I ran 5G2.5, which lets me split into two separate branches after the junction box upstairs. Each branch continues with a 3G2.5 cable, plus an independent 6mm² earth cable. Earthing the PV frame is well documented in the ESDEC documentation. For the north roof, one 3G2.5 cable and one 5G2.5 cable run between the utility room and the garage for the battery connections. This was the most tedious part — running conduits under the wooden decks, behind the external insulation cladding, and under the green roof. It takes time, but the finish looks much better for it.
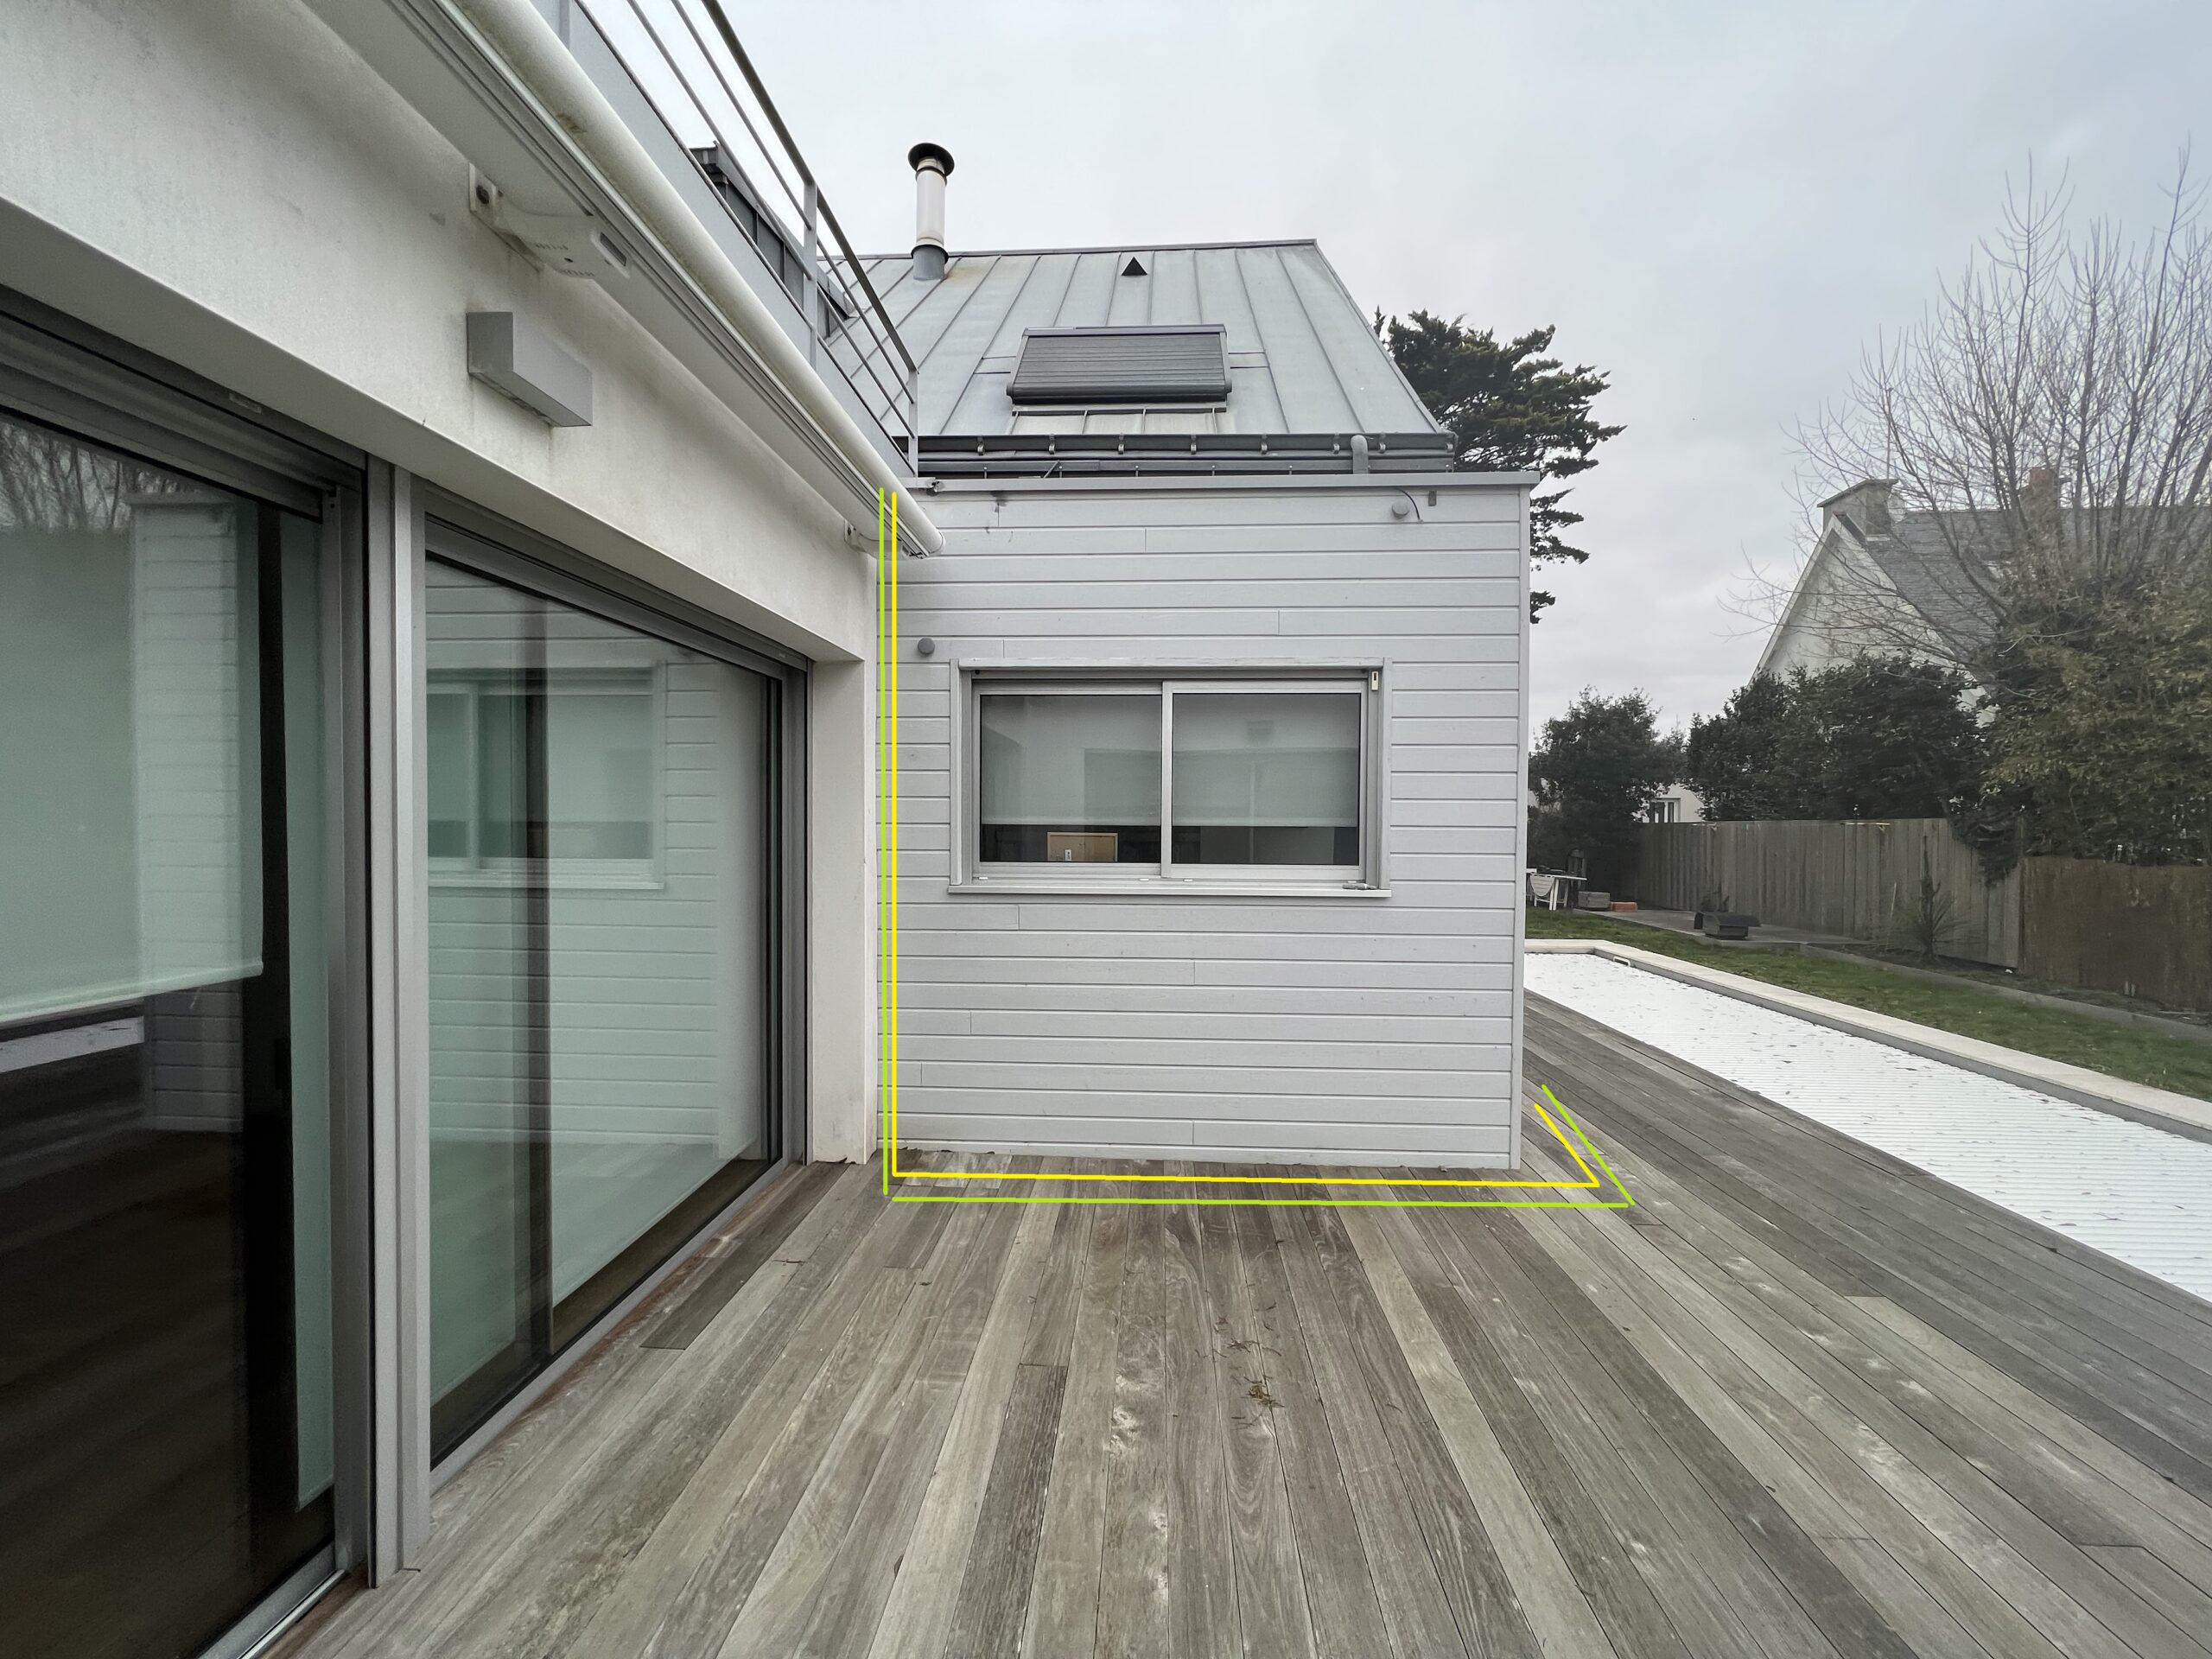
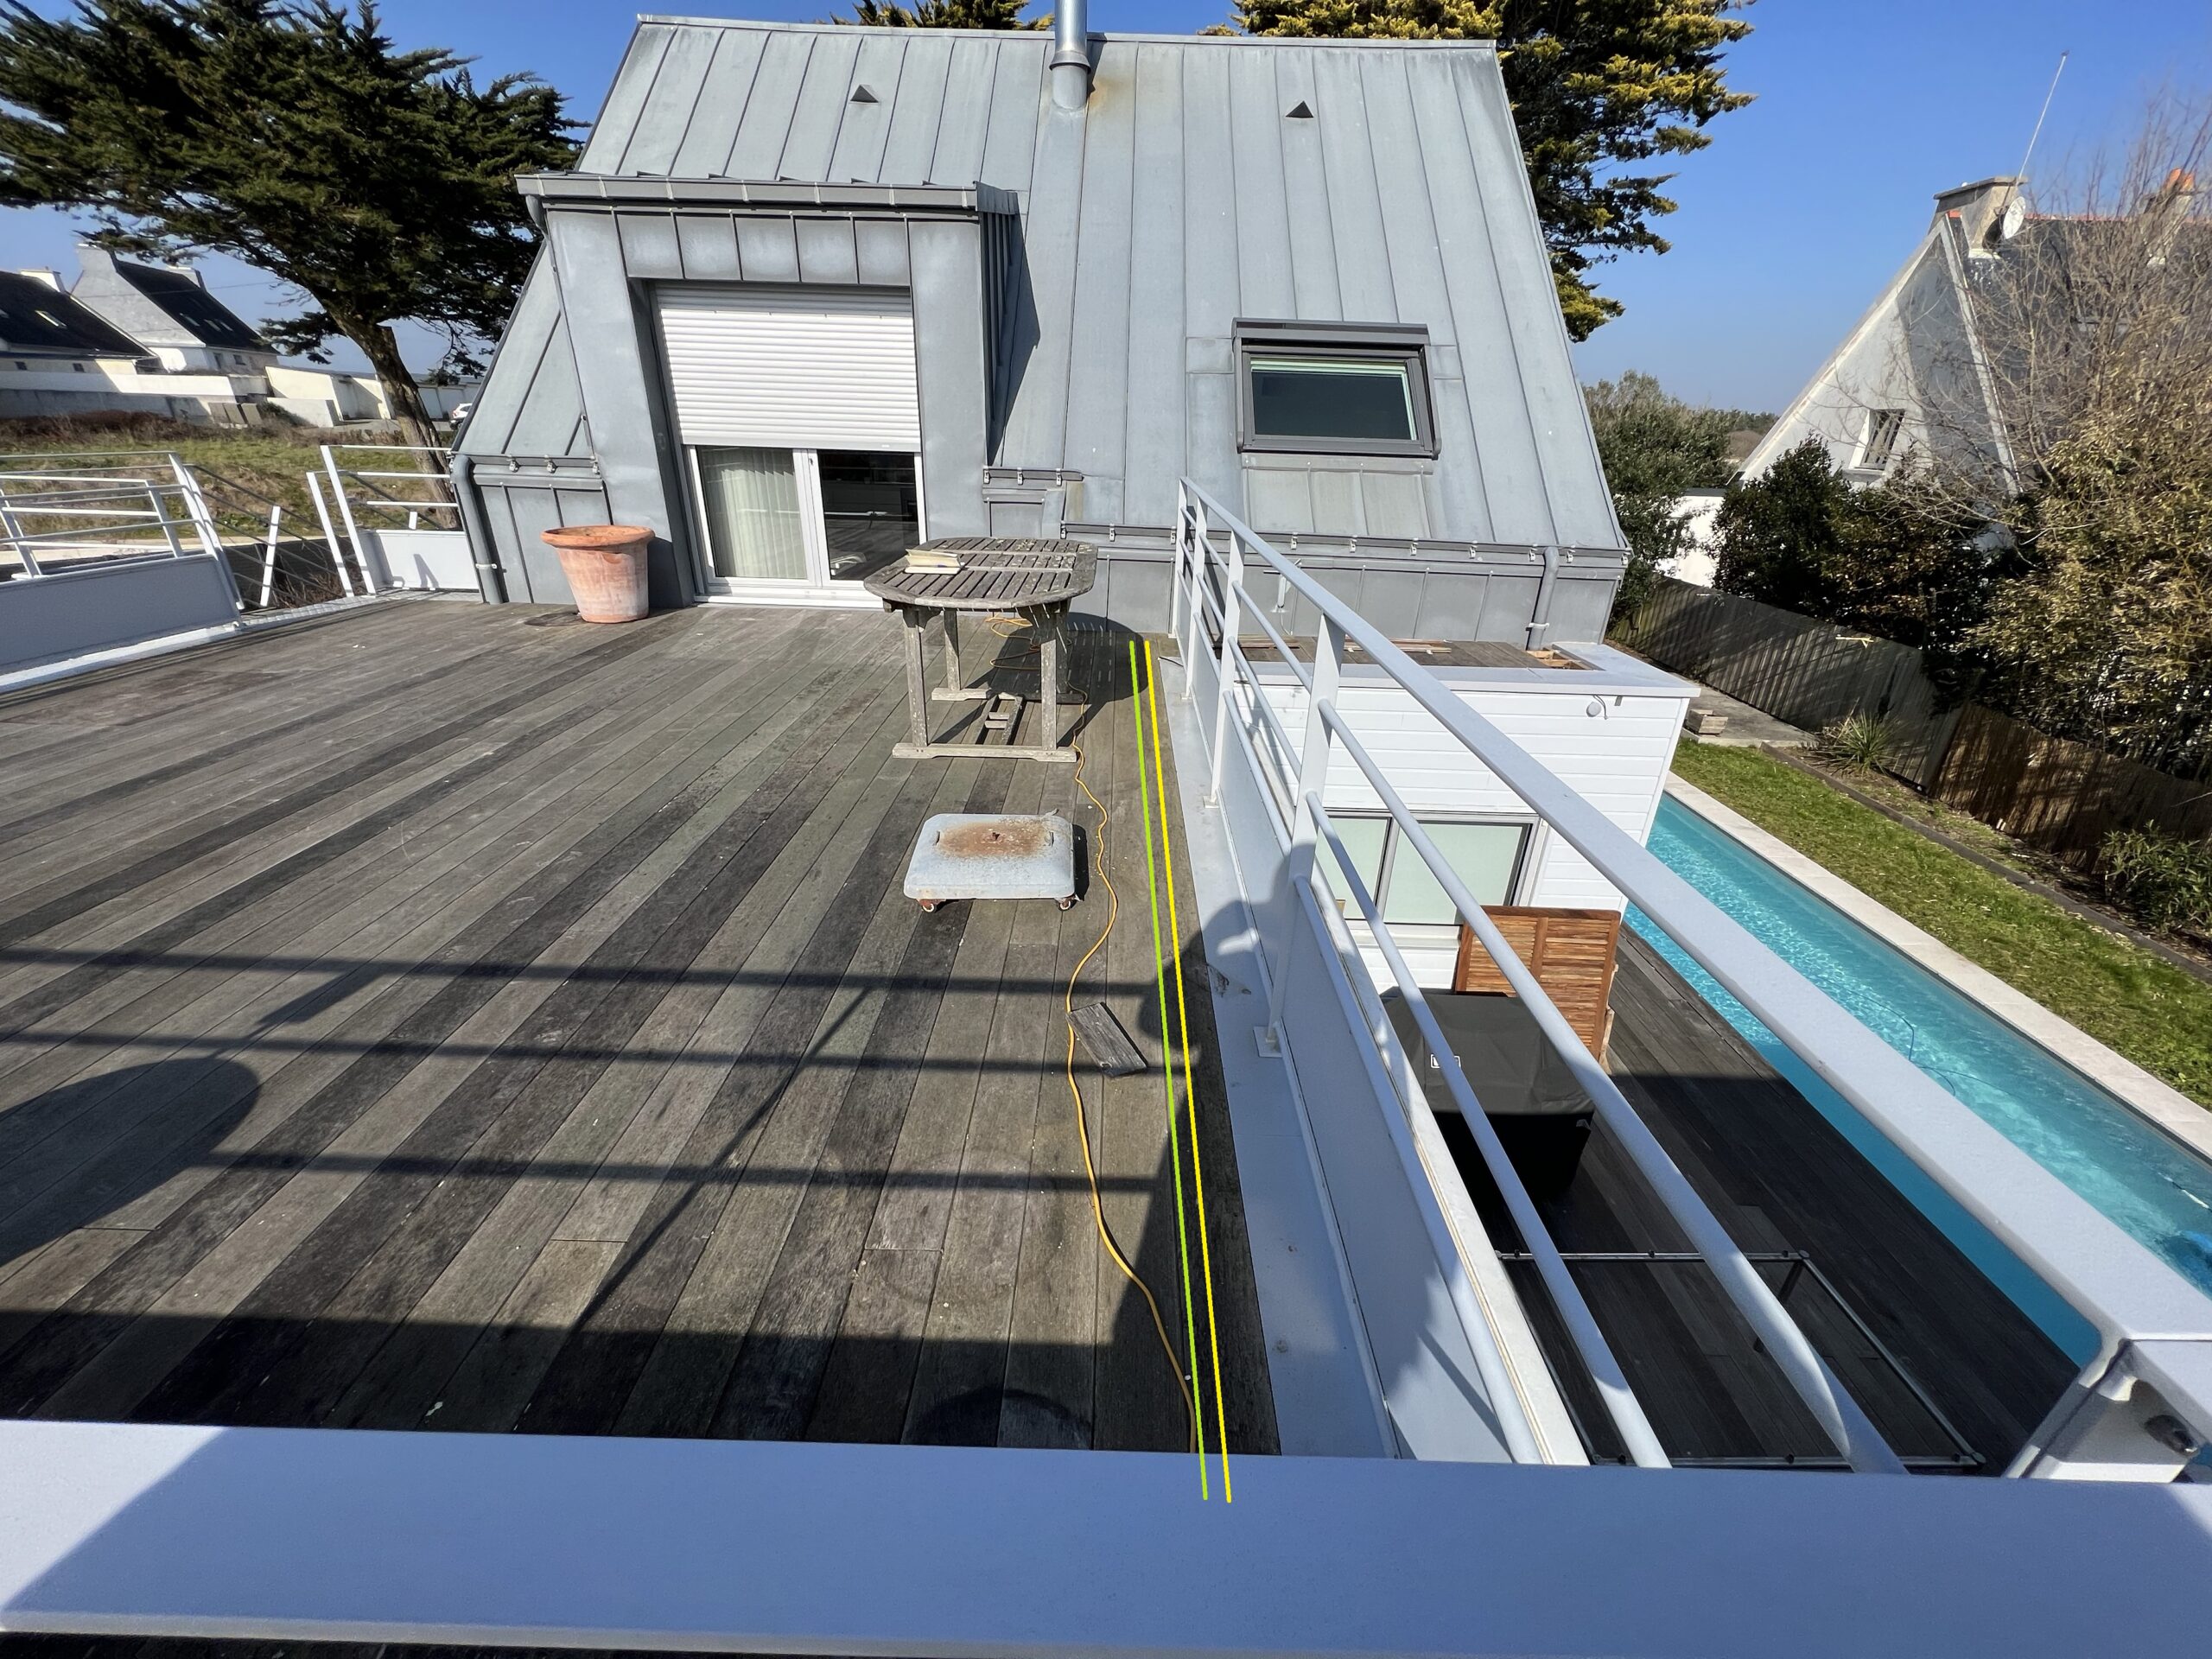
Start of production with capped inverters in June
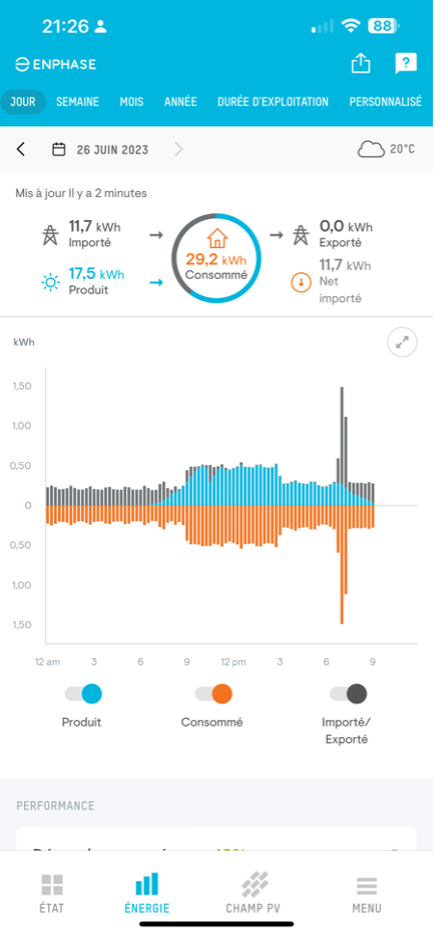
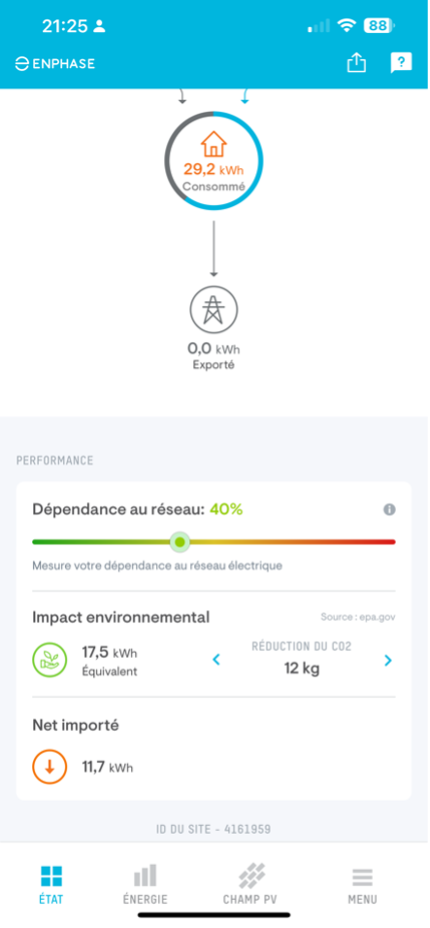
Production on 26 June 2023 with the micro-inverters “capped” (zero export), viewed from the Enlighten iOS app: you can see the micro-inverters are properly capped and the blue production curve tracks the orange consumption curve. Throughout this period, the installation worked perfectly with no export — the IQ capping happens “intelligently,” in that no panel gets “shut off” in case of overproduction; instead, the Enphase system balances the production demand across all the panels. All panels produce all the time, which makes it easy to check they’re all working.
Post-installation settings:
Maintenance: Easy access to the decks lets me easily check the panel fixings before winter and storms, and clean them when birds leave droppings on them. I’ll also be able to swap out failed components in future (panels or micro-inverters).
Tracking production/consumption and costs: I keep a summary spreadsheet of all costs and monthly consumption/production for 2024, to retrospectively assess actual production vs. estimated production from the 2023 PVGIS data. In theory this gives me a payback period of 7.6 years without the battery, and 10.5 years with the 3.5kWh battery. I think that’s about right for a site in Brittany. I should be able to cut my bill by more than 50%.
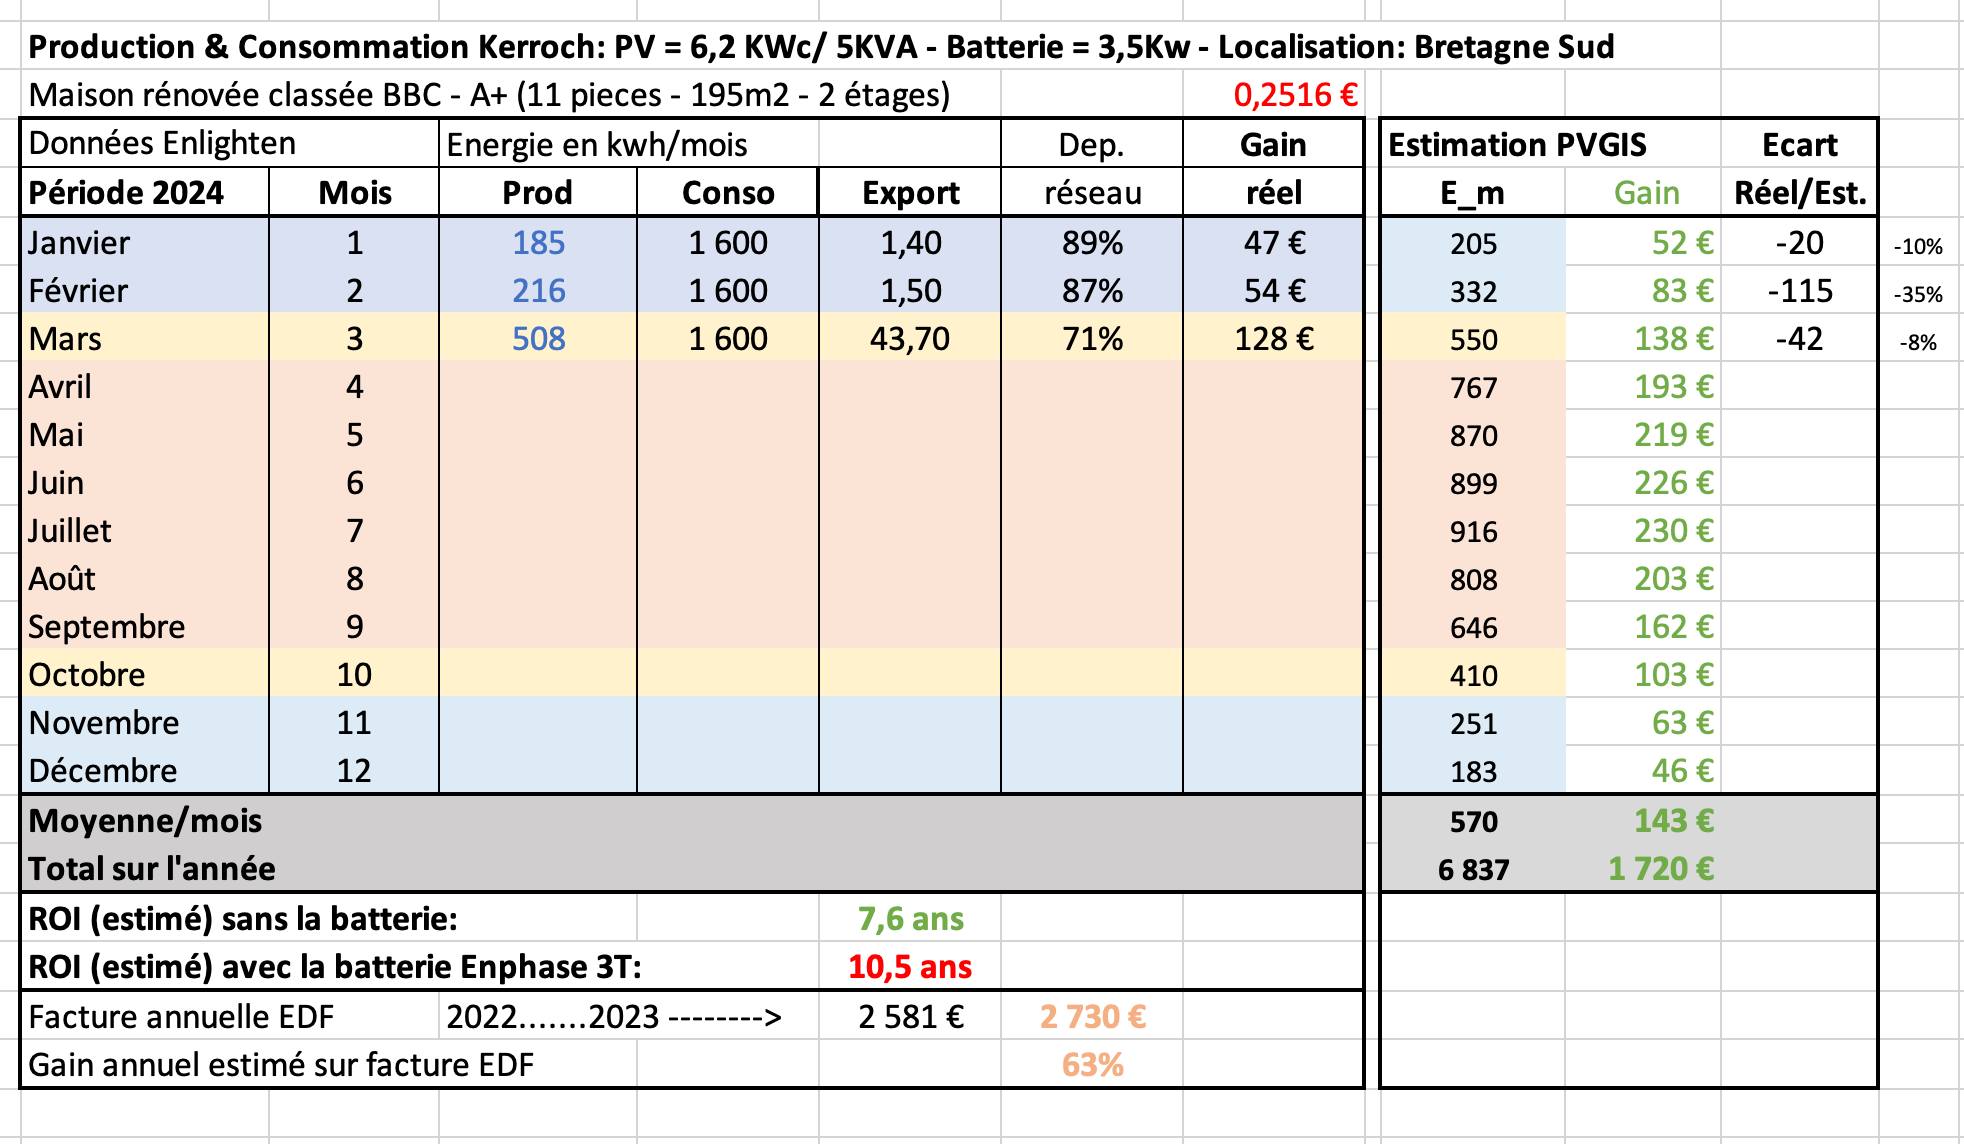
Monthly cost/production/consumption tracking spreadsheet
Mitsubishi heat pump settings: By default, the thermodynamic hot-water tank heats early morning (5am-6am) and evening (6pm onward). That’s not suited to a self-consumption site producing maximum energy from midday to 4pm. The heat pump needs reprogramming. In my case that was possible, and I shifted the hours to the 1:30pm-4pm window. I had this checked by the maintenance company during the annual visits.
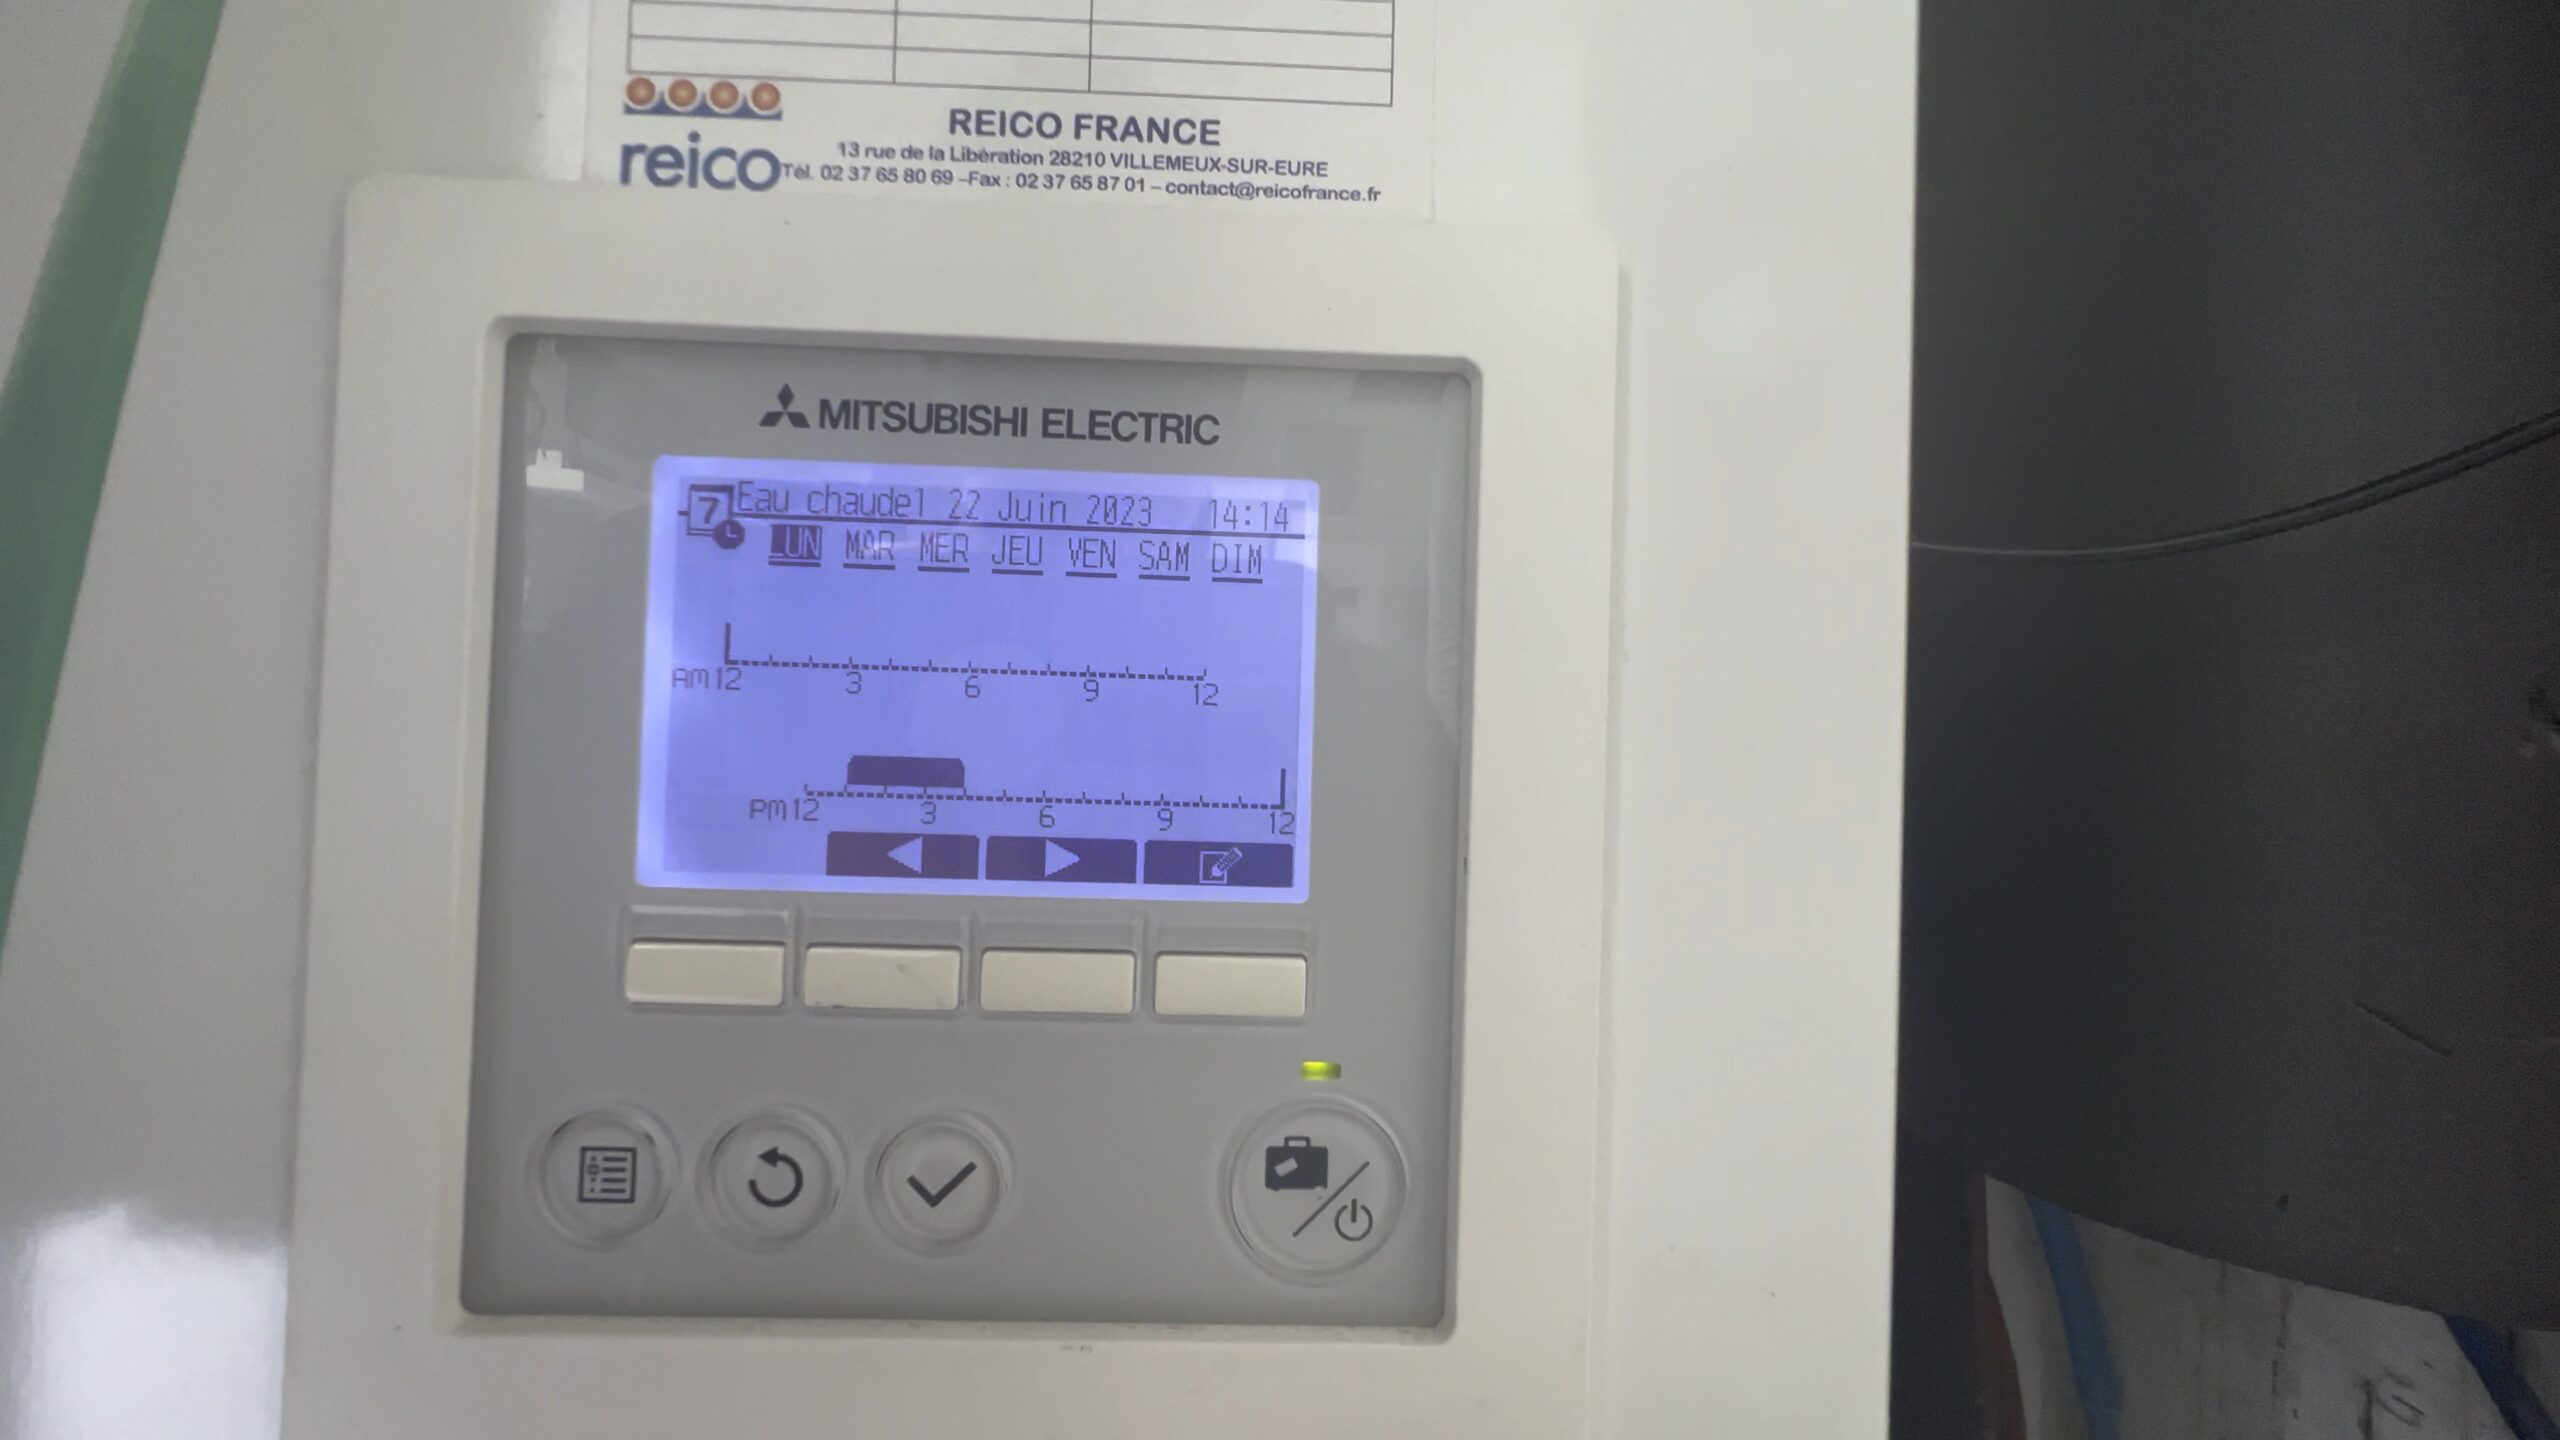
Heat-pump settings panel for scheduling hot-water hours
I verified with my AEOTEC energy meters, connected to my Homey Pro 2023 home-automation system, that this was indeed happening. There are also two scheduling slots, which would let me run different schedules for summer and winter — something I still need to look into, as described in the Mitsubishi manual.
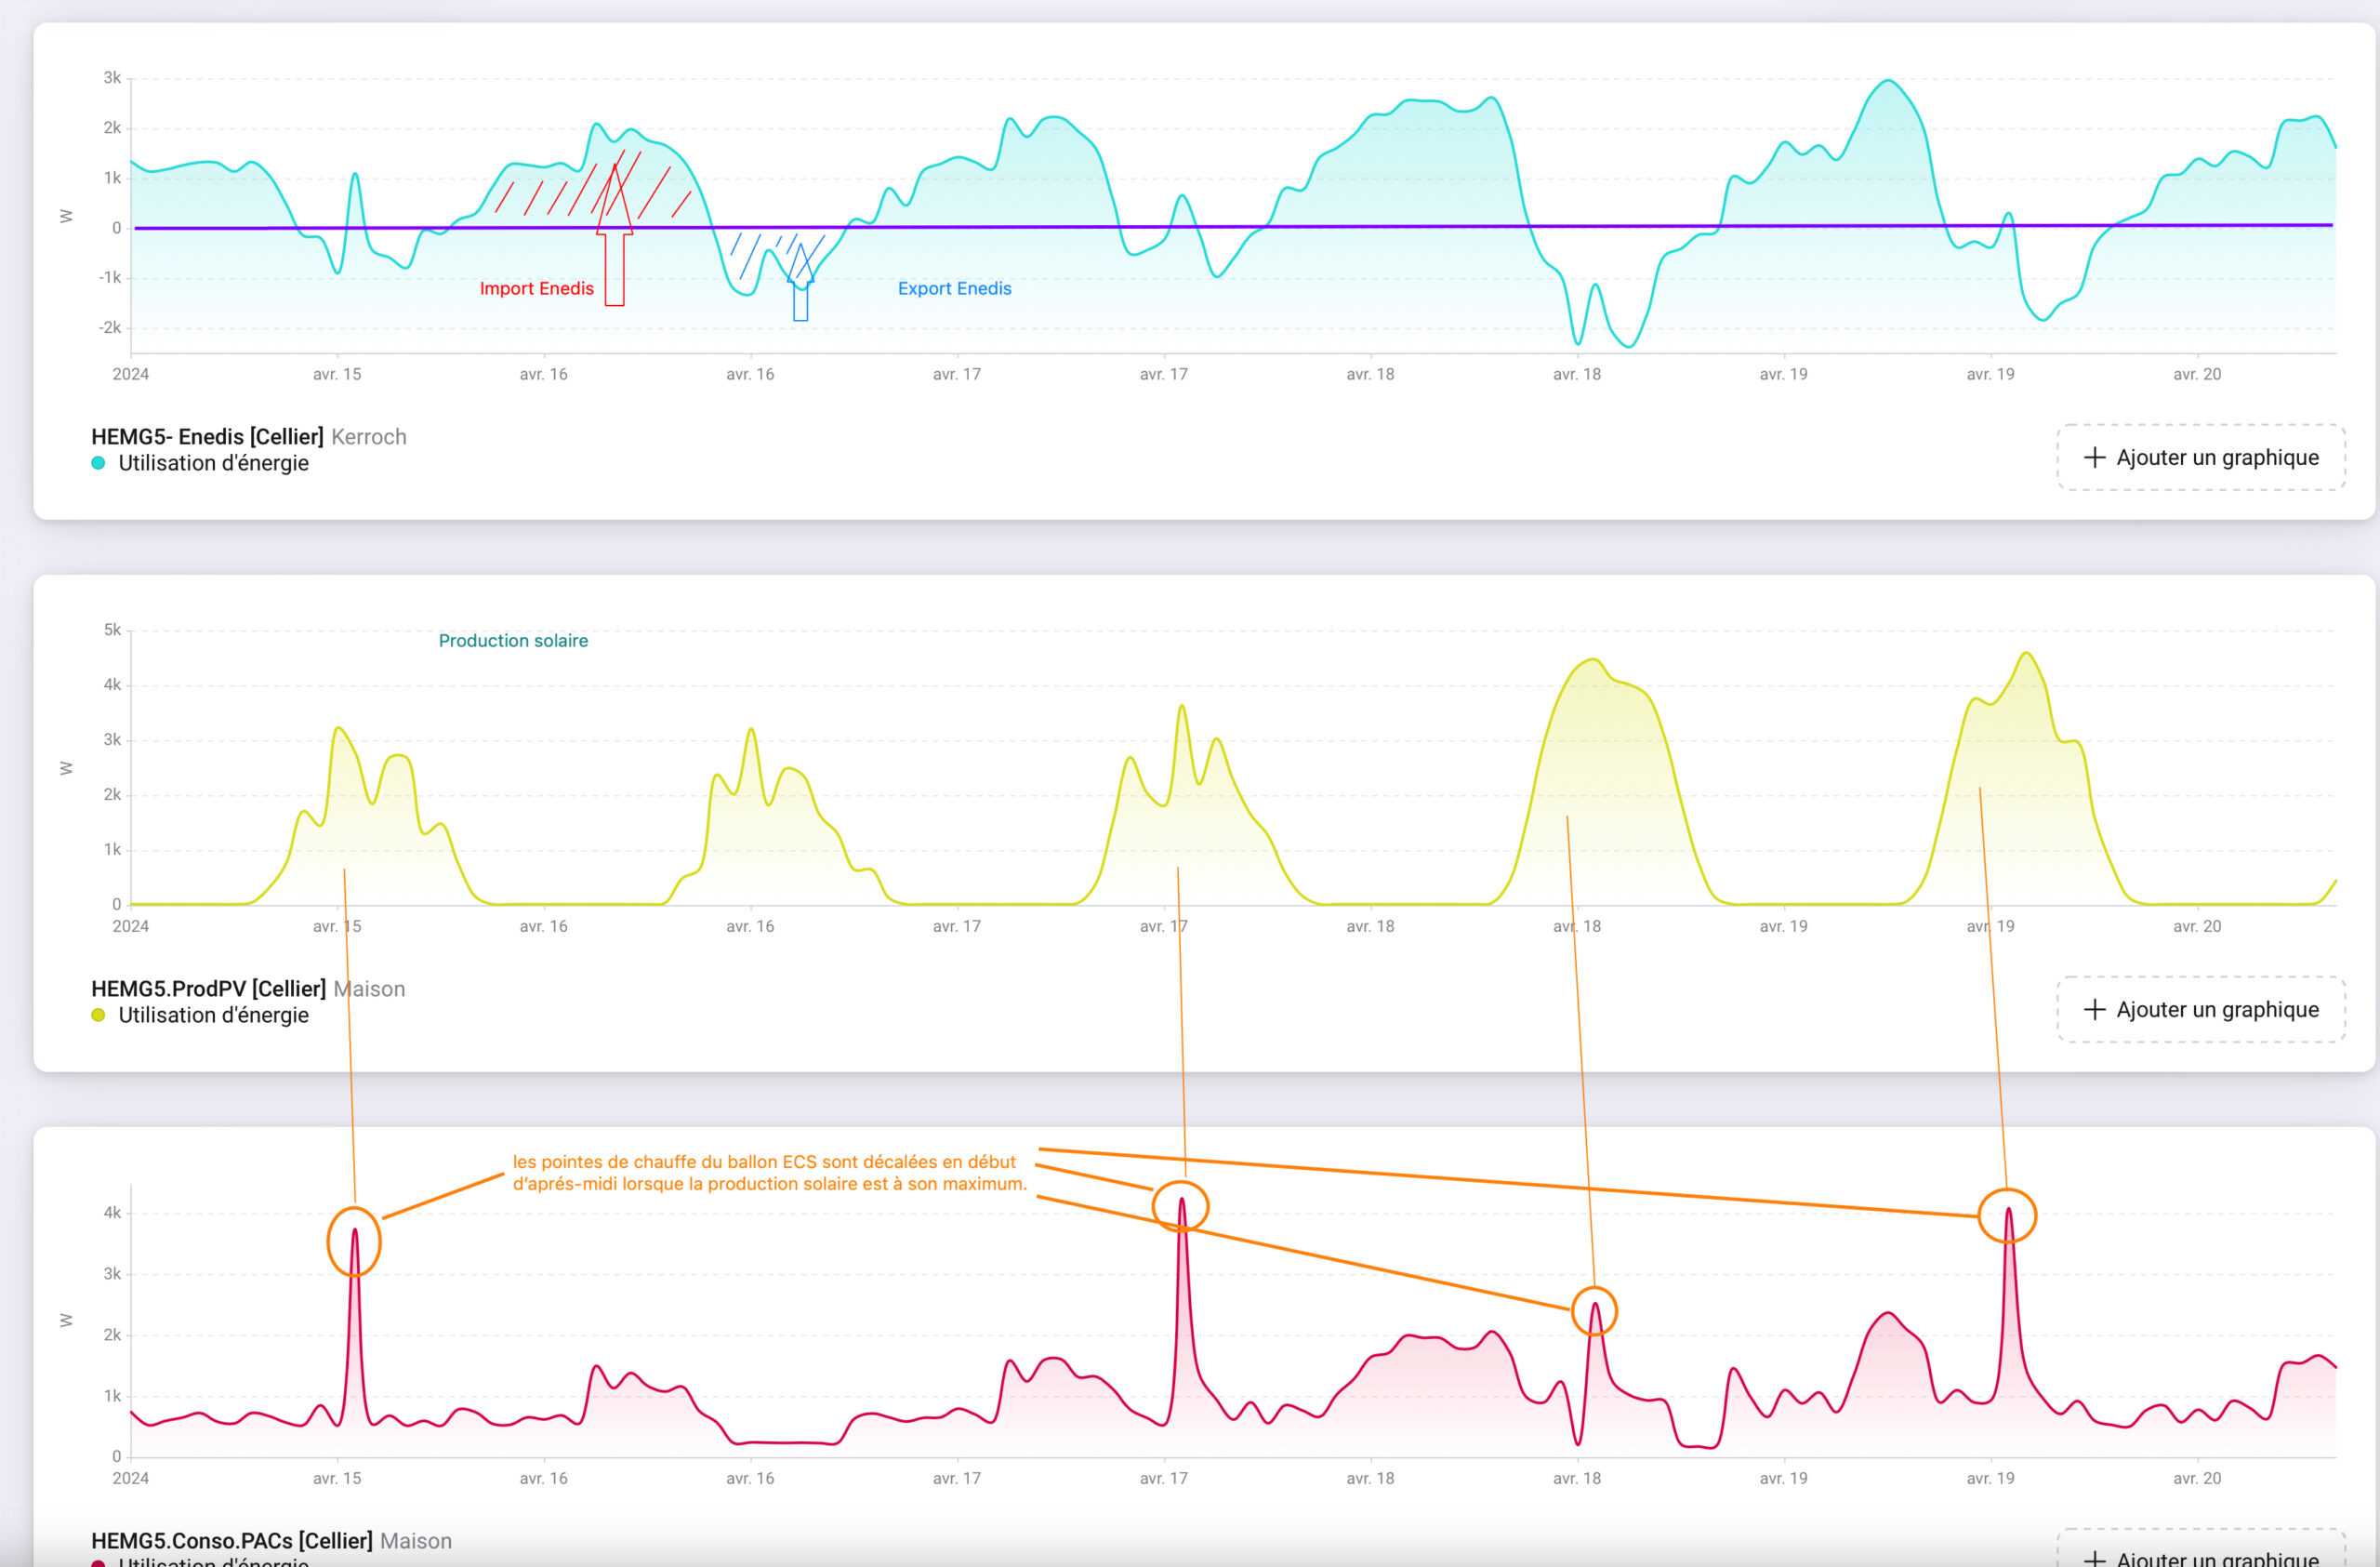
Shift in the hot-water tank’s heating hours
Holiday mode: It’s possible to put the heat pump in “standby” (holiday mode on the Mitsubishi), and it will stop heating the hot-water tank and limit the temperature to a low of 8-10°C. This is a very useful option for extended absences, since the heat pump then draws very little power (200W in my case). If you’re away for several weeks or months, it’s worth using. You can also install a WiFi module (MelCloud) to control the heat pump remotely (temperature, mode). This lets you switch it back to “normal” mode and “warm up” the house before you return from a long absence — just do it remotely two days ahead.
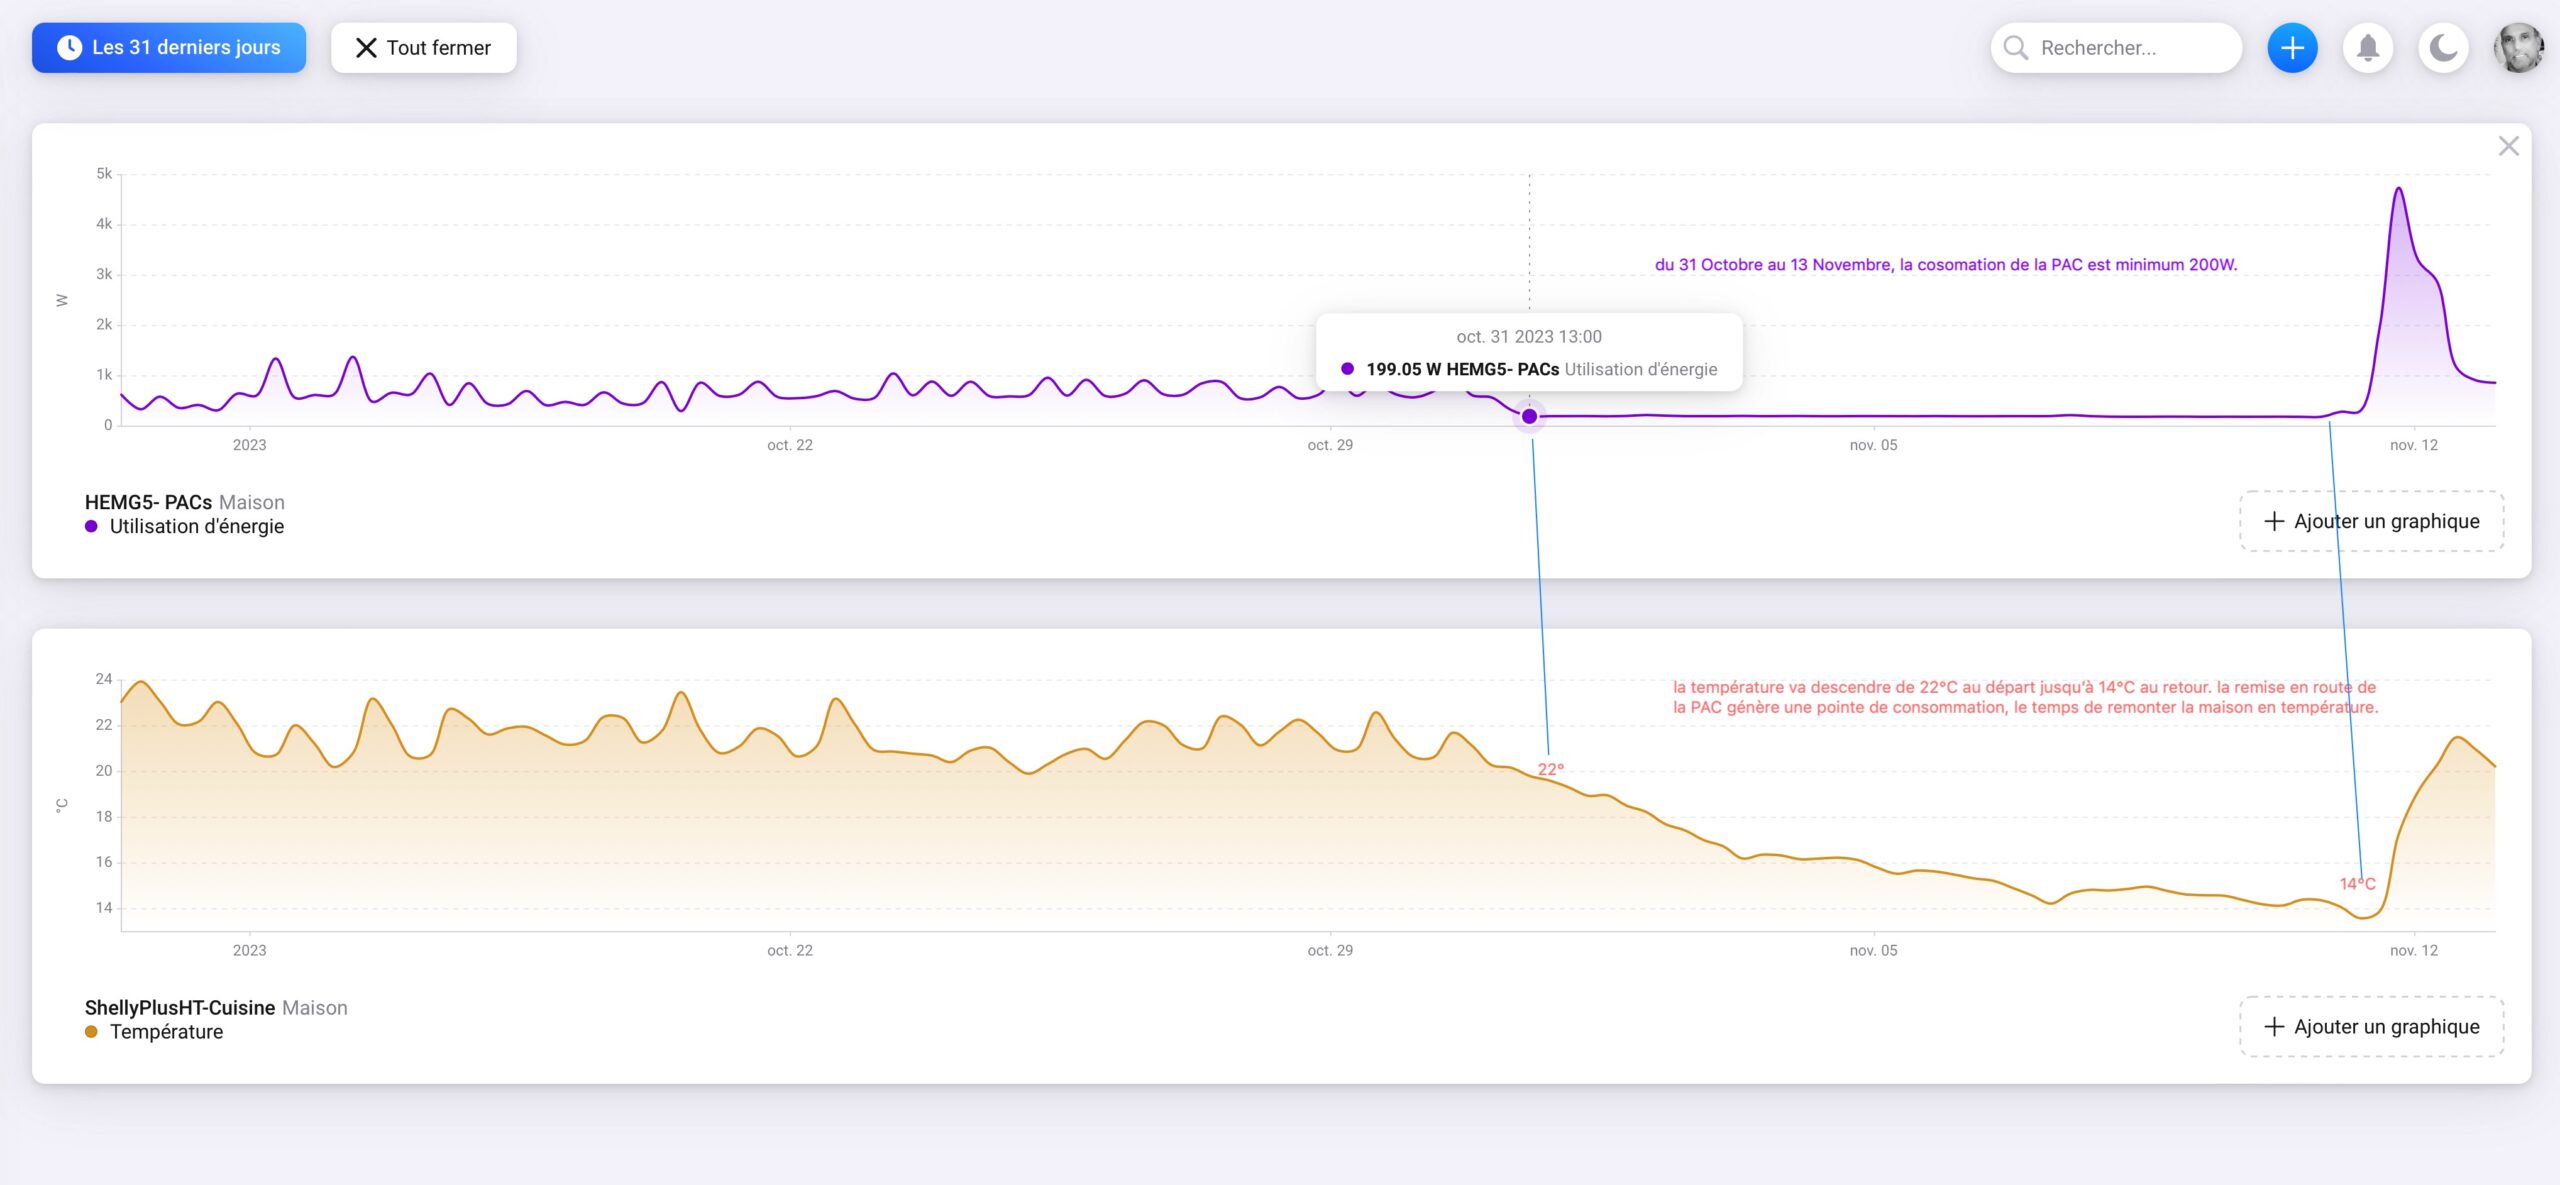
Heat-pump consumption and indoor temperature over time in holiday mode
Changing EDF contract: Another avenue for improvement concerns the types of contracts available from suppliers. Personally, I’m in favour of a national nuclear grid, and I’ve been with EDF Digiwatt for 2-3 years. The Bleu HP/HC tariff (peak/off-peak) is worth it if you can shift your consumption to off-peak hours. If, on top of that, you can align them with the hours of strong solar production, it can generate meaningful savings. Since April, I’ve switched contracts and moved to the Bleu HP/HC tariff with the Tempo option. Since I’m often away in winter, the Tempo option could turn out to be very worthwhile. The one “black mark”: you need to consume very little during peak hours on red days. I’m going to try it this year, 2024/2025. If it turns out unmanageable, I’ll switch back to plain HP/HC without Tempo (the change is possible at any time).
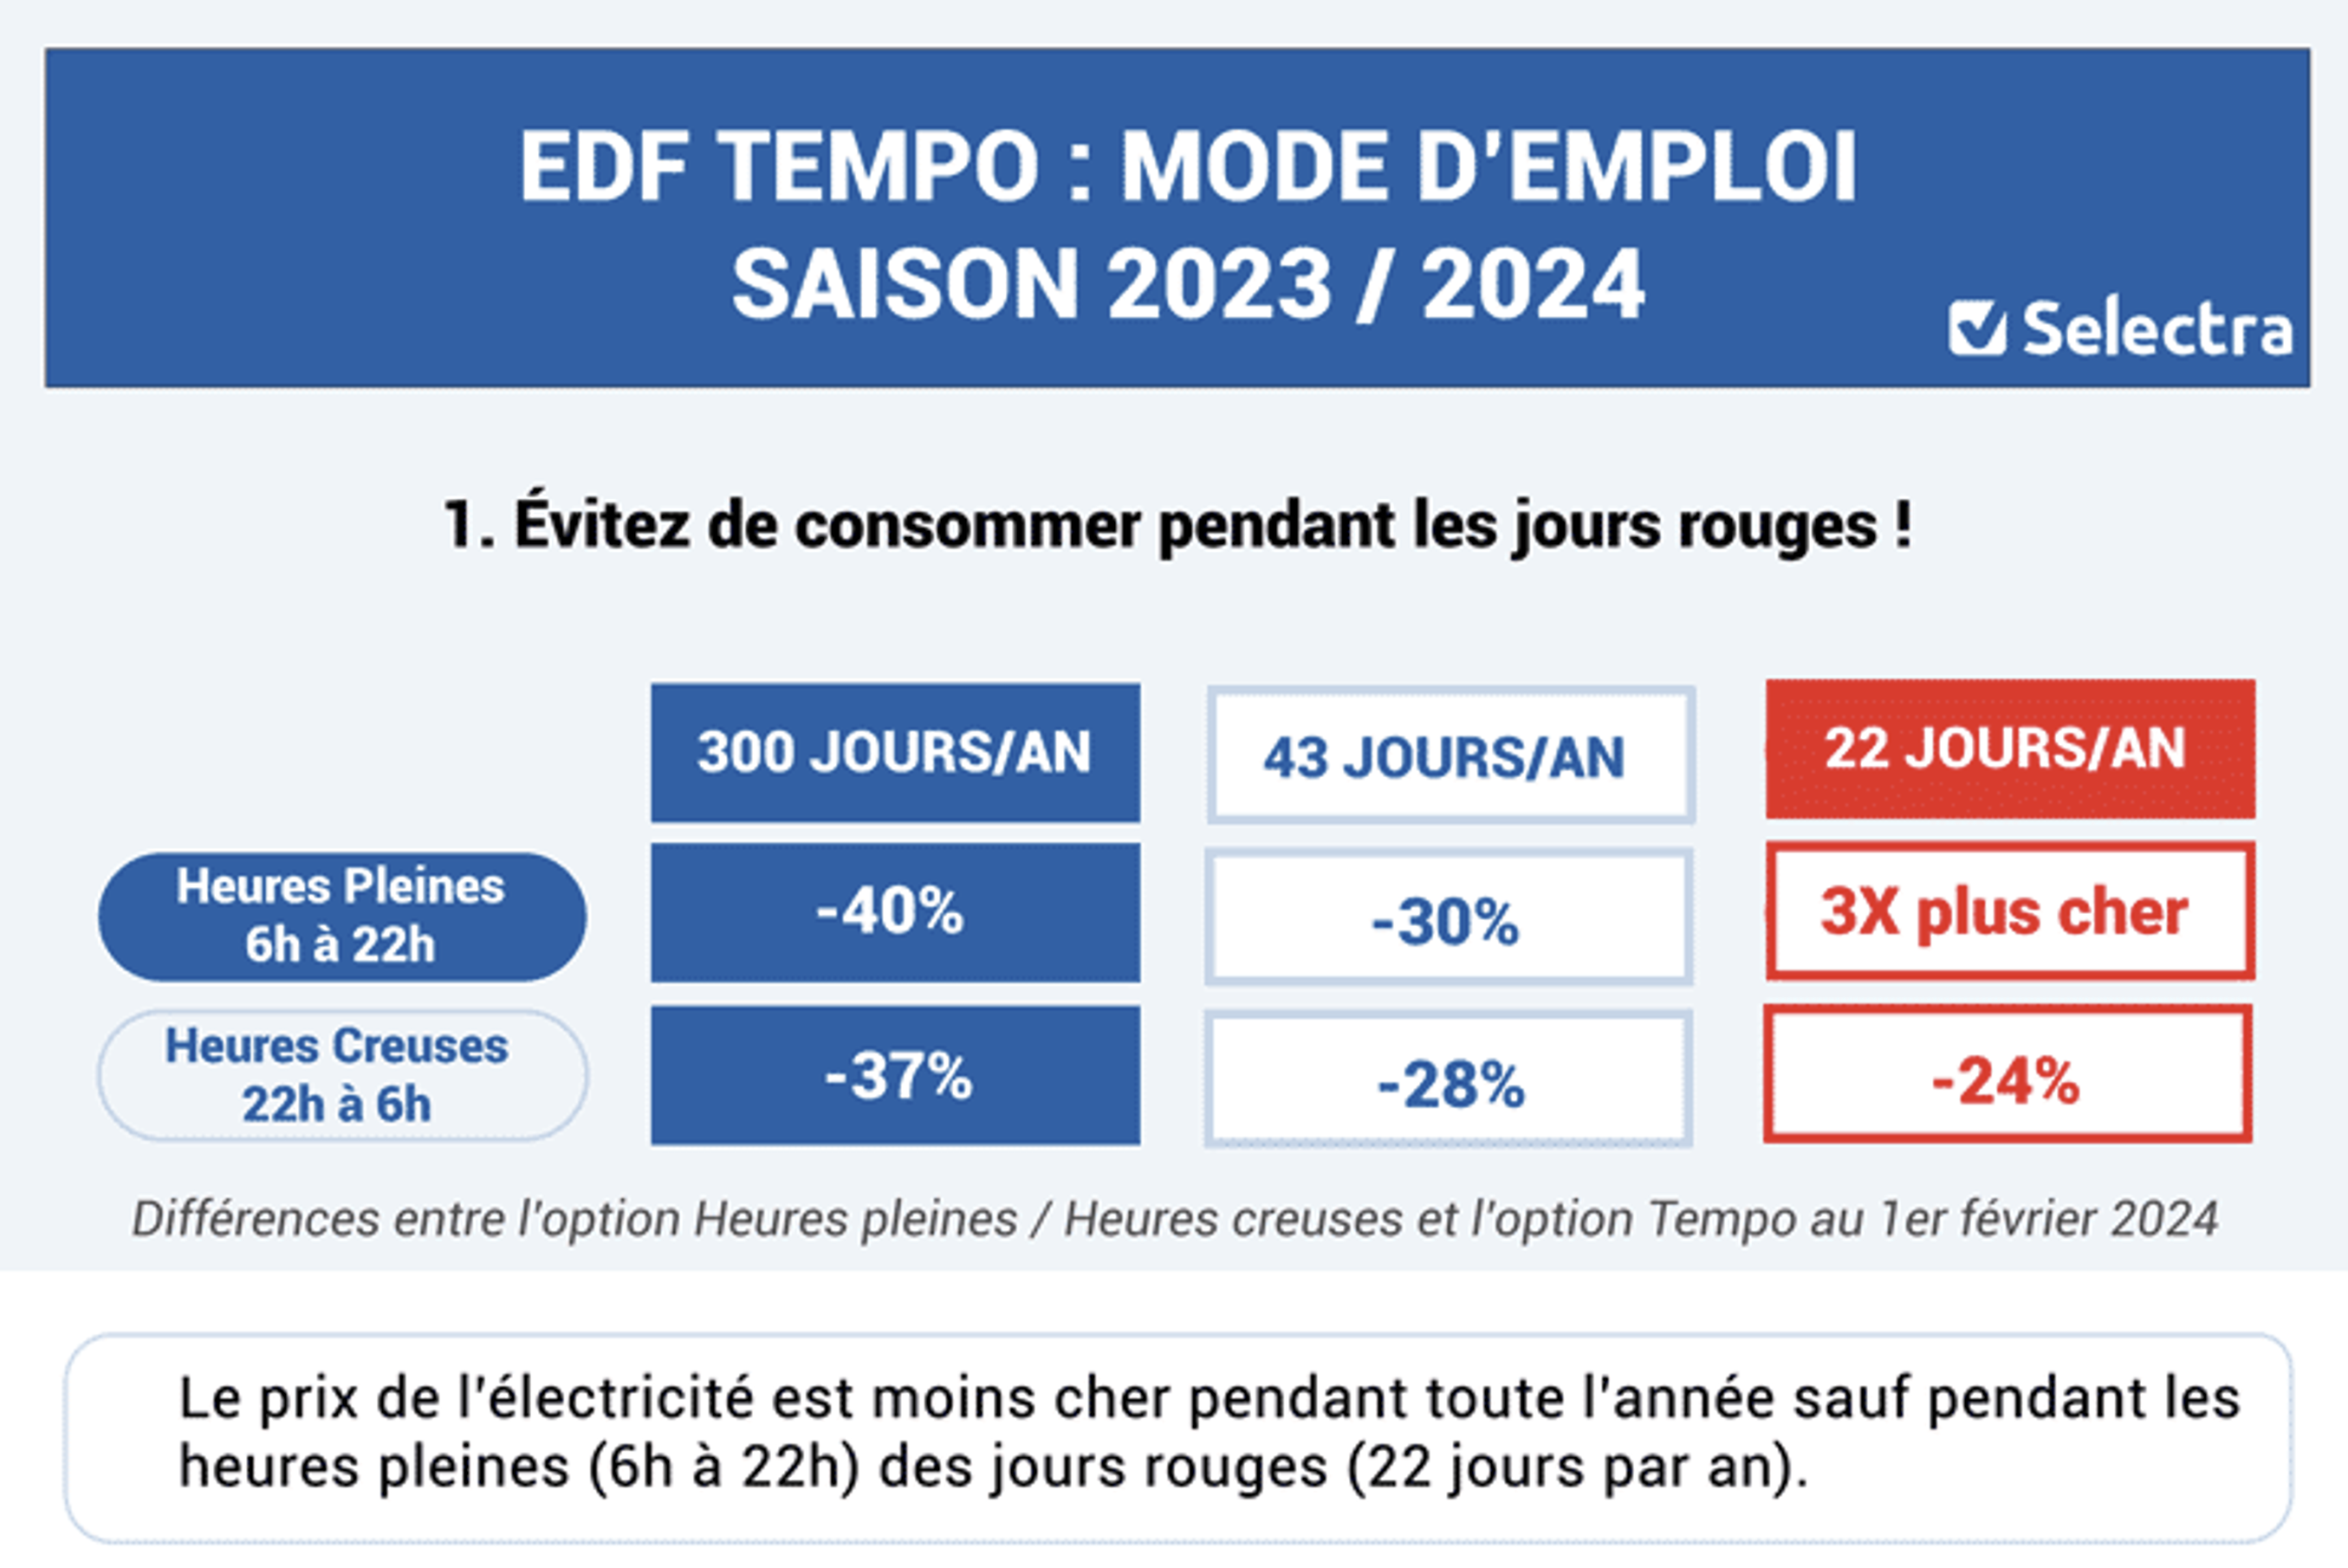
EDF Tempo: very good rates, but you’d better be able to manage your consumption during winter (when possible?).
Possible future upgrades:
Adding panels: In theory I could add panels on all the decks — there’s enough space if I reduce the fairly generous clearance for walking around. The wiring and the rest of the system would stay unchanged. The 3 branches (2.5mm²) can technically support more micro-inverters (11 x IQ8MC, 10 x IQ8AC and 9 x IQ8HC). By reworking the current layout, I could double the number of panels on the carport (4 to 8 panels with IQ8AC), add 3 panels on the south deck (8 to 11 panels with IQ8MC), and 1 panel on the north deck (3 to 4 panels in dome mode with IQ8MC). All that’s needed is adding the panels and their micro-inverters to the end of each existing branch. That would be a theoretical addition of 8 panels, or 3.2kWc more.
Update, June 2024: added 1 panel on the north deck in dome mode, and added 4 panels in columns on the carport.
Adding a battery: Adding a battery in the garage is also possible. The space and wiring are already planned for it. So I can quickly add an Enphase 3T battery, or the 5P coming to France in 2024, without having to pull any new cable or conduit.
Conclusion:
The project took quite a while, but I worked without rushing. The lack of availability of certain products (K2 fixings, battery delivery delays) wasn’t too costly, since there’s plenty of work that can be done in parallel.
By doing the installation myself, I saved around €4,000 compared with two similar quotes (based on Enphase or APS products) from RGE-certified installers in the region, minimised the visual impact (no trunking on the cladding or decks), redid the meter panel and main switchboard in the utility room, redid the secondary switchboard in the garage, reorganised my data network, trained myself on the technologies installed, and gained self-sufficiency in managing/configuring the system and its future upgrades (adding batteries or panels).