Ubiquiti: my home network on Unifi
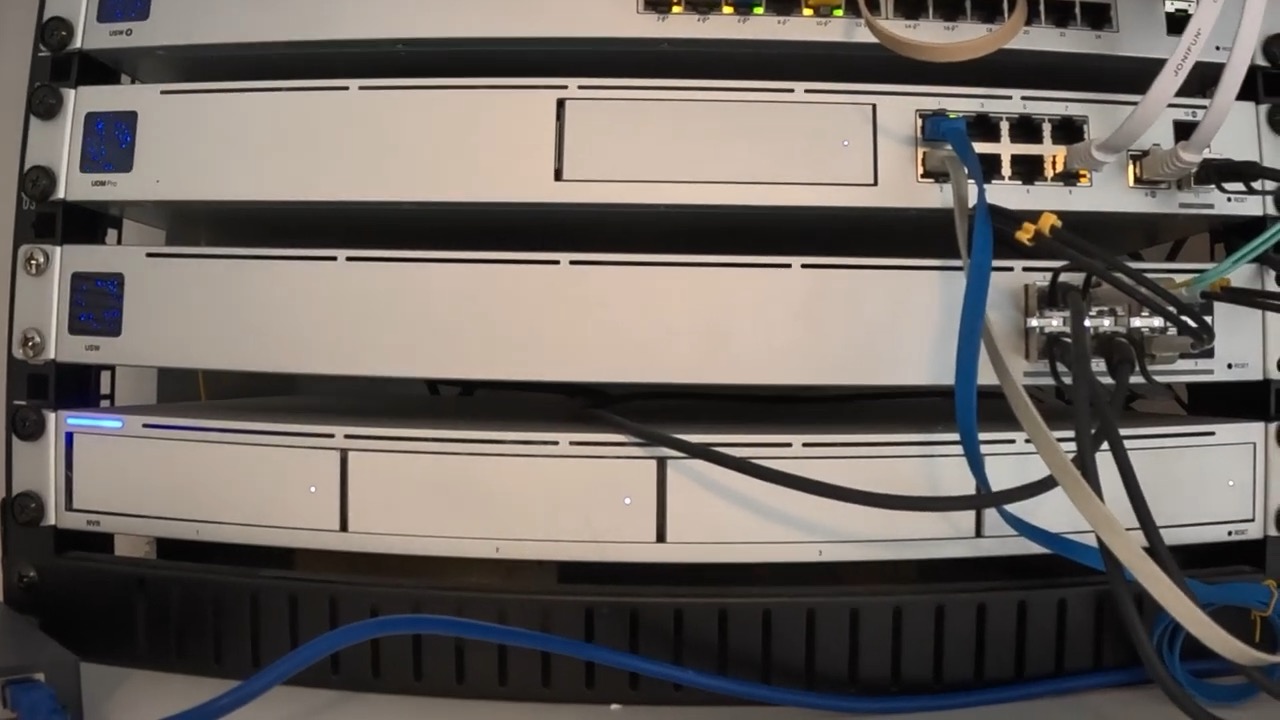
In the utility room rack, four stacked boxes run the entire network of the house: at the bottom the UNVR video recorder, above it the UDM-Pro with its disk and connections, then a 24-port switch, and finally a fibre aggregation switch. Everything downstream of that is Unifi — I ended up standardising completely.
Ubiquiti and the Unifi range
Ubiquiti is an American company making network hardware: switches, access points, routers, surveillance cameras, and some fairly sophisticated wireless bridging systems. They have several ranges; the one I’m talking about here, Unifi, is what you’d call the semi-professional line. It suits a reasonably well-equipped house without tipping over into enterprise gear.
2019: the first system
I started in 2019 with a setup built from separate pieces:
- a Cloud Key, a small box that connected to the network and ran the software;
- a USG, the gateway acting as internet router;
- switches;
- WiFi access points;
- a few cameras, mostly G3 and G3 Flex.
It worked for five years, and a good part of that hardware is still running.
2024: the UDM-Pro, then the UNVR
In September 2024 I moved to the UDM-Pro — Unifi Dream Machine Professional. It’s the keystone of the current system: it brings together in one box what previously took three devices. The software, the internet router and switch ports are now all in one place. The Cloud Key and the USG are the only two pieces I no longer use.
Two pieces of software need distinguishing at Unifi: the network one, and the camera one, which Ubiquiti calls Protect. The UDM-Pro can run both, but Protect is limited there — around twenty cameras, from memory — because the machine has to handle the whole network, the recording and the surveillance at the same time. That’s already a lot, but I wanted each function to have room to breathe.
So I added a 4 TB UNVR. Since then the split is clean: Protect runs on the UNVR, the network on the UDM-Pro.
The Meccano principle
This is what I appreciate most about the range: nothing gets thrown away. The switches, access points and cameras bought in 2019 all still work with the current software. I have 24-port PoE switches, a 16-port PoE, and 8-port PoE units — including a 150 W one that takes fibre, which lets you place it a long way off. You add, you move things, you reconfigure, without having to sell off what’s no longer in use.
On the access point side, I have several generations in service, in various form factors. The U7s, the most recent, I don’t have yet.
The cameras
The original G3s are still running, alongside G4s and G5s, again in various form factors. Two recent additions are worth mentioning:
- the floodlights, cameras with a built-in lamp that comes on when motion is detected, powered over PoE;
- the G4 Doorbell, the connected doorbell, which gives you an indoor chime and a camera at the door.
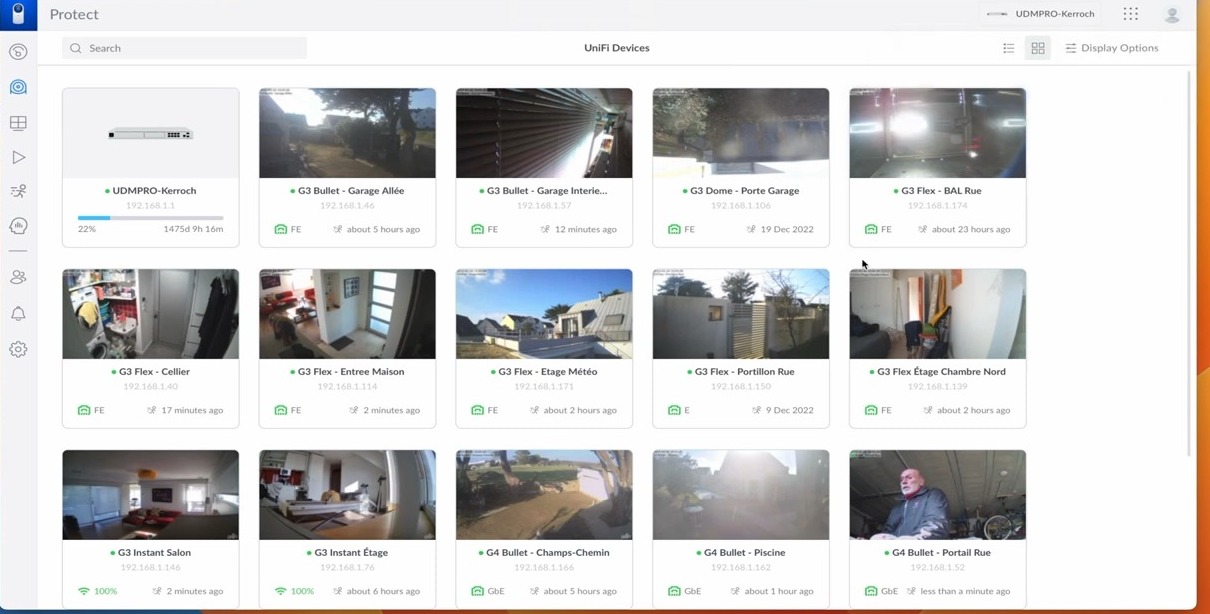
The Protect grid: every camera with its latest frame, model, address and last activity.
Adopting a camera: the G5 Flex, live
Adding a device is where Unifi shows its coherence. I plug in a G5 Flex: a window opens in the network software to say a device has been detected.
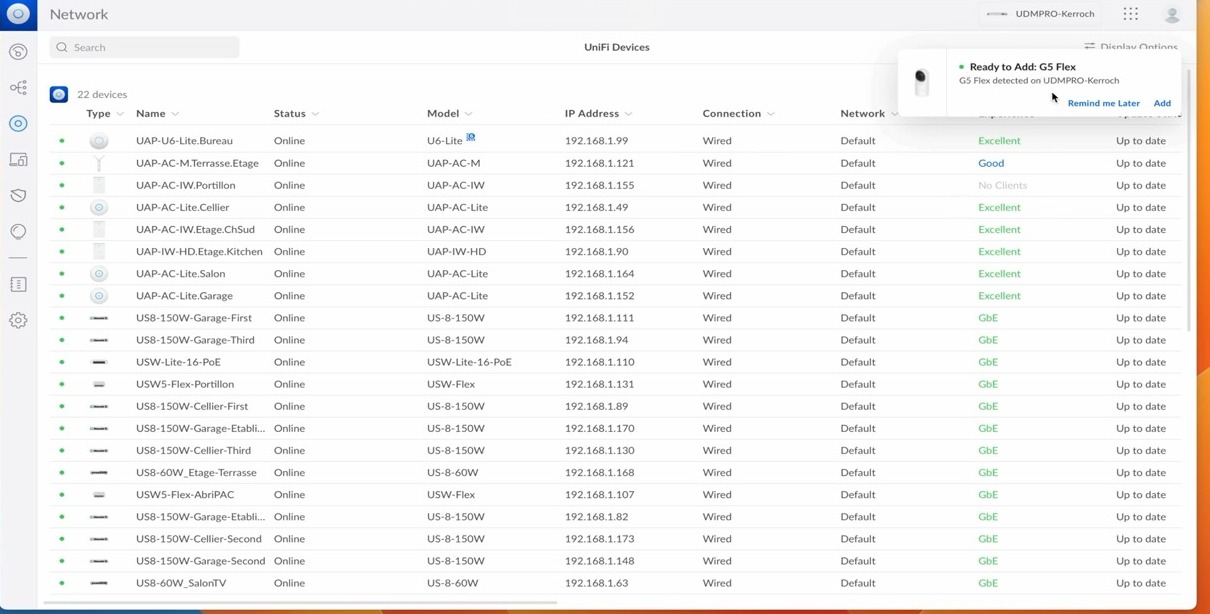
The notification appears at the top right of the device list: ‘Ready to Add: G5 Flex’.
I click Adopt, the system switches over to Protect, asks me to confirm again, and that’s it — the camera is adopted, the LED turns blue, it’s already recording. The quality is good straight away, with a slight delay.
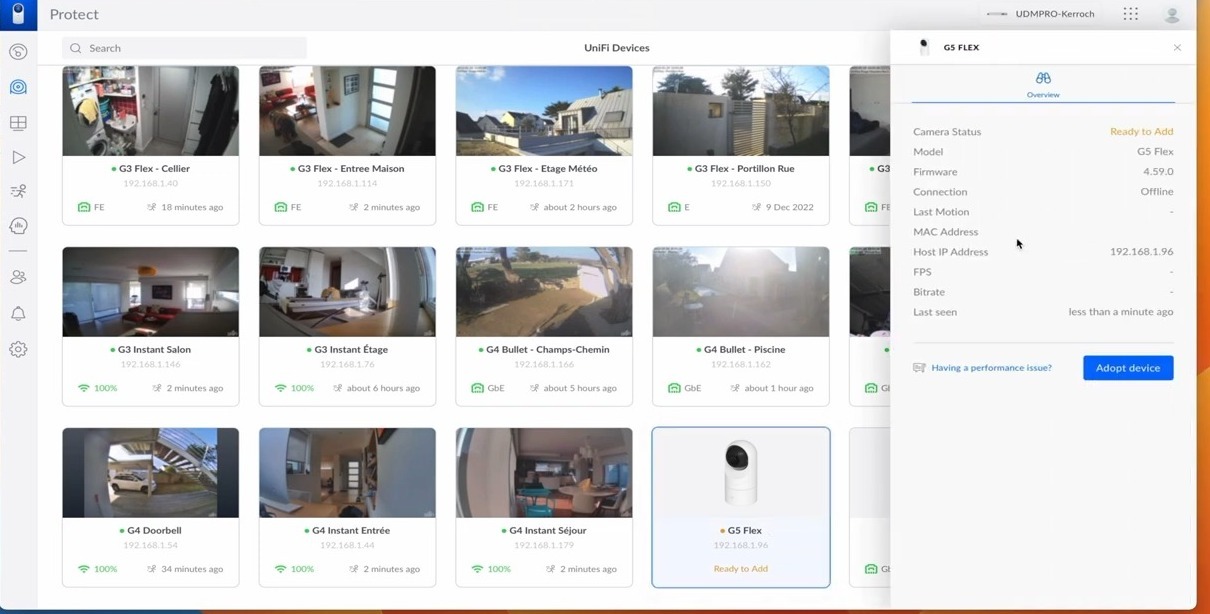 Before: the camera is detected but offline, the ‘Adopt device’ button waiting
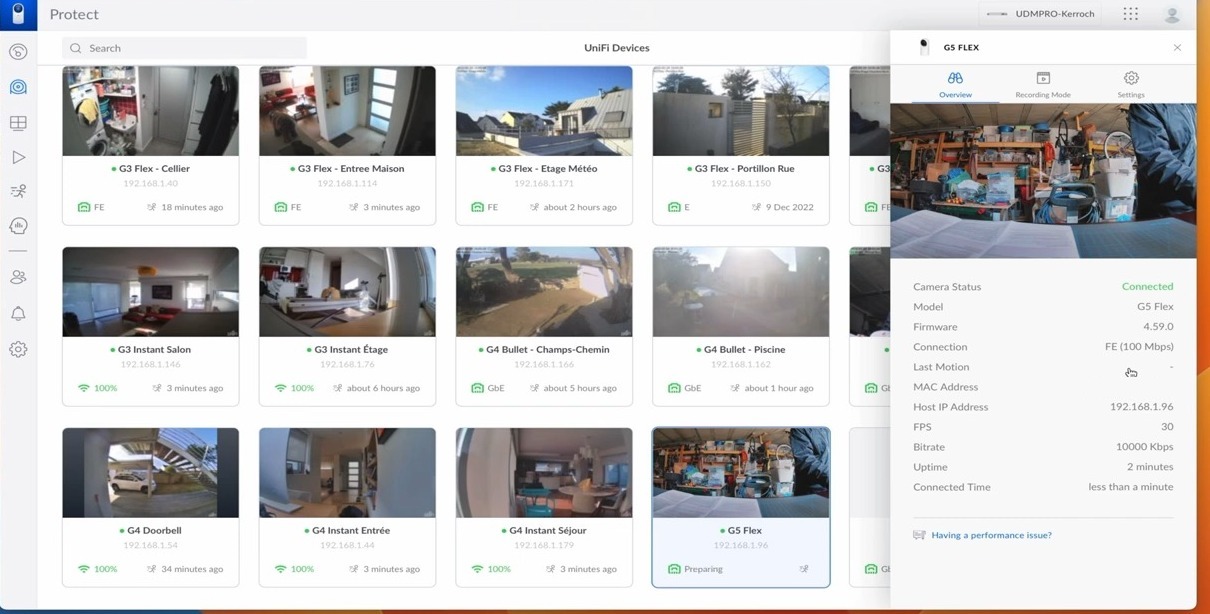 After: connected, 30 frames per second, and the live image
One detail that will amuse anyone who tracks versions: its firmware is on 4.59, while all my other cameras are on 4.57.35. That’s normal for a product that has just come out. I ended up keeping a little notebook to stay on top of it — there have been so many versions that at one point I was lost.
Setting up a camera
A camera almost always arrives configured for continuous recording. I switch it over to detection, with no schedule, and notifications on movement. My usual settings:
- 2 seconds of detection delay. That’s enough for real movement, and it stops it firing over nothing.
- 10 seconds before and 10 seconds after, the maximum. You may as well have the context.
- 30 frames per second and 100 % quality.
Then there are the zones. On this camera I’m leaving the full field, but you can carve it up: not watching one particular side, for instance, which matters outdoors when bushes set things off at the slightest gust. You can also define a privacy zone, masked from the recording — for a stretch of street that falls into the frame, and to stay within local and national regulations. That isn’t a detail: a camera filming the public highway is a genuine legal problem.
Two features appeared with this generation that my other cameras don’t have: the smart detection zone and crossing line, which fires when movement crosses a line you’ve drawn yourself. Useful when you want to be alerted to one specific crossing rather than to all movement.
For the overlay I keep the time and the camera name. The Unifi logo, no. Nerd mode, which adds the technical detail of the encoding, no either.
The architecture: from the Livebox to the carport
The starting point is an Orange fibre line. I recently moved to Sosh — still Orange — with 400 Mb/s symmetrical. Before that I was on 1 Gb/s down and 600 Mb/s up; I kept that for a year, perfectly reliable.
The Livebox 5 takes the fibre, and the UDM-Pro connects to it through its WAN port. From there on, everything is Unifi.
I live with a double NAT: public address on the Livebox, private address behind it, then my own private domain. It isn’t ideal in theory, but it is by far the simplest, and I have no reason to do without it — it works perfectly well. Taking the box out to connect the UDM-Pro directly would be a good deal more complicated technically. The Livebox doesn’t do much any more: you can configure it so that it almost disappears — it doesn’t offer a true bridge mode the way a Freebox does, but you get close. It’s the UDM-Pro that carries the firewall, the intrusion detection and prevention, and that’s where the power lies.
Behind the UDM-Pro, an aggregation switch feeds several fibre branches out to different points on the property: the garage, the terrace, the carport. In the garage, a second aggregation switch takes over and feeds smaller switches. The access points and cameras hang off those switches, with a 24-port upstairs covering its share.
That cabling didn’t appear by itself: it was pulled during the solar installation, when I took advantage of the work in the utility room to bring the whole data network up to standard — moving to Cat7, fibre between the utility room and the garage, and 19″ racks at both ends.
The dashboard
The interface has come a long way and I think it has reached a very good level. On arrival I see the full state of the system: 1 gateway, 11 switches, 11 access points, 29 cameras and 55 clients. That last figure climbs quickly once you have a lot of small devices chattering away.
The speed test is built into the UDM-Pro. I run it automatically every morning, and I do get my 400 Mb in both directions. The dashboard shows monthly usage — 367 GB since the start of the month — current activity, and response times to Microsoft, Google and Cloudflare. An on-demand test goes through nPerf France: 7 ms latency, 400 Mb confirmed, ISP at 100 %.
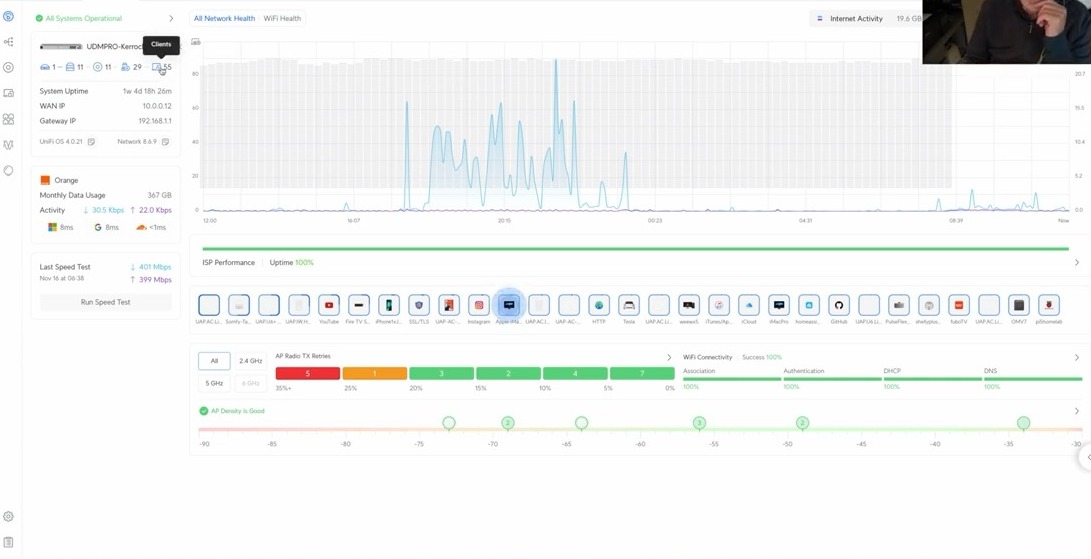
The dashboard: the inventory and the latest speed test on the left, internet activity and WiFi health on the right.
One view gives WiFi coverage quality access point by access point. Below 70 it starts to degrade. Only one corner comes near that threshold — upstairs and the terrace — and one access point is plenty there.
The connectivity view traces the full path, from Orange to the UDM-Pro, then to the aggregation switch, then to the garage, the utility room and the south terrace. It was approximate for a long time, with missing devices and updates lagging behind; it is markedly more reliable now.
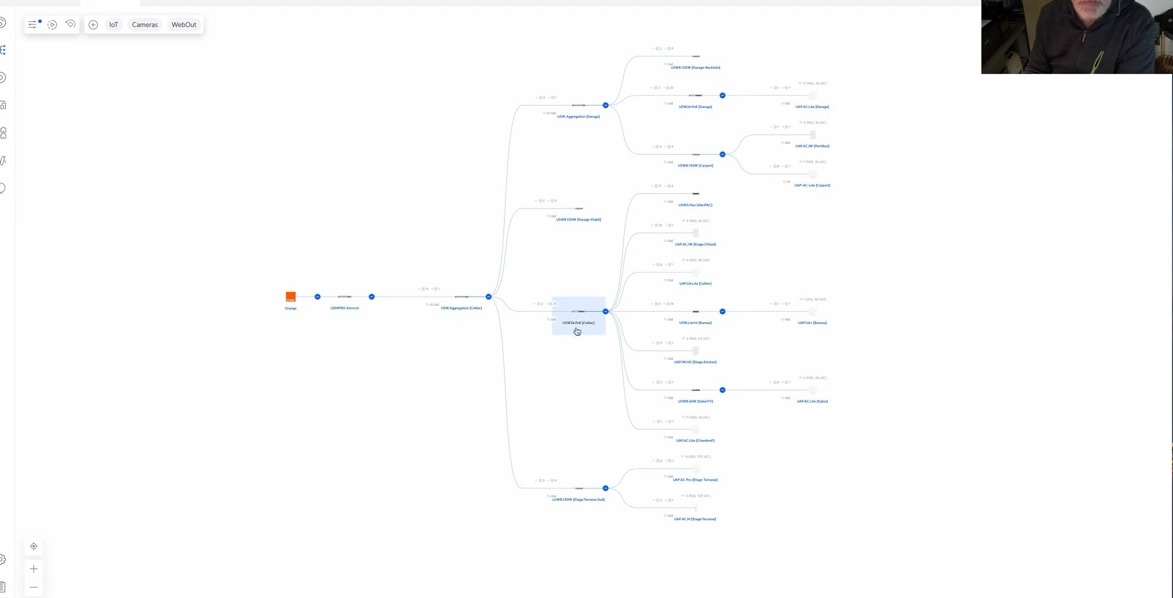
The topology: Orange on the left, then the UDM-Pro, the aggregation switches, and the branches to the garage, the utility room, the carport and the terraces.
Devices, clients and VLANs
The Devices tab lists every Unifi device, sortable however you like — by IP address in my case. You drill into each one to check it’s working and how its ports are used: on my aggregation switch, 6 ports in use, 2 free. The port manager then lets you act port by port, notably to assign VLANs.
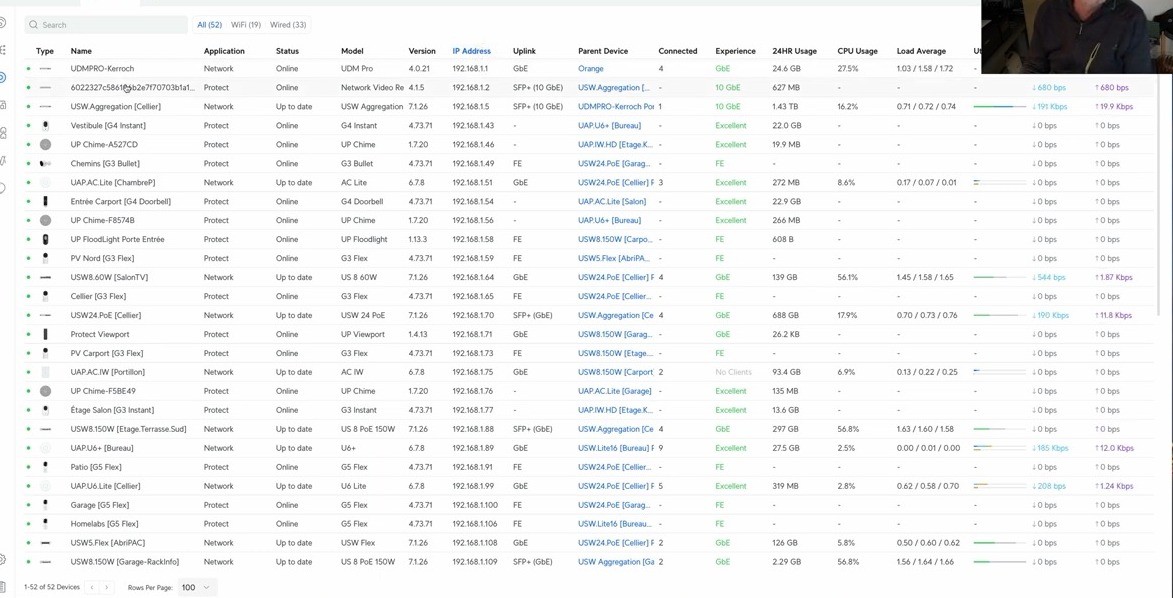
The full device list, each with its model, software version, parent device and bandwidth used.
The Clients tab shows the same thing from the usage side: static addresses first — the Synology NAS among them — then the dynamic DHCP range.
I’ve created several VLANs according to the nature of the devices. All the small connected objects that demand an IP address and talk constantly, like the Fire TV, go into a dedicated VLAN. Another VLAN is reserved for what sits outdoors, notably my weather station.
On top of that there’s a ports view across all devices, a WiFi analysis filterable to 2.4 or 5 GHz, and a read-out of the most-used internet protocols with the matching client — the Tesla, the Apple TV, the Fire TV, the iPhone, the Mac.
Protect day to day
On the camera side, some of my oldest G3s have been recycled to watch over the solar installation. When there’s a storm, it lets me check everything is still in place. In principle I have nothing to worry about, it’s well fixed down, but I may as well look.
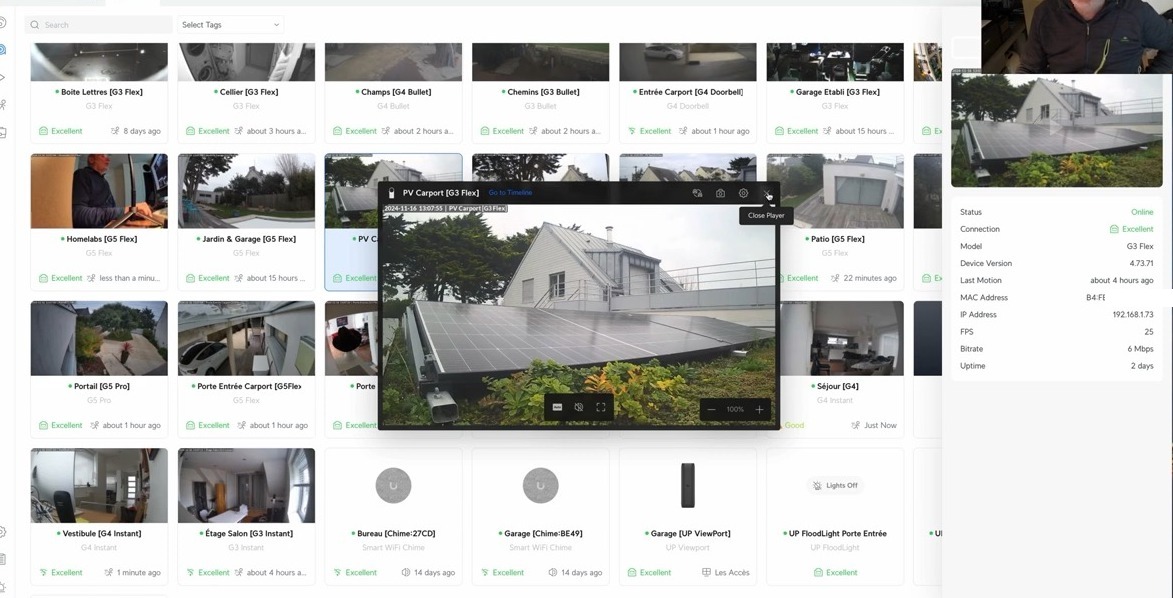
A recycled G3 watches over the carport panels. It earns its keep after a storm.
The rest covers the front door, seen from inside and outside, and the upstairs access.
Detections can be sorted by category, including animals. That’s where Pablo turns up, the neighbour’s ginger cat, who ended up adopting us. He was at our place all the time — I think he appreciated how quiet the house was. He sleeps outdoors, and at five in the morning he’s already at the door waiting to be let in for something to eat. He comes in, he goes out, he does more or less as he pleases. We’re away often, and he always finds his way back after a while.
The grey cat is the intruder. He’s after Pablo’s territory, he’s the stronger of the two, and he has already injured him — badly enough that Pablo had to be taken to the vet. The night recordings are usually how we find out the two of them have crossed paths.
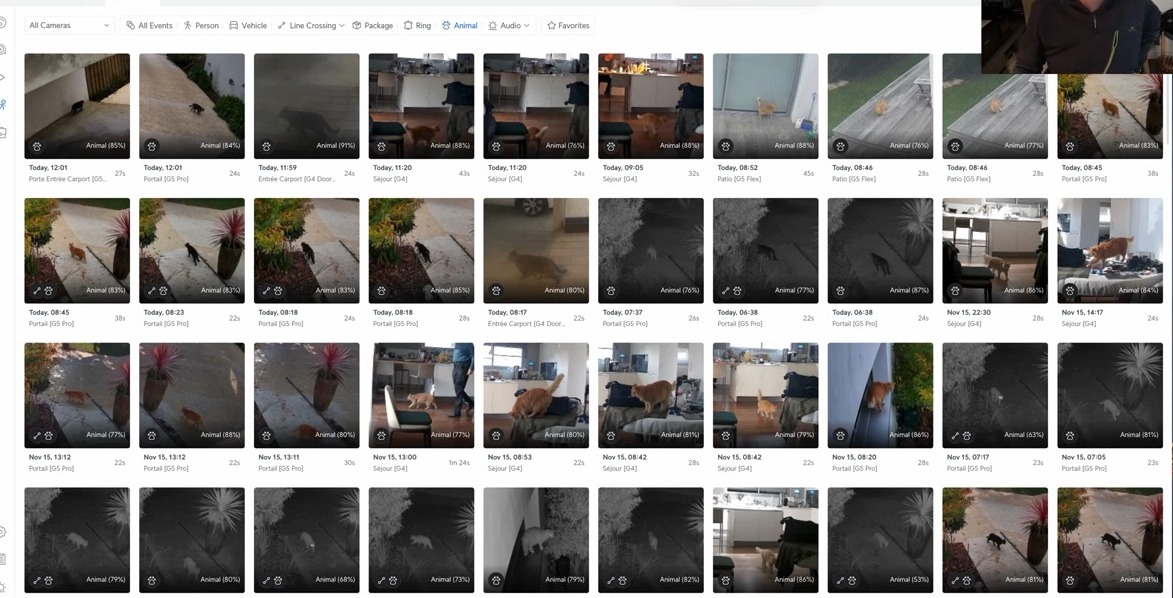
Protect’s ‘Animal’ filter. A fair share of the activity detected around the house comes down to Pablo and his rival.
Five years on
Five years on the same range, with 2019 hardware still running alongside the newest, software that has gone from version 2 to version 4 gaining features each time, and a single interface for both the network and the video surveillance. It’s hardware you grow by adding to rather than by replacing, and that is exactly what I was after.
What happened next
We have since sold the house, and the buyer took over the whole network installation. That made sense: the fibre runs through the walls and under the terraces, the switches are rack-mounted, the cameras and access points are fixed in place. Dismantling all of it would have served no purpose.
Ubiquiti provides a procedure for exactly this case, ownership transfer, which hands the console and the devices over to the new owner without having to reset everything.
That left the sensitive part: the recordings. A Protect installation accumulates months of video of the house, its surroundings and the comings and goings of the people living there. That is personal data, and it has no business ending up in the buyer’s hands. I reformatted every Protect disk on the day of the sale, before handing over the keys. It’s a step not to forget when you sell a house fitted with video surveillance.